


0 of 0


About this mod
This Integration configures Disney Infinity 3.0 for modding with the Continuum Mod Manager by unpacking the game files and fixing some common problems with modding
- Requirements
- Permissions and credits
Installation Tutorial
Step - 1
Click the Manual Download Button this will bring up a warring window saying
you need the Continuum Mod Manager to use Integrations

Step - 2
If you have never installed the Continuum Mod Manager before click the
link this will redirect you to Google Drive if the link does not show up
you can use this backup link thy are both the same - Continuum Mod Manager 1.1.0

Step - 3
Google Dose not scan large files so it will give you a warring you can just press Download anyway

Step - 4
Once you have Download the Continuum Mod Manager head back to the Nexus
page you wear on before then and press Manual download This will send
you to the download page

Step - 5
If you have Nexus Premium use the download button on the Right if
not just press the free button on the Left thy are the same file it just
downloads a bit slower without Premium

Step - 6
Once both zips have finished downloading open a file manager and head to you
downloads folder then unzip both archives to wherever you want

Step - 7
Now that you have unzipped both archives you should have a .integration
file and a folder with the Continuum Mod Manager in it open the Continuum folder
highlighted in red

Step - 8
Run ( ContinuumModManager.exe ) to start the Mod Manager

Step - 9
In Continuum Mod Manager go to the settings tab if all you see is a dark
screen minimize then restore the windows or resize it this is a
workaround for a small bug in Continuum if you run into it

Step - 10
In the settings tab head to the Integrations menu and press Add Integration this will bring up a files manager

Step - 11
Select the ( .Integration ) file you downloaded this will close the window depending on you system you may freeze weal it loads so give it a sec

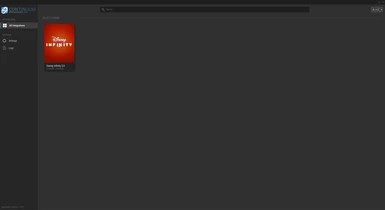
Step - 12
Wean the loading is done you will see the game show up click on it

Step - 13
Do not press setup yet this will faille you fist need to configure the Integration so head to the settings tab for the game

Step - 15
The ( Game Installation Path ) is wherever you have you game installed
in my case it's ( D:\Games\Steam_Games\steamapps\common\Disney Infinity 3.0 Gold Edition ) by default with steam it's the installe is loacated in ( Program Files (x86)\Steam\steamapps\common\Disney Infinity 3.0 Gold Edition ) so find your path and copy it

Step - 16
Now that you have your path past it as the ( Game Installation Path )

Step - 17
Now that you are done with configuration save your setting then click out of the settings window

Step - 18
Now press ( Setup ) this will bring up a conformation popup

Step - 19
This will prompt you to configure your game we have already done this so press ( OK ) then the game will begin unpacking and setting up

Step - 20
Now that the game is unpacking you need to sit back till it's done it may take a wile depending on your system

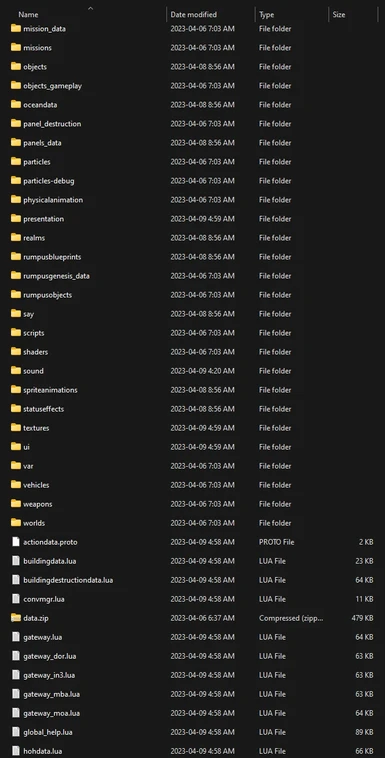
Step - 21
This is less of a step more just showing what the unpacking did on the left is the games textures folder before unpacking and on the right is the unpacked textures folder

Step - 22
Now you need some mods not all mods work with the Continuum Mod Manager
only custom made mods work you can identify them because thy use the ( .mod ) file extension for demos sake lets take 2 mods i made Ant-Man and The Marvel Battlegrounds Play-Set

Step - 23
Wean Downloading the mods thy will say you need the Continuum Mod Manager
and a Integration this is what we already setup so skip this step and
press Download

Step - 24
Once your mods are downloaded unzip the archives to wear ever you want

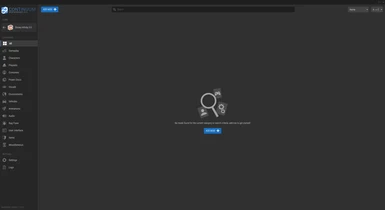
Step - 25
Go back to the Continuum Mod Manager and in the game tab press ( Add Mod ) this is in the middle of the screen if you have no mods
installed however if you have already installed mods it will be on the
top left of the screen both buttons do the same thing

Step - 26
Once you have pressed the ( Add Mod ) button a file manager will pop up and prompt you to select a mod
select one of the mods you unzipped and it will be loaded then repeat
this step for the second mod and it will be loaded as well

Step - 27
Not all mods have customizable settings but you should always check the 2
mods you have downloaded don't but you can check if thy do by clicking on one of them and a pop up windows
will appear

Step - 28
This Menu shows you a description of the mod who made and who helped as well as any
settings that are available this is showing a mod from LEGO Batman 2 for demos sake if there are any settings thy will be in the settings tab

Step - 29
In the case of the LEGO Batman mods thy allows you to chose what characters will be installed every mods
settings are different so remember to check wean are done save your settings and click out of the menu

Step - 30
The mods are loaded but not installed so select the checkbox on the top
right of each mod then press the blue install button this will add the
mods to the game files

DONE!
The mods are installed and everything is setup now jump in game and play with your mods!

Continuum Mod Manager 1.1.0 or later is required
Join the Discord Server for more info or if you need help installing the mod - Modtastic Modding Community Discord