


0 of 0
About this mod
A framework that splits apart locomotive meshes for compatibility between mesh-altering mods.
- Requirements
- Permissions and credits
- Changelogs
- Donations
Not compatible with:
Enter the Secret Room (game should still run fine, but the DE6 interior will have some z fighting)
What is this thing
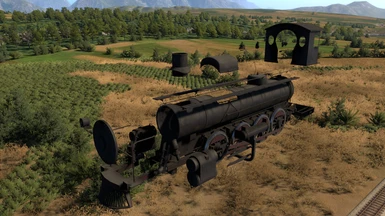
This mod splits apart the meshes of the S282A, S060, DE6, and DE6 slug into many pieces, so that multiple mods can edit the meshes at once.
So Rearranged S282 can edit the cylinders, a different mod could move the headlight, etc.
With just this mod installed, you won't visually notice anything different. It's a framework that other mods can use to edit parts of the S282A, S060, DE6, and DE6 slug.
For now, I'm supporting the S282A, S060, DE6, and DE6 slug, although I might support more in the future if people request more. Let me know if you need something split apart further for your mod, and I can look into it.
Installation
Just drag and drop the zip file into Unity Mod Manager like any other mod.
For Mod Authors
If you're just trying to install a mod that depends on Loco Mesh Splitter, feel free to ignore this section.
To make mods depending on this framework, you'll need to know how to code and know C#.
The easiest way to figure out how this mod works is to download and install the Runtime Unity Editor mod, find a spawned LocoS282A in the Object Browser, and navigate to the transform "LocoS282A_Body/Static_LOD0/s282a_split_body(Clone)". There, you'll see all the game objects that the locomotive mesh has been split into. I've also split apart the smokebox lid and put those meshes in "LocoS282A_Body/Static_LOD0/s282a_split_smokebox_door(Clone)".
Note that I'm not modifying the prefab: I'm spawning in these items by patching the TrainCar.Start() method. If you want your code to modify or move the split meshes, you'll have to write a postfix patch for TrainCar.Start(). See the Harmony docs if you don't know how to do this. Make sure your patch loads after this mod's patch, by using the HarmonyAfter annotation:

NEW IN B99/LMS 1.1.0:
If you're just trying to install a mod that depends on Loco Mesh Splitter, feel free to ignore this section.
In order to attach gadgets to a locomotive, Altfuture has added some code that generates special collision meshes that get created from the LOD1 meshes when the locomotive is spawned in. After you move part of the locomotive, mod authors need to also move these collision meshes. Here's how to do it:
While moving meshes, you might want to attempt to move the gadgets mounted to that mesh... or you could just not bother lol (sounds like a pain in the butt to me).
For the DE6 interior, the process is the same; just find the LMSCustomizationPlacementMeshes on TrainCar.loadedInterior.
Source code
You can find the source code here.
Enter the Secret Room (game should still run fine, but the DE6 interior will have some z fighting)
What is this thing
This mod splits apart the meshes of the S282A, S060, DE6, and DE6 slug into many pieces, so that multiple mods can edit the meshes at once.
So Rearranged S282 can edit the cylinders, a different mod could move the headlight, etc.
With just this mod installed, you won't visually notice anything different. It's a framework that other mods can use to edit parts of the S282A, S060, DE6, and DE6 slug.
For now, I'm supporting the S282A, S060, DE6, and DE6 slug, although I might support more in the future if people request more. Let me know if you need something split apart further for your mod, and I can look into it.
Installation
Just drag and drop the zip file into Unity Mod Manager like any other mod.
For Mod Authors
If you're just trying to install a mod that depends on Loco Mesh Splitter, feel free to ignore this section.
To make mods depending on this framework, you'll need to know how to code and know C#.
The easiest way to figure out how this mod works is to download and install the Runtime Unity Editor mod, find a spawned LocoS282A in the Object Browser, and navigate to the transform "LocoS282A_Body/Static_LOD0/s282a_split_body(Clone)". There, you'll see all the game objects that the locomotive mesh has been split into. I've also split apart the smokebox lid and put those meshes in "LocoS282A_Body/Static_LOD0/s282a_split_smokebox_door(Clone)".
Note that I'm not modifying the prefab: I'm spawning in these items by patching the TrainCar.Start() method. If you want your code to modify or move the split meshes, you'll have to write a postfix patch for TrainCar.Start(). See the Harmony docs if you don't know how to do this. Make sure your patch loads after this mod's patch, by using the HarmonyAfter annotation:
NEW IN B99/LMS 1.1.0:
If you're just trying to install a mod that depends on Loco Mesh Splitter, feel free to ignore this section.
In order to attach gadgets to a locomotive, Altfuture has added some code that generates special collision meshes that get created from the LOD1 meshes when the locomotive is spawned in. After you move part of the locomotive, mod authors need to also move these collision meshes. Here's how to do it:
- Install Loco Mesh Splitter with UMM
- Add Loco Mesh Splitter's mod folder to your Directory.Build.targets file (the folder in your Derail Valley install folder that contains "LocoMeshSplitter.dll")
- Find where you want to regenerate the collision meshes
- In that file, put using LocoMeshSplitter.MeshLoaders; at the top
- Get a reference to the LMSCustomizationPlacementMeshes object that has been instantiated on the TrainCar
e.g. var cpm = trainCar.GetComponent<LMSCustomizationPlacementMeshes>(); - Call one of the methods
- cpm.ReloadAllGadgetMeshTransforms(): updates the transform of all gadget collision meshes that LMS knows about
- cpm.ReloadGadgetMeshTransform(MeshFilter): updates the transform of a specific gadget collision mesh
- cpm.ReloadAllGadgetMeshes(): if you've changed a mesh itself, updates the gadget collision mesh to match(i.e., MeshCollider.sharedMesh = MeshFilter.sharedMesh)
- cpm.ReloadGadgetMesh(MeshFilter): updates a specific gadget mesh to match what's in the given meshfilter (same as the previous method, but for a specific MeshFilter)
While moving meshes, you might want to attempt to move the gadgets mounted to that mesh... or you could just not bother lol (sounds like a pain in the butt to me).
For the DE6 interior, the process is the same; just find the LMSCustomizationPlacementMeshes on TrainCar.loadedInterior.
Source code
You can find the source code here.