File information
Created by
HotPocketRemixUploaded by
HotPocketRemixVirus scan
Documentation
Readme
View as plain text
Dark Souls Item Randomizer
Instructions:
* (PTDE Only) Unpack your Dark Souls archive files using UnpackDarkSoulsForModding, which can be found at http://www.nexusmods.com/darksouls/mods/1304/ or on
GitHub at https://github.com/HotPocketRemix/UnpackDarkSoulsForModding.
* Place `DarkSoulsItemRandomizer.exe` in your Dark Souls directory, where DARKSOULS.exe (PTDE) or DarkSoulsRemastered.exe (DS1R) are.
* Run the Item Randomizer and select your options. When you are ready to randomize your items, click the Export button to automatically write the modified item
configuration to `GameParam.parambnd` or `GameParam.parambnd.dcx`, depending on the game version. A backup copy will be created if it does not already exist.
A directory with the current date/time stamp will be created containing information about the item distribution, including a cheatsheet.
* If you want to inspect a certain item distribution, but not modify the actual game files, you can instead input a seed and click the "Write Seed Info" button
to generate the same type of folder as above, without modifying the current item distribution. Note that you *must* input a seed for this to work.
To restore the default item distribution:
* Check that `GameParam.parambnd[.dcx].bak` exists in `\param\GameParam`.
* Delete `GameParam.parambnd[.dcx]` from `\param\GameParam`.
* Re-name `GameParam.parambnd[.dcx].bak` to `GameParam.parambnd[.dcx]`.
(For PTDE, ignore the `[.dcx]` portion. For DS1R, ignore just the `[` and `]`.)
The data/time-stamped directory that is generated contains 5 files:
* `ItemLotParam.param`, `ShopLineupParam.param` and `CharaInitParam.param`. These files are the actual subfiles that are being modified in `GameParam.parambnd` and are
provided for those who wish to inspect them in a .param editor.
* `cheatsheet.txt` contains a list of every location that items can be shuffled to -- with a short description of the location -- and a list of each
shuffled item that is placed at each location. Since NPC drop tables are also shuffled, they are included at the end of the cheatsheet.
* `hintsheet.txt` contains a list of each key item in the game, together with the area that it is located in. If you are stuck, you can use the
hint sheet to give an idea of where a key item is before resorting to using the cheatsheet to find its exact location.
* `seed_info.txt` contains the settings and seed used in the Item Randomizer to produce the item distribution. If you forget the seed/setting you used or want to share the
settings with others, this file has the exact information needed.
**Randomizer Settings**:
The following is a brief description of each of the Item Randomizer's settings:
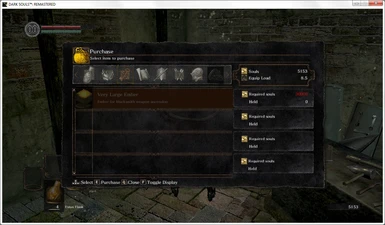
Difficulty: Determines how much the Randomizer is biased against you. The more unfair it is, the more it attempts to hide desirable items (good weapons, lighter armor, keys)
in harder-to-reach or less well-known locations.
Key Placement: Determines how the Randomizer places keys. On "Not Shuffled", key items are in their usual locations. On "Shuffled", key items are placed in any locations, provided they do
not lead to a softlock where not all areas can be accessed before defeating Gwyn. On "Race Mode", key items are placed in a restricted set of locations, so that not every location needs
to be checked for a key. The list of locations consists of boss drops, in chests, dropped by Black Knights, and in locations where key items (including embers) are normally.
This README contains a full list of all the Race Mode locations at the end. On "Race Mode +", key items are placed as in Race Mode, but skips and glitches
are taken into account. This README contains a list of these skips and glitches that you may need to use.
Soul Items: Determines how the Randomizer treats soul consumables. On "Shuffled", they are treated like any other item. On "Replaced", they are replaced with a random consumable before being shuffled.
This reduces the number of soul consumables in the game, but can make item pickups more interesting, as otherwise you receive many soul consumables, which some players find boring.
On "Transposed", each boss soul has a 75% chance to be replaced by a corresponding boss weapon.
Starting Items: Determines what pool of weapons/shields the Randomizer draw from when choosing the player's starting left-hand and right-hand items.
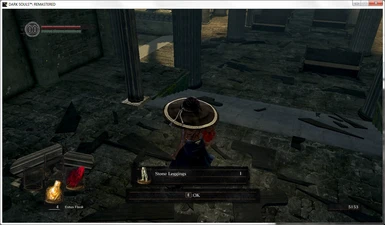
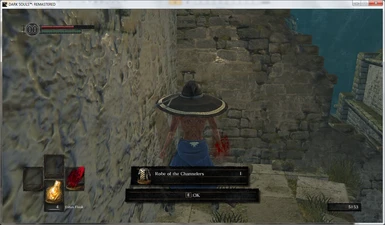
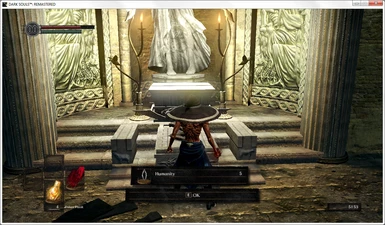
Fashion Souls: If active, the many armor sets in game are split up, and each piece is placed separately.
Laundromat Mixup: If active, most human NPCs will wear random armor instead of their usual sets. If Fashion Souls is not active, NPCs will wear randomly chosen full sets of armor.
If Fashion Souls is active, NPCs will wear independently chosen random pieces of armor.
Senile Gwynevere: If active, the Lordvessel will be shuffled like other key items, and Gwynevere will give the player a different item in place of the Lordvessel. Not compatible with not shuffling keys.
Senile Primordial Serpents: If active, the four Lord Souls will be shuffled like other key items. Not compatible with not shuffling keys.
**Race Mode Possible Key Locations**:
1100: Ingward Gift / Drop
(Ingward only gifts you this item if you have found the Lordvessel.
His dialogue glitches out if you have used the Key to the Seal,
and you'll have to kill him to get the item.)
2500: Gaping Dragon Drop
2510: Capra Demon Drop
2520: Crossbreed Priscilla Drop
2530: Moonlight Butterfly Drop
2540: Great Gray Wolf, Sif Drop
2550: Pinwheel Drop
2560: Gravelord Nito Drop
2570: Chaos Witch Quelaag Drop
2580: Bed of Chaos Drop
2590: Iron Golem Drop
2600: Dark Sun Gwyndolin Drop
2610/2620: Dragon Slayer Ornstein and Executioner Smough Drop
(Whichever one you kill last will drop the key item. Note that Gwynevere no
longer has a key item and can be killed immediately or ignored entirely if
you feel like it, unless Senile Gwynevere is OFF in which case she will
still have the Lordvessel.)
2630: Four Kings Drop
2640: Seath the Scaleless Drop
2650: Gwyn, Lord of Cinder Drop
2670: Centipede Demon Drop
2680: Sanctuary Guardian Drop
2690: Knight Artorias Drop
2700: Manus, Father of the Abyss Drop
2710: Black Dragon Kalameet Drop
6190: Andre of Astora shop item / drop
(The key item will be sold by Andre if he drops it and vice versa.
You don't need to kill him to find out what it is.)
6231: Undead Merchant shop item / drop
(Same idea as with Andre.)
1000240: Depths - Sewer Chamber Key Original Location
(Leaning against the bars near the Giant Rat.)
1000500: Depths Chest
(Near the Butcher, normally holds the Large Ember)
1010000: Undead Parish - Mystery Key Original Location
(In the lower corner of the room with all the Hollows,
after the Boar. Behind a picnic table.)
1010140: Undead Parish - Basement Key Original Location
(Just after the portcullis on the ground.)
1010450: Undead Burg Chest #1
(In the house near the bonfire. Normally has Black Firebombs.)
1010460: Undead Burg Chest #2
(In the locked house near the Black Knight. Needs the Residence Key
or the Master Key to access, or an extremely tricky jump.
Normally has Gold Pine Resin x3.)
1020070: Firelink Chest #1
(Overlooking graveyard, in the secret area under elevator.)
1020180: Firelink Chest #2
(In the secret area under the elevator.)
1020190: Firelink Chest #3
(In the secret area under the elevator.)
1020200: Firelink Chest #4
(In the secret area under the elevator.)
1020210: Firelink - Undead Asylum F2 West Key Original Location
(On top of the roof. Use the elevator to access.)
1100140: Painted World - Annex Key Original Location
(At the end of an underground passage behind illusory walls,
guarded by a Bonewheel Skeleton.)
1100370: Painted World Andre Statue
(In the Annex, requires the Annex Key or a tricky jump.)
1100500: Painted World Chest
(In the basement of the second large building. Drop down into
the area, or use the ladder from the attic of the large room
with all the Engorged Hollows. Normally has the Painting
Guardian Set.)
1200140: Darkroot Garden Andre Statue
(After fighting the Moonlight Butterfly. Holds three items or more,
two of which can be key items.)
1200500: Darkroot Garden Chest #1
(In a pool of water surrounded by Mushroom Children and Mushroom Parents.
Normally has the Enchanted Ember.)
1200510: Darkroot Garden Chest #2
(When running from the bonfire to Sif, just after Alvina, behind the
stone tower. Normally has the Stone Set.)
1210500: Royal Wood Chest #1
(In a pool of water guarded by many enemies, just after exiting Oolacile
Sanctuary. Normally has a Blue Titanite Slab.)
1210510: Oolacile Township Chest #1
(Past the ledge you jump from to reach the second Mimic.
Needs a tricky jump, or a light source to open an illusory wall.)
1210520: Oolacile Township Chest #2
(In a room of the structure after the Oolacile Township bonfire, but
before the first Mimic. Requires a light source to open the illusory
wall; the wall is marked with a developer summon sign.)
1210540: Oolacile Township Chest #3
(In the basement of one of the buildings near the previous item,
guarded by two Bloathead Sorcerers. There are several other
open empty chests nearby.)
1210550: Royal Wood Chest #2
(Hidden behind the far waterfall in Kalameet's arena.)
1300020: Catacombs - Darkmoon Seance Ring Original Location
(In an open coffin, past the Giant Skeleton that falls down on you
as you approach. You need to smash the obviously breakable wall to
reach this area.)
1310500: Tomb of the Giants Andre Statue
(In the room near the first bonfire, with several Giant Skeletons.
You'll probably die in here unless you're extremely lucky.)
1320180: Great Hollow Chest
(At the very start of the Great Hollow, behind the first illusory
wall. There are no key item locations any further in the Great
Hollow, this is as far as you have to go.)
1400500: Blighttown Chest #1
(At the entrance to the Valley of Drakes, at the top of the wooden
structure. Normally holds the Key to New Londo Ruins.)
1400510: Blighttown Chest #2
(In the large circular room near the swamp bonfire. Normally holds
a Dragon Scale.)
1400520: Blighttown Chest #3
(At the end of the walkway past the slippery branch near the waterwheel
elevator. You can also skip the branch by dropping down to it from
platforms above (before you go down the elevator), but you must run
back across the branch to leave.)
1410100: Demon Ruins Chest #1
(At the end of the side area guarded by Burrowing Rockworms. Take a left
as you approach Demon Firesage's arena. Normally holds the Chaos Flame Ember.)
1410410: Lost Izalith Chest #1
(At the end of a passage in the swamp area with the Chaos Eaters. Allow
the floor to break, and then drop straight down to land above the entrance
to the passage.)
1410500: Lost Izalith Chest #2
(Inside the first square tower in the lava area with all the Bounding
Demons (Dragon Butts))
1410520: Lost Izalith Chest #3
(Around a corner if you continue straight when approaching the Bed of Chaos
arena. Guarded by a Chaos Eater. Normally holds Pyromancy: Chaos Fire Whip.)
1410530: Demon Ruins Ember Location
(In the lava where Ceaseless Discharge stands before being defeated, guarded
by several Taurus Demons. Normally has the Chaos Flame Ember.)
1500000: Sen's Fortress Chest #1
(At the end of the large straight ball ramp near Seigmeyer of Catarina, in
a small room. Normally holds the Ring of Steel Protection.)
1500020: Sen's Fortress Chest #2
(Just past the second set of swinging blades, guarded by an arrow trap.
Normally holds Large Titanite Shard x2.)
1500040: Sen's Fortress Chest #3
(In the tower guarded by Undead Prince Ricard.)
1500090: Sen's Fortress Chest #4
(In a corner of the roof, guarded by a Balder Knight. Normally holds the
Flame Stoneplate Ring. Turn right as you go through the fog gate to the roof.)
1500100: Sen's Fortress Chest #5
(In the tower guarded by Undead Prince Ricard.)
1500150: Sen's Fortress - Cage Key Original Location
(At the bottom of Crestfallen Merchant's tower.)
1510510: Anor Londo Chest #1
(Hidden behind the bottom of the automatic screw elevator. Normally
holds Demon Titanite.)
1510520: Anor Londo Chest #2
(On a ledge in the painting room. Requires a jump / drop from
the rafters.)
1510530: Anor Londo Chest #3
(In a hidden room behind an illusory wall in a fireplace.)
1510540: Anor Londo Chest #4
(In a hidden room behind an illusory wall in a fireplace.)
1510560: Anor Londo Chest #5
(In a hidden room behind an illusory wall in a fireplace.)
1510570: Anor Londo Chest #6
(In a hidden room behind an illusory wall in a fireplace.)
1510580: Anor Londo Chest #7
(In a room with many dragon trophies, guarded by a Silver Knight.
Normally has half of the Silver Knight Set.)
1510590: Anor Londo Chest #8
(In a room with many dragon trophies, guarded by a Silver Knight.
Normally has half of the Silver Knight Set.)
1510600: Anor Londo Chest #9
(In a room with three Silver Knights; Seigmeyer of Catarina
is trapped nearby. Normally has Demon Titanite x2.)
1510610: Anor Londo Chest #10
(Behind the Giant Blacksmith. Normally has the Hawk Ring.)
1510620: Anor Londo Chest #11
(In Darkmoon Tomb, after defeating Dark Sun Gwyndolin.)
1510650: Anor Londo Chest #12
(In Darkmoon Tomb, after defeating Dark Sun Gwyndolin. This chest is normally empty,
but can have an item after randomization.)
1510660: Anor Londo Chest #13
(In Darkmoon Tomb, after defeating Dark Sun Gwyndolin.)
1510670: Anor Londo Chest #14
(In the room that leads to Duke's Archives, guarded by two Giant Sentinels.
A Mimic is nearby: this chest is on the left, the Mimic is on the right.)
1510680: Anor Londo Chest #15
(In the room that leads to Sen's Fortress, guarded by two Giant Sentinels.)
1510690: Anor Londo Chest #16
(In the room across from the bonfire where Knight Solaire rests, guarded by a
Silver Knight.)
1600290: New Londo Ruins Chest #1
(In a small room behind an illusory wall in lower New Londo Ruins. The
walkway after the illusory wall is very thin. Normally holds a Titanite Chunk.)
1600500: New Londo Ruins Chest #2
(On the third floor of the main building. Requires draining the water.
Normally holds the Very Large Ember.)
1600510: New Londo Ruins Chest #3
(In the corner of the bottom floor of Ingward's building, just before
the fog gate to the Four Kings. Normally holds a Titanite Chunk.)
1700020: The Duke's Archives Chest #1
(On the top of a bookshelf in the first large area. Requires a drop from
an upper floor or the spinning staircase. Normally holds the Avelyn.)
1700050: The Duke's Archives Chest #2
(In the room with broken machinery; a fog gate nearby leads to the
outside grounds and Crystal Cave. Normally holds Prism Stone x20.)
1700210: The Duke's Archives - Archive Prison Extra Key Original Location
(In a side cell in the Prison. The cell's door can be opened using the
Archive Tower Cell Key, which is always dropped by the sleeping Serpent
Soldier outside the bonfire cell.)
1700510: The Duke's Archives Chest #3
(On the second floor of the first large book area. Take a left when running
up the stairs from the first floor. Taking a right will lead to a Mimic.)
1700520: The Duke's Archives Chest #4
(On the third floor of the first large book area, near the elevator.
This area must be accessed from the second large book area, or by doing
Duke Skip.)
1700530: The Duke's Archives Chest #5
(In the room where the invincible Seath the Scaleless is encountered.
Appears after Seath the Scaleless has been defeated in Crystal Cave.)
1700540: The Duke's Archives Chest #6
(On the fourth floor of the second large book area, on the left side
when facing the balcony bonfire.)
1700560: The Duke's Archives Chest #7
(In the side area behind the movable bookcase, where the freed Big Hat Logan
sits. Note that the chest that appears when Logan hollows is *not* a key
location, since it is possible to miss by not freeing Logan or killing him.)
1700580: The Duke's Archives Chest #8
(In the room behind the movable bookcase.)
1700590: The Duke's Archives Chest #9
(In the room behind the movable bookcase.)
1700600: The Duke's Archives Chest #10
(In the room behind the movable bookcase.)
1700630: The Duke's Archives Chest #11
(In the Prison, on the balcony with the noise mechanism.)
1810080: Northern Undead Asylum - Peculiar Doll Original Location
(Only appears after returning to the Asylum via the crow, even if it's not
the Doll.)
27100200: The Duke's Archives Special Golem
(The item only drops after Dusk of Oolacile has been saved from the Golden
Crystal Golem in Darkroot Basin.)
27803001: Oolacile Township 2nd Mimic - Crest Key Original Location
(Unlike Mimics elsewhere in the game, this Mimic's drop will not despawn
if you die or warp before picking it up.)
27900000: Undead Burg Black Knight
(Sword Black Knight normally guarding the Blue Tearstone Ring.)
27900100: Undead Parish Black Knight
(Greatsword Black Knight in the tower after Hellkite Drake.)
27901000: Darkroot Basin Black Knight
(Halberd Black Knight on the way down from Darkroot Forest to
Darkroot Basin. Loved/hated by speedrunners.)
27902000: Catacombs Black Knight
(Greataxe Black Knight. After turning right from the Titanite Demon, drop through
the collapsing floor after climbing down a ladder. Prepare to get one-shot
by an immedaite overhand slam of the greataxe.)
27903000: Tomb of the Giants Black Knight
(Halberd Black Knight, just after the fog gate near the first bonfire and Patches,
on a lower level.)
27907000: Northern Undead Asylum Black Knights Drop
(Sword Black Knights, guarding the Peculiar Doll location and the starting weapon
location. The first Knight you kill (whichever one it is) will drop the item.
Both Knights drop an upgrade material, however.)
**Race Mode + Skips and Glitches**
- Lower Undead Burg Skip
(Undead Burg -> Lower Undead Burg without Basement Key)
- Capra Skip
(Undead Burg -> Depths without Key to Depths)
- Sen's Gate Skip
(Undead Parish -> Sen's Fortress without ringing both Bells)
- Annex Key Skip
(Painted World -> Painted World Annex without the Annex Key)
- Firesage Drop (PTDE only)
(Quelaag's Domain -> Lost Izalith without the Lordvessel)
- Seal Skip
(Upper New Londo Ruins -> Some areas of Lower New Londo Ruins
& Four Kings fight without the Key to the Seal)
- Duke Skip
(Bypass forced death to Seath the Scaleless, so the
Duke's Prison Giant Door Key may not be placed in the Prison)
- Purple Coward's Crystal Wrong Warp to Oolacile
(Darkroot Basin -> Oolacile Township without the Broken Pendant)
- Purple Coward's Crystal Wrong Warp to Kiln
(Firelink Altar -> Kiln of the First Flame via Oolacile Township
without having collected all four Lord Souls)
- Force Quit Wrong Warp is *not* generally required, but may be
useful to escape from certain softlocks and avoid the need for
some keys.


