


0 of 0

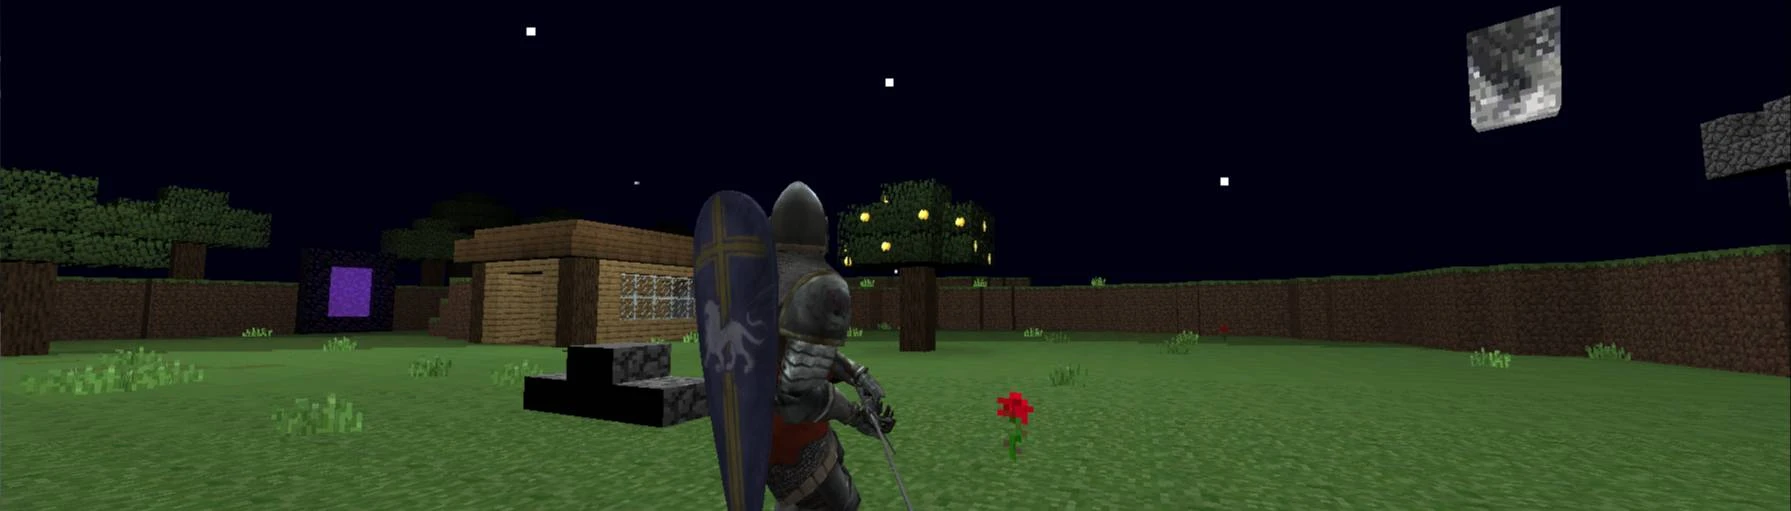
https://steamcommunity.com/sharedfiles/filedetails/?id=3045507711
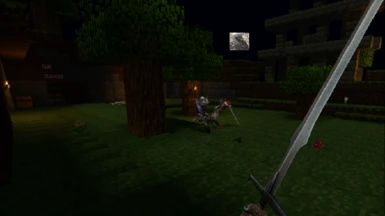
CLICK HERE -- Steam Workshop: Minecraft (Last Team Standing/Duelyard)^^^^^^^^^^^^^^
Do you want to make a custom map?
Chivalry includes map editor software in the game launcher! Hooray!
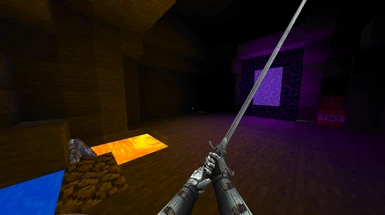
chivalry 1 already gives you some assets, but if you want to remake an official map in the cookedPC/AOC/Levels folderthere's a program called Umodel (u can google it)it lets u extract cooked packages from unreal games into their uncooked version for editing and re-uploading under a new name
sadly ammo crates, etc require the developer's bone molds to function nor can the vanilla music be changed per the final update
my artwork and sound effects for the map will be:
-pictures must be .png
-audio MUST be .wav
My Static mesh will be .fbx
ive skipped a few points such
remember if you are making minecraft graphics, so after you import pictures to make them -1 LODBias and
change it from "Linear" to "Nearest".
name the map according to your desired gamemode
aocffa_CUBEWORLD_p
aoclts_ aocto_
aoctdm_ aockoth_ aocduel_
ideally, you will make a level for artwork and create a sublevel for the other stuff like spawn points and code
my download contains a mesh .fbx so you wont need to install blender. it's the default cube from a fresh install of blender. possibly your own .fbx will be better because i dont know anything about .fbx files or making UVs. i didn't make any cool shapes because i dont have the skills in blender or chivalry. sadly i didnt bother to fully utilize the editors Persistant Art Levels and materials that wrap around any shape using math and coordinate widgets
when you import transparent textures you need to checkbox opaque and change the dropdown to masked or something above masked
you can easily Ctrl+A Ctrl+C copy the kismet for the Golden Apple tree, and Chivalry assets inside the level: light sources and spawn points. etc. and make a new blank map in the editor and paste the lights...
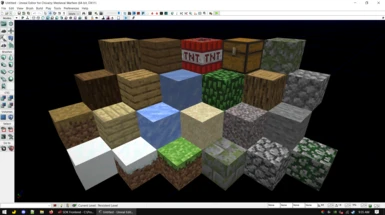
but you need to make the blocks manually using files kept inside your ContentSDK folder. ALWAYS put your files in ContentSDK before you build them!!!
C:\Program Files (x86)\Steam\steamapps\common\chivalrymedievalwarfare\UDKGame\ContentSDK
Let's begin the tutorial:
press CTRL+Shift+F to open the content browser.
Create a new package with a unique filename
(anything but MyPackage to avoid error) Torn Banner method would be naming it with the prefix CHV_
close the content browser and load my map. you see a toolbar at the top and you click the Green K to open the kismet (visual scripting) viewport.
Ctrl+C everything and load your new map. paste the code inside and you're done.
This is the bootleg method i did for the blocks: now I can search the content browser for 2Sided Master and right click>create New Material Instance (Constant)
then you assign a highlighted texture this Instance's diffuse slot or copy copies if you want multiple
then now, we apply the 2sided copy to the .fbx
the static mesh editor opens when you double -click the mesh.
you need to use this menu to apply your Material and enable collision.
now you can play around and design your map.
the bottom right corner checkbox in the toolbar will also toggle snap so you can move at 32pixels
(half-slab height) or 64pixels snap (full block)
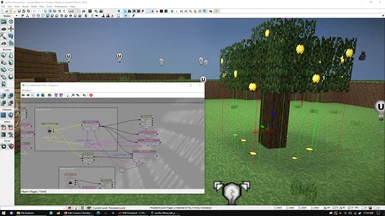
for the golden apple tree, right click the floor > select place a Trigger. keep this trigger highlighted and open the Kismet
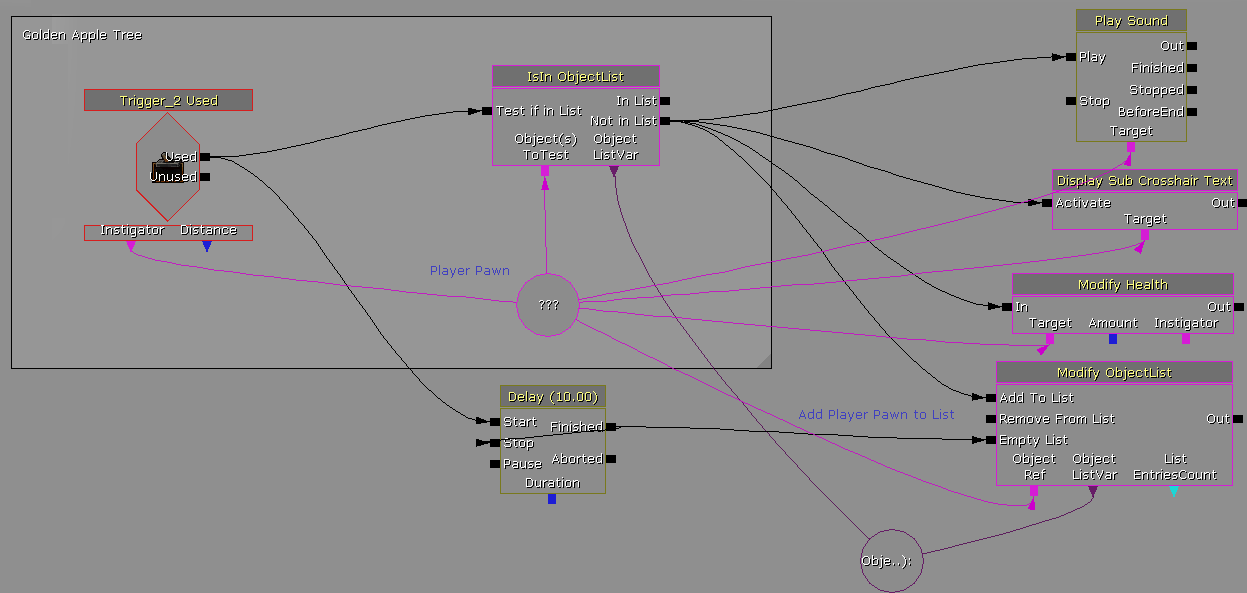
this is the kismet above for my golden apple tree, when you eat an apple it plays the sound, and heals you and prevents spam by adding you to a cooldown list on the server for ten seconds.
and right click>create trigger in the
kismet window. connect the trigger as pictured above. and CHANGE THE CHECKBOX INSIDE THE TRIGGER KISMET set radius for text to show, and trigger radius. see picture below
then place the wind direction onto the map, aswell as weather, fog, light, from the ActorClass menu (on the top toolbar by default)
Make sure you edit the spawn point
"View> World Properties> Game Type"
choose AOCLTS (or AOCFFA)
"View> Actor Classes> AOCPlayerStart
click and drag on the floor
select the spawnpoint and Press F4 to open the properties
•The map cannot have more than one game mode.
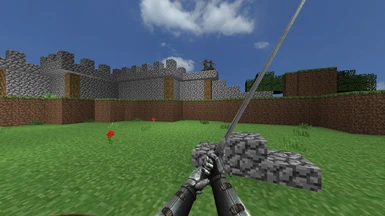
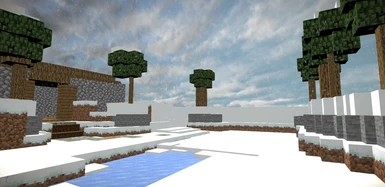
drop down a default skybox in the content browser and drag your custom texture to onto it.
or you can use the animated sky collection inside the content browser
 (you will have better shadow blending than picture.)
ANIMATED GRASS MATERIAL:
in the content browser, a forest foliage master material has a unique menu for easily enabling grass animations. 
when you go to copy the 2Sided Master or this 2sided foliage master, DONT CREATE A COPY since your first copy needs to be a New Material Instance (Constant) like this:
right click forest foliage master, choose New Material Instance (Constant) to your package, this will create the Material Instance i make into copies for each minecraft texture.
apply the red flower texture to forestfoliage_master, highlight your new material, and apply the material to .fbx static mesh i made for flowers. finally when your done you Click the "build all" button, seen on the bottom toolbar to Render the shading with full production quality and you can upload the maps to steam. each time you update the map, you need to pick a new thumbnail image for the update to work and make sure your multiplayer servers are shut off
CLICK HERE -- Steam Workshop: Minecraft (Last Team Standing/Duelyard)^^^^^^^^^^^^^^
Do you want to make a custom map?
Chivalry includes map editor software in the game launcher! Hooray!
chivalry 1 already gives you some assets, but if you want to remake an official map in the cookedPC/AOC/Levels folderthere's a program called Umodel (u can google it)it lets u extract cooked packages from unreal games into their uncooked version for editing and re-uploading under a new name
sadly ammo crates, etc require the developer's bone molds to function nor can the vanilla music be changed per the final update
my artwork and sound effects for the map will be:
-pictures must be .png
-audio MUST be .wav
My Static mesh will be .fbx
ive skipped a few points such
remember if you are making minecraft graphics, so after you import pictures to make them -1 LODBias and
change it from "Linear" to "Nearest".
name the map according to your desired gamemode
aocffa_CUBEWORLD_p
aoclts_ aocto_
aoctdm_ aockoth_ aocduel_
ideally, you will make a level for artwork and create a sublevel for the other stuff like spawn points and code
my download contains a mesh .fbx so you wont need to install blender. it's the default cube from a fresh install of blender. possibly your own .fbx will be better because i dont know anything about .fbx files or making UVs. i didn't make any cool shapes because i dont have the skills in blender or chivalry. sadly i didnt bother to fully utilize the editors Persistant Art Levels and materials that wrap around any shape using math and coordinate widgets
when you import transparent textures you need to checkbox opaque and change the dropdown to masked or something above masked
you can easily Ctrl+A Ctrl+C copy the kismet for the Golden Apple tree, and Chivalry assets inside the level: light sources and spawn points. etc. and make a new blank map in the editor and paste the lights...
but you need to make the blocks manually using files kept inside your ContentSDK folder. ALWAYS put your files in ContentSDK before you build them!!!
C:\Program Files (x86)\Steam\steamapps\common\chivalrymedievalwarfare\UDKGame\ContentSDK
Let's begin the tutorial:
press CTRL+Shift+F to open the content browser.
Create a new package with a unique filename
(anything but MyPackage to avoid error) Torn Banner method would be naming it with the prefix CHV_
close the content browser and load my map. you see a toolbar at the top and you click the Green K to open the kismet (visual scripting) viewport.
Ctrl+C everything and load your new map. paste the code inside and you're done.
This is the bootleg method i did for the blocks: now I can search the content browser for 2Sided Master and right click>create New Material Instance (Constant)
then you assign a highlighted texture this Instance's diffuse slot or copy copies if you want multiple
then now, we apply the 2sided copy to the .fbx
the static mesh editor opens when you double -click the mesh.
you need to use this menu to apply your Material and enable collision.
now you can play around and design your map.
the bottom right corner checkbox in the toolbar will also toggle snap so you can move at 32pixels
(half-slab height) or 64pixels snap (full block)
for the golden apple tree, right click the floor > select place a Trigger. keep this trigger highlighted and open the Kismet
this is the kismet above for my golden apple tree, when you eat an apple it plays the sound, and heals you and prevents spam by adding you to a cooldown list on the server for ten seconds.
and right click>create trigger in the
kismet window. connect the trigger as pictured above. and CHANGE THE CHECKBOX INSIDE THE TRIGGER KISMET set radius for text to show, and trigger radius. see picture below
then place the wind direction onto the map, aswell as weather, fog, light, from the ActorClass menu (on the top toolbar by default)
Make sure you edit the spawn point
"View> World Properties> Game Type"
choose AOCLTS (or AOCFFA)
"View> Actor Classes> AOCPlayerStart
click and drag on the floor
select the spawnpoint and Press F4 to open the properties
•The map cannot have more than one game mode.
drop down a default skybox in the content browser and drag your custom texture to onto it.
or you can use the animated sky collection inside the content browser
ANIMATED GRASS MATERIAL:
in the content browser, a forest foliage master material has a unique menu for easily enabling grass animations.
when you go to copy the 2Sided Master or this 2sided foliage master, DONT CREATE A COPY since your first copy needs to be a New Material Instance (Constant) like this:
right click forest foliage master, choose New Material Instance (Constant) to your package, this will create the Material Instance i make into copies for each minecraft texture.
apply the red flower texture to forestfoliage_master, highlight your new material, and apply the material to .fbx static mesh i made for flowers. finally when your done you Click the "build all" button, seen on the bottom toolbar to Render the shading with full production quality and you can upload the maps to steam. each time you update the map, you need to pick a new thumbnail image for the update to work and make sure your multiplayer servers are shut off