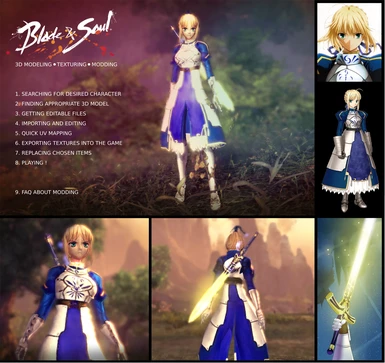
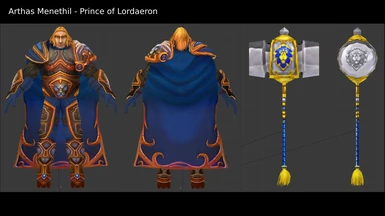
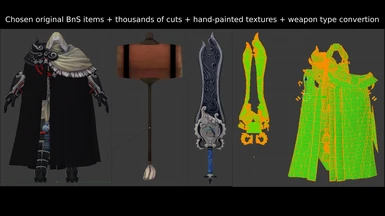
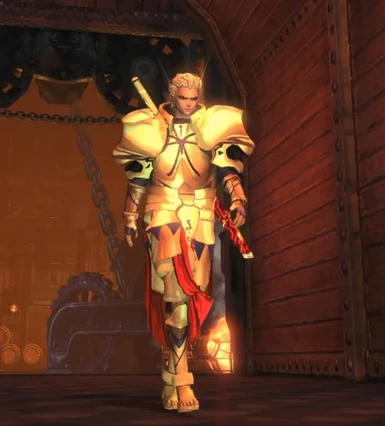
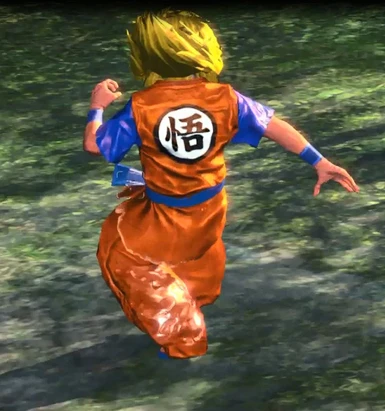
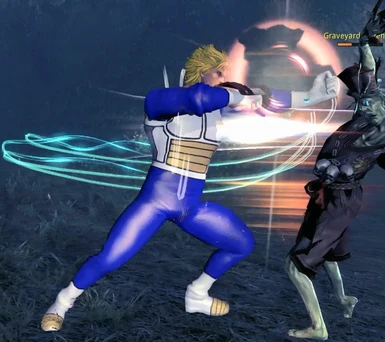
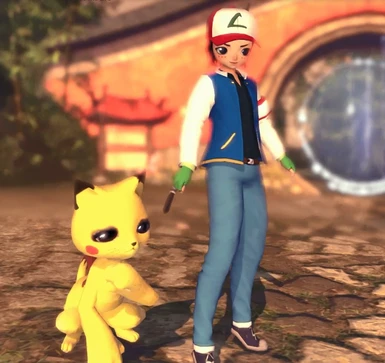
Hello, fellow BnS players ! I'm a modder for about 2 years now and I want to share my experience with 3d modeling and modding. This tutorial will tell you everything step by step without knowing anything about 3d design ! There is also full Blender tutorial so anyone can follow. Good luck and enjoy ! :)
You won't be banned for modding. It only replaces your files which means no one knows you have different skins etc. I was using this method on CN and EU servers for over 3 years with my main accounts. No one ever noticed. :)
Check my videos to see the mods in the game: https://www.youtube.com/channel/UCEWnu8O5wunvnAS4twL5ZoQ/videos
My tutorial was well known on Blade and Soul Dojo which sadly will be closed in december so I'm uploading it here...
http://www.bladeandsouldojo.com/forums/topic/191117-advanced-3d-modeling-and-modding-tutorial-from-zero-to-fully-customized-playable-character/
Please, before you comment read this:
1. People asked me thousands of questions already answered in the tutorial. I'm really tired of people who didn't even bother reading it yet they want something done. Tutorial explains everything you need so I won't answer questions like "How to make this dress transparent" or "How to export animations and meshes" etc.
2. I don't take requests anymore. There are many topics on the internet for this.
3. Many people succesfully created their own mods based on my tutorial so It seems it's explained well enough. If something don't work for you, try to check if everything was done according to describtions.
------------------------------------------------------------------------------------------------------------------------------------


PREPARATIONS:
DOWNLOAD AND INSTALL – BnS Mod Tool, Umodel, UPK Manager,
Hex Workshow, Blender or Maya + PSK. plugin, Gimp or Photoshop (google it and make it work)
1. SEARCHING FOR DESIRED CHARACTER
If you already decided that you want to play Blade and Soul as your favourite character, then
you need to find some pictures from the internet with good quality and resolution. I reccomend to
get references which are neccesary to paint your character way faster. I always use 2 orthogonal
images of front and back side of the body. Pictures shown below can be easily painted on 3d model
with ortogonal view enabled. You will see very soon how fast and easy it is.

2. FINDING APPROPRIATE 3D MODEL
Second step requires decent knowledge about the items from the game. We need to find an
outfit with the model similar to our character references. The best way to know which items to
choose is to open some upk. viewer like BnS Mod Tool by Jonathan. Just set the 'Race” and „Type
of item” in the program, then check all the available models and compare them with your character.
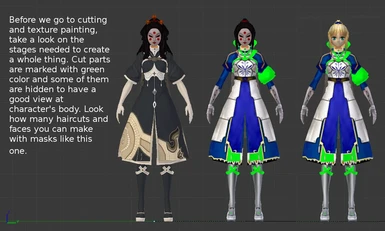
It's important to look for potencial cuts in the model. What I mean by that is to see how many
„layers” of polygons the model has. For example the one shown below which I used for the Saber
from Fate Zero is full of stripes and baggy parts of the outfit. Those elements are what I call „layer
2”. Layer 2 can be easily modified to create different shapes. Layer 1 is the main body. If you cut
layer 1 in 3D software, you will have a holes in your character. It's mainly the whole body skin and
some parts of the clothing. The model is like a blown easter egg. You don't want to see what's
inside. Only decoration matters. (Keep note: Outfits can't be combined with other outfits set as e.g
head item. The game will crush a lot.)
If you intend to create realistic face, standard character customization fails no matter how
hard you try. For this issue the best way is to find face mask similar to the one is the pictures.
The last thing is a weapon. Look for the icons with special effects to get nicer look. It's not
easy to find a model matching desired look but all the special effects kind of compensate it.

3. GETTING EDITABLE FILES
After chosing the items it's time to make them editable in 2D and 3D software. Copy the
numbers of every item you consider worth remaking from BnS Mod Tool or any other upk. viewer.
Use any text editor to save the upk. numbers and make some adnotations describing the items:
"skeleton": "00020504",
"texture": "00020502",
"material": "00020503",
"col1Material": "00020503",
"col": "col1",
"core": "040080_JinF",
"code": "040080",
"race": "JinF",
"pic": "Attach_040080_JinM_col1.png" Geisha Mask
Open Umodel and wait for it to load all the upk. game files (3-10 min. of empty black
console sometimes...) Now when the files are loaded use the „filter” to find your files. You need
„skeleton” and „texture”. According to numbers typed here, the files for Geisha Mask we need are
00020504 and 00020502. Copy+Paste them in the filter. The file you need will pop up in the table.
Select it and click „export”. Now you will have the folder named „UmodelExport” with the files
you have just exported. It should be in the program folder or \BnS\contents\bns . The software
converted „texture” to tga. format and „skeleton” to psk. format from Unreal Development Kit
(upk., udk.) files. Now we can close Umodel but don't be hasty. Remember it takes ages to load it.
Make sure you have all the wanted files exported. Save the numbers obtained from BnS Mod tool.
We will need it later.

4. IMPORTING AND EDITING
This is easily the most time consuming and chalengable part of the tutorial. We will start
with opening 3D software with installed psk. plugin. In my case, it going to be free software called
Blender. I can't teach you how to use it at full scale with just one simple tutorial but I will use only
few simple techniques to create the whole character. Hopefully it's going to be easy for you to copy
all the steps without any knowledge about 3D design.
I used very limited ammount of skills needed to learn. I followed my steps to check if I
didn't make any mistakes while writeing the instructions. Just follow the red circles and describtions
to learn everything you need to create good looking character.
Right Click to enlarge the pictures.


5. QUICK UV MAPPING
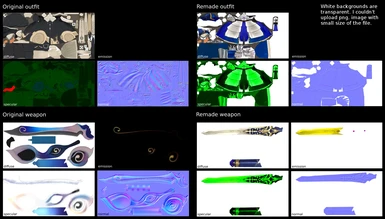
Compared to previous part, this one is super fast. We just need to open our custom diffuse
texture and make few changes to create a set of textures interacting with the game's graphic engine.
There are 4 main types of textures:
- diffuse map (standard texture with painted details and colors)
- normal map (bump effect, faking 3D shapes by reflecting the lighting on certain parts of the
diffuse texture)
- specular map (also known as reflection map, bright parts of the texture reflect more lighting)
- emission map (texture create it's own light source, bright parts of the texture produce stronger
emission)
There are other UV maps but those are used to create additional details. Specular maps have
usually green and blue colors used to define the power of reflection. However, many of them have
red parts used for character's skin to match the brightness and color of your BnS character. The only
part of the character's body which really have the skin color you have chosen in the starting
character customization is the face. For example, you can make an outfit with your specular map all
red and you will end up having super bright diffuse texture with a pale,white skin character and
super dark outfit with a dark skin character.
In order to create full basic set of UV textures open your diffuse map with Gimp, Photoshop
or any other 2D software then do the following:
1) Diffuse map (D)
Your custom texture has a lot of bright green parts used to determine which polygons should be cut.
Now you just need to „select by color” to select all the parts with this color. Then just delete it to
make it transparent. Make sure to clean up the texture from the green egdes if something didn't
select properly. Export texture with File > Export as > choose folder and format (tga. or png.)
2) Specular map (S)
Keep the diffuse map open. Now colorize the whole texture to be all green or light blue. Adjust
some contrast to make dark parts less reflective and light parts more reflective. Look at the image
below. You can see that the neck of outfit's specular map is red. It means the brightness will scale on
this part depending on the skin color your character has. Export as png. or tga.
3) Emission map (E) – You can make weapon emit any color you want. I painted it as yellow/purple
4) Normal map (N) – Put your diffuse map to any online converter. Customize your settings. Save.

6. EXPORTING TEXTURES INTO THE GAME
The artistic part is finally over. It's time to rebuild the game files with our custom textures.
Open UPK manager. Let it load game files. Choose „Show files in type” > „Texture 2d”. Look for
the texture numbers in the filter on the lower window (from the text file you made based on BnS
Mod Tool ). Tick the upk. numbers and File > Export Selected Files. This process will create
custom folder for all your modded textures. You will see the files inside the folder with dds. format
(actual format of textures used in game). This folder can be saved anywhere on the disc.
Open the folder with all customized UV textures and compare them with the UPK manager's
export folder. See if you have the same number and type of textures as the original files. If you see
some additional files then create some empty, transparent textures to prevent the effect of original
textures on custom ones. You can't just delete them from the folder. Blade and soul will crush this
way or it will try to rebuild missing files.
Name your files the exact same way they are named in the UPK Manager's export folder
with dds. fomat.
Upload all your custom UV textures in any DDS. online converter. Make sure to set the
convertion settings supporting alfa chanels (DXT4 or DXT5). Don't set it to R8G8B8 etc. You will
end up getting all the item's cut parts white or black instead of transparent.
Copy your custom, converted dds. textures and paste them in the UPK Manager's export
folder. It will ask you if you want to replace few files. Make sure it's the number of textures inside
the folder you want to replace. Otherwise, you probably called them wrong or they aren't dds. files.
The last step is to create a new upk. file in BnS\contents\bns\CookedPC\mod. UPK Manager
will do it automatically if you go to „Rebuild” tab>search for bns/CookedPC>tick the upk. numbers
with replaced textures>”Rebuild”(near Edit and Settings)>Rebuild Selected Exports
DONE ! Your custom character is already in the game ! Now it's only a matter of having replaced
items in the game or having any outfit, head and adorment to see if it worked as intended.
7. REPLACING CHOSEN ITEMS
For the last step I don't reccomend using BnS Mod Tool. It's very good at replacing outfits
but the adorments and head items are bugged very often. With older versions of the program you
can't replace weapons. We will use Hex Workshop in order to do it.
Go to ...\BnS\contents\bns\CookedPC and find the upk. files of original outfits you want to
replace with your custom textures. We already have them in the text file created at the beggining of
the tutorial. Copy upk. of „material” and „skeleton” to a new folder (call it HexEditMods or
something). Save this folder on the pulpit or other place. Use BnS Mod tool to search for numbers
of items you want to swap. For this tutorial we will use JIN FEMALE Training Weapon (lvl 1),
Stalker's Head and Stalker's Outfit (lvl.6, first boss, items drop easily from Wheel of Fate).
For my outfit the numbers are – 00008206.upk (skeleton) and 00008205.upk (material)
For my head the numbers are - 00020504.upk (skeleton) and 00020503.upk (material)
Rename the „skeleton” and „material” with the name of upk. files belonging to items you have
already in game. (in this case – Stalker's Head and Stalker's Outfit)
For Geisha Mask (and now our character's head) to replace Stalker's Head I renamed:
skeleton: 00020504.upk to 00012184.upk
material: 00020503.upk. to 00019135.upk
For baggy, dark blue outfit to replace Stalker's Outfit I renamed:
skeleton: 00008206.upk to 00012176.upk
material: 00008205.upk. to 00012175.upk
Open copied skeleton upk. file from custom folder with RMB > „Hex edit with Hex Workshop”
Now do the following:

Repeat those steps for every item you want. It doesn't matter if it's a weapon, head, outfit or
adorment. Don't try to replace Jin Female's items with other races's items. It will end up crushing
the game. Sometimes replacing col.mat with other col.mat doesn't work. You can try mat. instead.
Now just put hex edited items in ...\BnS\contents\Local\NCWEST\ENGLISH\CookedPC\mod
If you don't have „mod” folder just create it manually in this directory.
DON'T PUT IT IN ...\BnS\contents\bns\CookedPC
You should also check if your programs created „mod” folder in the right direction. If not, cut them
and paste them here ...\BnS\contents\Local\NCWEST\ENGLISH\CookedPC\mod
You may eventually end up getting error this way - „Unautorized folder was found in the CookedPC
folder”. It will still work fine but it's quite annoying to click „Ok” for every mod you put into the
game and... I have plenty of them.
DONE ! The items are already in the game !
Note:
I tried to merge 2 outfits to make cutom 3D model and replace one of them for adorment. The
second outfit just didn't show up in the game yet it was crushing every 2 minutes. The reason it
happend is because the physics node from Unreal Engine is trying to simulate 2 items with mesh
collision set to „block all”. 2 spawned outfits in the same place are glitching with each other making
unwanted log outputs.
8. PLAYING !
Finally we ended the whole process of creating custom character. You can now launch Blade and
Soul and see if everything is working. It's also the best way to check if our character is made
properly. Sometimes there is too much bump, reflection, emission or the whole shaders are broken.
If you followed the tutorial without any mistakes it should look just fine. I gave you the exact files
used by my Saber from Fate Zero so you have a proof it can be done.
Have fun playing your custom characters ! :)
9. FAQ ABOUT MODDING
TOP 1 question: Can I import meshes, edit them, export them into the game ?
You can import meshes and edit them. You can edit bones for animations and open game animations in any 3d software with psk. plugin support. Exporting it back is possible but it won't work for more than 3s... First problem is very similar to merging 2 existing outfits with each other and replacing the second one with head or adorment. The items will glitch with each other and crash the game after 1-2 minutes. It's because the collision of the models is set to "block all" and Unreal Engine will end up with negative log outputs making the game crush.
I've tried merging my custom model with existing bones and make Weight Paint to make BnS animations natural (not to fly around the globe...) with my models. I couldn't export them back into upk. with any available modding software but I did it manually using Unreal Development Kit and exporting it as upk. It just crashes every time no matter the settings. The other problem is that one upk. file of skeletal mesh includes about 20-30 files of UDK physics related to each other. Character itself is not affected by basic physics but the outfits are. Let's say you somehow made the model to work with BnS. The character is still affected by physics and it has a lot of settings about: what to overlap, what to block, what's basic collision geometry for the model etc. If my game was able to handle it without crushing, my character would just fall into abyss through other meshes. The last thing I can think of is the number of polygons of your custom model. If it was too big the game would crush after few seconds. I don't think anyone currently can handle this topic... But I don't really care anymore. I was able to create any character I wanted with my methods. The library of BnS is big enough to create any humanoid character if you just put your imagination into this.
Edit 18.10.2017: Forget about exporting meshes into the game. Unreal Development Kit is no longer supported by Epic Games. Games like Smite or Bns use their own private developers. Even Unreal 4 can't make proper upk. files for UDK Engine. Downloadable versions of this engine are outdated and create corrupted files no matter which version you use.
You won't be banned for modding. It only replaces your files which means no one knows you have different skins etc. I was using this method on CN and EU servers for over 3 years with my main accounts. No one ever noticed. :)
Check my videos to see the mods in the game: https://www.youtube.com/channel/UCEWnu8O5wunvnAS4twL5ZoQ/videos
My tutorial was well known on Blade and Soul Dojo which sadly will be closed in december so I'm uploading it here...
http://www.bladeandsouldojo.com/forums/topic/191117-advanced-3d-modeling-and-modding-tutorial-from-zero-to-fully-customized-playable-character/
Please, before you comment read this:
1. People asked me thousands of questions already answered in the tutorial. I'm really tired of people who didn't even bother reading it yet they want something done. Tutorial explains everything you need so I won't answer questions like "How to make this dress transparent" or "How to export animations and meshes" etc.
2. I don't take requests anymore. There are many topics on the internet for this.
3. Many people succesfully created their own mods based on my tutorial so It seems it's explained well enough. If something don't work for you, try to check if everything was done according to describtions.
------------------------------------------------------------------------------------------------------------------------------------


PREPARATIONS:
DOWNLOAD AND INSTALL – BnS Mod Tool, Umodel, UPK Manager,
Hex Workshow, Blender or Maya + PSK. plugin, Gimp or Photoshop (google it and make it work)
1. SEARCHING FOR DESIRED CHARACTER
If you already decided that you want to play Blade and Soul as your favourite character, then
you need to find some pictures from the internet with good quality and resolution. I reccomend to
get references which are neccesary to paint your character way faster. I always use 2 orthogonal
images of front and back side of the body. Pictures shown below can be easily painted on 3d model
with ortogonal view enabled. You will see very soon how fast and easy it is.

2. FINDING APPROPRIATE 3D MODEL
Second step requires decent knowledge about the items from the game. We need to find an
outfit with the model similar to our character references. The best way to know which items to
choose is to open some upk. viewer like BnS Mod Tool by Jonathan. Just set the 'Race” and „Type
of item” in the program, then check all the available models and compare them with your character.
It's important to look for potencial cuts in the model. What I mean by that is to see how many
„layers” of polygons the model has. For example the one shown below which I used for the Saber
from Fate Zero is full of stripes and baggy parts of the outfit. Those elements are what I call „layer
2”. Layer 2 can be easily modified to create different shapes. Layer 1 is the main body. If you cut
layer 1 in 3D software, you will have a holes in your character. It's mainly the whole body skin and
some parts of the clothing. The model is like a blown easter egg. You don't want to see what's
inside. Only decoration matters. (Keep note: Outfits can't be combined with other outfits set as e.g
head item. The game will crush a lot.)
If you intend to create realistic face, standard character customization fails no matter how
hard you try. For this issue the best way is to find face mask similar to the one is the pictures.
The last thing is a weapon. Look for the icons with special effects to get nicer look. It's not
easy to find a model matching desired look but all the special effects kind of compensate it.

3. GETTING EDITABLE FILES
After chosing the items it's time to make them editable in 2D and 3D software. Copy the
numbers of every item you consider worth remaking from BnS Mod Tool or any other upk. viewer.
Use any text editor to save the upk. numbers and make some adnotations describing the items:
"skeleton": "00020504",
"texture": "00020502",
"material": "00020503",
"col1Material": "00020503",
"col": "col1",
"core": "040080_JinF",
"code": "040080",
"race": "JinF",
"pic": "Attach_040080_JinM_col1.png" Geisha Mask
Open Umodel and wait for it to load all the upk. game files (3-10 min. of empty black
console sometimes...) Now when the files are loaded use the „filter” to find your files. You need
„skeleton” and „texture”. According to numbers typed here, the files for Geisha Mask we need are
00020504 and 00020502. Copy+Paste them in the filter. The file you need will pop up in the table.
Select it and click „export”. Now you will have the folder named „UmodelExport” with the files
you have just exported. It should be in the program folder or \BnS\contents\bns . The software
converted „texture” to tga. format and „skeleton” to psk. format from Unreal Development Kit
(upk., udk.) files. Now we can close Umodel but don't be hasty. Remember it takes ages to load it.
Make sure you have all the wanted files exported. Save the numbers obtained from BnS Mod tool.
We will need it later.

4. IMPORTING AND EDITING
This is easily the most time consuming and chalengable part of the tutorial. We will start
with opening 3D software with installed psk. plugin. In my case, it going to be free software called
Blender. I can't teach you how to use it at full scale with just one simple tutorial but I will use only
few simple techniques to create the whole character. Hopefully it's going to be easy for you to copy
all the steps without any knowledge about 3D design.
I used very limited ammount of skills needed to learn. I followed my steps to check if I
didn't make any mistakes while writeing the instructions. Just follow the red circles and describtions
to learn everything you need to create good looking character.
Right Click to enlarge the pictures.


5. QUICK UV MAPPING
Compared to previous part, this one is super fast. We just need to open our custom diffuse
texture and make few changes to create a set of textures interacting with the game's graphic engine.
There are 4 main types of textures:
- diffuse map (standard texture with painted details and colors)
- normal map (bump effect, faking 3D shapes by reflecting the lighting on certain parts of the
diffuse texture)
- specular map (also known as reflection map, bright parts of the texture reflect more lighting)
- emission map (texture create it's own light source, bright parts of the texture produce stronger
emission)
There are other UV maps but those are used to create additional details. Specular maps have
usually green and blue colors used to define the power of reflection. However, many of them have
red parts used for character's skin to match the brightness and color of your BnS character. The only
part of the character's body which really have the skin color you have chosen in the starting
character customization is the face. For example, you can make an outfit with your specular map all
red and you will end up having super bright diffuse texture with a pale,white skin character and
super dark outfit with a dark skin character.
In order to create full basic set of UV textures open your diffuse map with Gimp, Photoshop
or any other 2D software then do the following:
1) Diffuse map (D)
Your custom texture has a lot of bright green parts used to determine which polygons should be cut.
Now you just need to „select by color” to select all the parts with this color. Then just delete it to
make it transparent. Make sure to clean up the texture from the green egdes if something didn't
select properly. Export texture with File > Export as > choose folder and format (tga. or png.)
2) Specular map (S)
Keep the diffuse map open. Now colorize the whole texture to be all green or light blue. Adjust
some contrast to make dark parts less reflective and light parts more reflective. Look at the image
below. You can see that the neck of outfit's specular map is red. It means the brightness will scale on
this part depending on the skin color your character has. Export as png. or tga.
3) Emission map (E) – You can make weapon emit any color you want. I painted it as yellow/purple
4) Normal map (N) – Put your diffuse map to any online converter. Customize your settings. Save.

6. EXPORTING TEXTURES INTO THE GAME
The artistic part is finally over. It's time to rebuild the game files with our custom textures.
Open UPK manager. Let it load game files. Choose „Show files in type” > „Texture 2d”. Look for
the texture numbers in the filter on the lower window (from the text file you made based on BnS
Mod Tool ). Tick the upk. numbers and File > Export Selected Files. This process will create
custom folder for all your modded textures. You will see the files inside the folder with dds. format
(actual format of textures used in game). This folder can be saved anywhere on the disc.
Open the folder with all customized UV textures and compare them with the UPK manager's
export folder. See if you have the same number and type of textures as the original files. If you see
some additional files then create some empty, transparent textures to prevent the effect of original
textures on custom ones. You can't just delete them from the folder. Blade and soul will crush this
way or it will try to rebuild missing files.
Name your files the exact same way they are named in the UPK Manager's export folder
with dds. fomat.
Upload all your custom UV textures in any DDS. online converter. Make sure to set the
convertion settings supporting alfa chanels (DXT4 or DXT5). Don't set it to R8G8B8 etc. You will
end up getting all the item's cut parts white or black instead of transparent.
Copy your custom, converted dds. textures and paste them in the UPK Manager's export
folder. It will ask you if you want to replace few files. Make sure it's the number of textures inside
the folder you want to replace. Otherwise, you probably called them wrong or they aren't dds. files.
The last step is to create a new upk. file in BnS\contents\bns\CookedPC\mod. UPK Manager
will do it automatically if you go to „Rebuild” tab>search for bns/CookedPC>tick the upk. numbers
with replaced textures>”Rebuild”(near Edit and Settings)>Rebuild Selected Exports
DONE ! Your custom character is already in the game ! Now it's only a matter of having replaced
items in the game or having any outfit, head and adorment to see if it worked as intended.
7. REPLACING CHOSEN ITEMS
For the last step I don't reccomend using BnS Mod Tool. It's very good at replacing outfits
but the adorments and head items are bugged very often. With older versions of the program you
can't replace weapons. We will use Hex Workshop in order to do it.
Go to ...\BnS\contents\bns\CookedPC and find the upk. files of original outfits you want to
replace with your custom textures. We already have them in the text file created at the beggining of
the tutorial. Copy upk. of „material” and „skeleton” to a new folder (call it HexEditMods or
something). Save this folder on the pulpit or other place. Use BnS Mod tool to search for numbers
of items you want to swap. For this tutorial we will use JIN FEMALE Training Weapon (lvl 1),
Stalker's Head and Stalker's Outfit (lvl.6, first boss, items drop easily from Wheel of Fate).
For my outfit the numbers are – 00008206.upk (skeleton) and 00008205.upk (material)
For my head the numbers are - 00020504.upk (skeleton) and 00020503.upk (material)
Rename the „skeleton” and „material” with the name of upk. files belonging to items you have
already in game. (in this case – Stalker's Head and Stalker's Outfit)
For Geisha Mask (and now our character's head) to replace Stalker's Head I renamed:
skeleton: 00020504.upk to 00012184.upk
material: 00020503.upk. to 00019135.upk
For baggy, dark blue outfit to replace Stalker's Outfit I renamed:
skeleton: 00008206.upk to 00012176.upk
material: 00008205.upk. to 00012175.upk
Open copied skeleton upk. file from custom folder with RMB > „Hex edit with Hex Workshop”
Now do the following:

Repeat those steps for every item you want. It doesn't matter if it's a weapon, head, outfit or
adorment. Don't try to replace Jin Female's items with other races's items. It will end up crushing
the game. Sometimes replacing col.mat with other col.mat doesn't work. You can try mat. instead.
Now just put hex edited items in ...\BnS\contents\Local\NCWEST\ENGLISH\CookedPC\mod
If you don't have „mod” folder just create it manually in this directory.
DON'T PUT IT IN ...\BnS\contents\bns\CookedPC
You should also check if your programs created „mod” folder in the right direction. If not, cut them
and paste them here ...\BnS\contents\Local\NCWEST\ENGLISH\CookedPC\mod
You may eventually end up getting error this way - „Unautorized folder was found in the CookedPC
folder”. It will still work fine but it's quite annoying to click „Ok” for every mod you put into the
game and... I have plenty of them.
DONE ! The items are already in the game !
Note:
I tried to merge 2 outfits to make cutom 3D model and replace one of them for adorment. The
second outfit just didn't show up in the game yet it was crushing every 2 minutes. The reason it
happend is because the physics node from Unreal Engine is trying to simulate 2 items with mesh
collision set to „block all”. 2 spawned outfits in the same place are glitching with each other making
unwanted log outputs.
8. PLAYING !
Finally we ended the whole process of creating custom character. You can now launch Blade and
Soul and see if everything is working. It's also the best way to check if our character is made
properly. Sometimes there is too much bump, reflection, emission or the whole shaders are broken.
If you followed the tutorial without any mistakes it should look just fine. I gave you the exact files
used by my Saber from Fate Zero so you have a proof it can be done.
Have fun playing your custom characters ! :)
9. FAQ ABOUT MODDING
TOP 1 question: Can I import meshes, edit them, export them into the game ?
You can import meshes and edit them. You can edit bones for animations and open game animations in any 3d software with psk. plugin support. Exporting it back is possible but it won't work for more than 3s... First problem is very similar to merging 2 existing outfits with each other and replacing the second one with head or adorment. The items will glitch with each other and crash the game after 1-2 minutes. It's because the collision of the models is set to "block all" and Unreal Engine will end up with negative log outputs making the game crush.
I've tried merging my custom model with existing bones and make Weight Paint to make BnS animations natural (not to fly around the globe...) with my models. I couldn't export them back into upk. with any available modding software but I did it manually using Unreal Development Kit and exporting it as upk. It just crashes every time no matter the settings. The other problem is that one upk. file of skeletal mesh includes about 20-30 files of UDK physics related to each other. Character itself is not affected by basic physics but the outfits are. Let's say you somehow made the model to work with BnS. The character is still affected by physics and it has a lot of settings about: what to overlap, what to block, what's basic collision geometry for the model etc. If my game was able to handle it without crushing, my character would just fall into abyss through other meshes. The last thing I can think of is the number of polygons of your custom model. If it was too big the game would crush after few seconds. I don't think anyone currently can handle this topic... But I don't really care anymore. I was able to create any character I wanted with my methods. The library of BnS is big enough to create any humanoid character if you just put your imagination into this.
Edit 18.10.2017: Forget about exporting meshes into the game. Unreal Development Kit is no longer supported by Epic Games. Games like Smite or Bns use their own private developers. Even Unreal 4 can't make proper upk. files for UDK Engine. Downloadable versions of this engine are outdated and create corrupted files no matter which version you use.


