


0 of 0


About this mod
This guide is currently outdated. Update coming eventually.
This is an instructional guide and template to be used by anyone who wants to create BG3 Weapons and Armour mods. Specifically this guide instructs you on how to create the Nightsong armor. Though of course it will help you to make any kind of Weapon and Armour mod.
- Permissions and credits
This guide is currently outdated. Update coming eventually.
Instructions to make a Weapons and Armour mod for BG3
In this guide I’ll show you how to make a mod containing the Nightsong armor, as an example. I have also made a mod containing the Nightsong as well as several other custom pieces of armor.
Tools you’ll need:
Notepad++: https://notepad-plus-plus.org/downloads/ (or an alternative advanced text editor)
ExportTool: https://github.com/Norbyte/lslib/releases
BG3 Mod Helper: https://www.nexusmods.com/baldursgate3/mods/76
Blender 2.79 (old): https://www.blender.org/download/releases/2-79/
Import Addon for Blender: https://github.com/LaughingLeader-DOS2-Mods/dos2de_collada_importer
Export Addon for Blender: https://github.com/LaughingLeader-DOS2-Mods/dos2de_collada_exporter
*Blender and Addons only necessary for 3D editing, so many different kinds of Weapon and Armour mods can be made without it.
Update 1.3. Adding containers to the world.
In this update I will provide instructions on how to add a container to the Ravaged Beach, near the Crash Site, that you can use to store the items from your mod. Using merchants is problematic in the long run since if multiple mods use the same merchant, only the mod that is loaded last will have its items placed in that merchant's inventory.
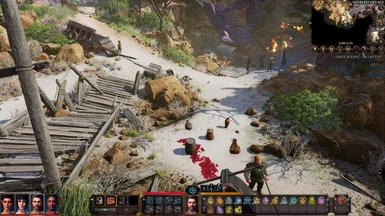
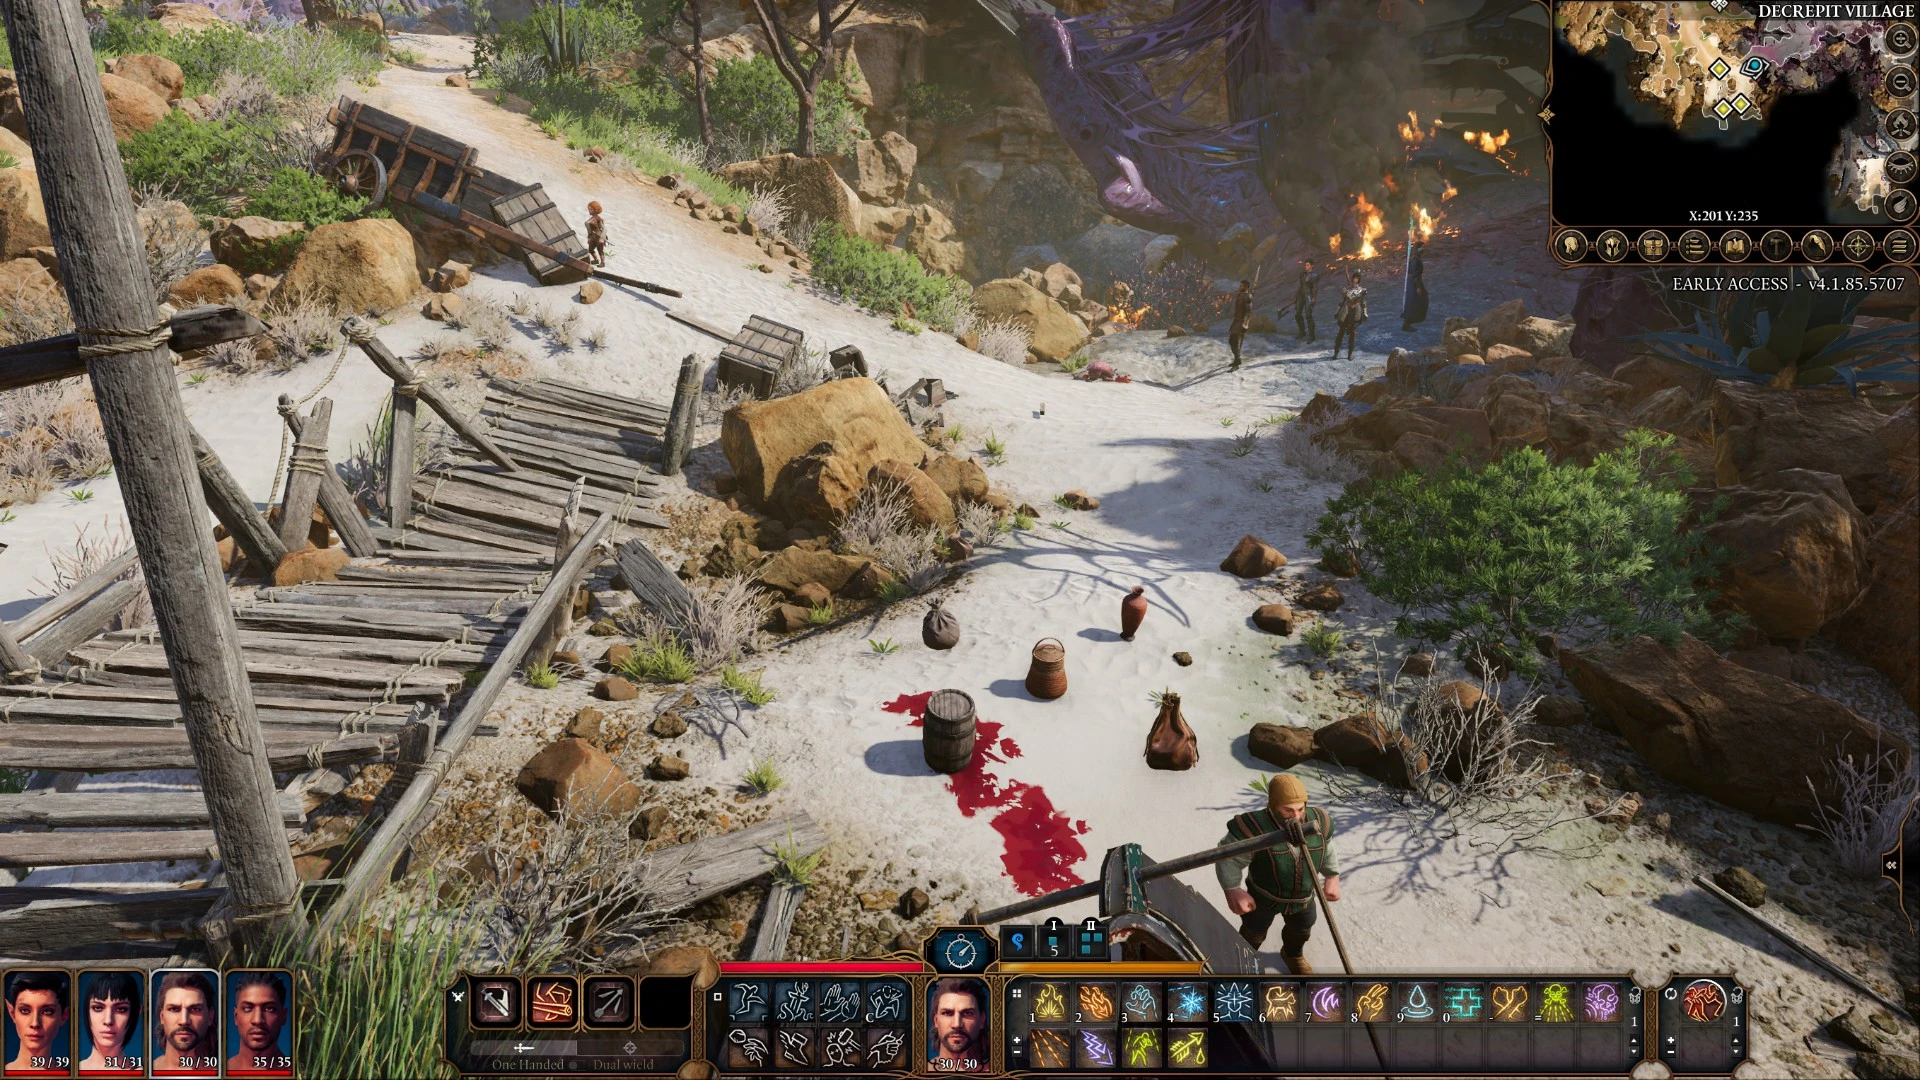
I created 5 containers: Basket, Barrel, Vase, Pouch and Bag and placed them in a X shape on the Ravaged Beach. This helps you understand the coordinate system we have to use. Since we don't have a level editor yet. If you place the container above the ground level, it will simply fall down. It might take fall damage if placed too high though. I confirmed that these containers appeared even in my nearly 100% completed save. I also attempted to add a container outside Jergal's Temple, but that container only appeared on saves that hadn't already visited the area. Can't confirm why.
I recommend using these container types since, unlike chests or crates, you don't need to worry about their rotation. I also recommend altering their size so they are easily differentiated of vanilla game items. Alternatively, you can use containers that wouldn't appear in this area. All these containers show their names when highlighted. You don't need to add these containers to the RootTemplate merged file, nor to Objects.txt. However, if they are not in those files, you cannot add them via Cheat Engine. Unlike the backpack which is part of the main guide.
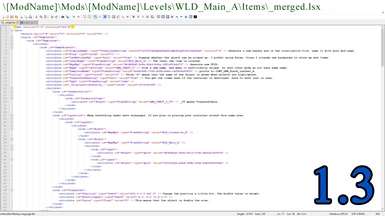
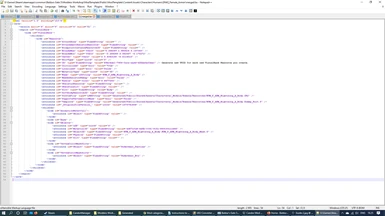
To add containers to the world in your mod, simply follow the instructions in the ModTemplate\Mods\ModTemplate\Levels\WLD_Main_A\Items\_merged.lsx. Please place your containers sufficiently far from the coordinates I used. Though, if two mods use the same, or nearly the same coordinates, the items will simply stack. This is also why I recommend using smaller containers, or containers whose size is reduced, so that they don't take up as much space in the world.
Update 1.2.
Update 1.1.
Addendums (placed on top for visibility)
If you want to create a new armor. For example, a Druid's armor, a Barbarian armor or a Flaming Fist armor. All of which exist in EA game files. With race or gender limited visuals. Instead of using my Armor template in the RootTemplate. I recommend copying an existing armor that is as close to your new armor as possible. If, for instance, you want to create the Flaming Fist Halfplate, then I'd recommend copying the existing basic (or +1 to avoid having unnecessary data on your mod, as base models are also used as ParentTemplates) Halfplate and start your modding from there. Not only will this allow similar visuals for races and genders that you can't or don't want to create new visuals for. It also allows you to have a baseline of visuals for your desired new armor. There may be visuals for Flaming Fist Halfplate, but they may be incomplete, so then you can use the existing Halfplate visuals to complete the set.
I'd also recommend that modders release as close to completed sets of armor for all races and genders. So, please, don't leave other races or genders without visuals, but fill them in with their closest matches. Some players may want to download your mods for their stats, not their visuals. And others may wish to have your gear for lore reasons. They may want a druid's armor, even if for their character's race and gender your druid's armor is only a recolored hide armor.
It takes a little extra time, but it may be worth it if even one more person gets enjoyment from playing BG3 with your mod. For other armor designs, this may not be possible, like my original combination outfits, but I still took the time to create something for the races and genders that I didn't have time and desire, nor game resources, to create custom designs.
1. Export PAK files from Data
Extract ExportTool to \BaldursGate 3\Modders Workshop. Open it and set it to Baldur’sGate 3 (64-bit).Then export the following PAK files: Shared.PAK, Gustav.PAK and Models.PAK. And Textures.PAK, if you intend to do texture modding.
You can export them to any location, but for this guide I’ll use the following location: \Baldurs Gate 3\Modders Workshop. You should end up with folders like this: \Baldurs Gate 3\Modders Workshop\Public. You can convert all PAK files to this same location. This is the location and the way I’ve unpacked these files, but it’s not the only way, nor is it necessarily the best way.
Shared contains most game files that are relevant to this kind of modding. Gustav is a code name for Chapter 1, so it contains addon files to Shared.PAK files, that are specific to Chapter 1. Most items are in Shared, but some are in Gustav.
Models.PAK contains 3D files. You’ll want to unpack it, even if you won’t do any 3D editing. Looking through GR2 (3D model) files is the simplest way of seeing which armor and weapon visuals are available.
Textures.PAK contains textures. They are in similar file paths to the Models.PAK files.
2. Convert .lsf to .lsx
From Shared.PAK files you’ll need to convert a lot of _merged.lsf files to readable _merged.lsx files. Use ExportTool and convert the lsx files to the same folder as the lsf file.
ModdersWorkshop\Public\Shared\RootTemplates\_merged.lsf
This contains the RootTemplates for most items. Rest of the RootTemplates for items in EA are here:
ModdersWorkshop\Public\Gustav\RootTemplates_merged.lsf
Next you’ll need to convert all VisualBank files. From folders like these:
ModdersWorkshop\Public\Shared\Content\Assets\Characters\Humans\[PAK]_Female_Armor
ModdersWorkshop\Public\Shared\Content\Assets\Characters\Dwarves\[PAK]_Male_Clothing
ModdersWorkshop\Public\Shared\Content\Assets\Weapons\[PAK]_Humans
And so on… You may not use all of these for your mod, but it’s best to do it all at once.
3. Making your mod. Opening files.
You should now have all the necessary game files unpacked and converted. For this guide you’ll need to open the following files in Notepad++. And spend a minute or two browsing these files:
ModdersWorkshop\Public\Shared\RootTemplates\_Merged.lsx
ModdersWorkshop\Public\Shared\Content\Assets\Characters\Humans\[PAK]_Female_Armor\_Merged.lsx
ModdersWorkshop\Public\Shared\Stats\Generated\Data\Armor.txt
ModdersWorkshop\Public\Shared\Stats\Generated\Data\Object.txt
ModdersWorkshop\Public\Shared\Stats\Generated\Equipment.txt
ModdersWorkshop\Public\Shared\Stats\Generated\TreasureTable.txt
Now extract my ModTemplate rar file to Modders Workshop\ and open all the files contained within, with Notepad++. And spend a minute or two browsing these files:
ModdersWorkshop\ModTemplate\Mods\ModTemplate\meta.lsx
ModdersWorkshop\ModTemplate\Public\ModTemplate\RootTemplates\merged.lsx
ModdersWorkshop\ModTemplate\Public\ModTemplate\Content\Assets\Characters\Humans\[PAK]_Female_Armor\merged.lsx
ModdersWorkshop\ModTemplate\Public\ModTemplate\Stats\Generated\TreasureTable.txt
ModdersWorkshop\ModTemplate\Public\ModTemplate\Stats\Generated\Data\Armor.txt
ModdersWorkshop\ModTemplate\Public\ModTemplate\Stats\Generated\Data\Object.txt
ModdersWorkshop\ModTemplate\Localization\English\ModTemplate.xml
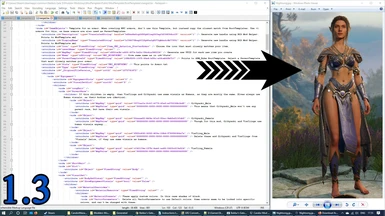
4. Making your mod. Editing the .lsx mod files.
Open ModTemplate\meta.lsx and follow instructions within. Once you're done with that. Rename the mod folders to your mod folder names.
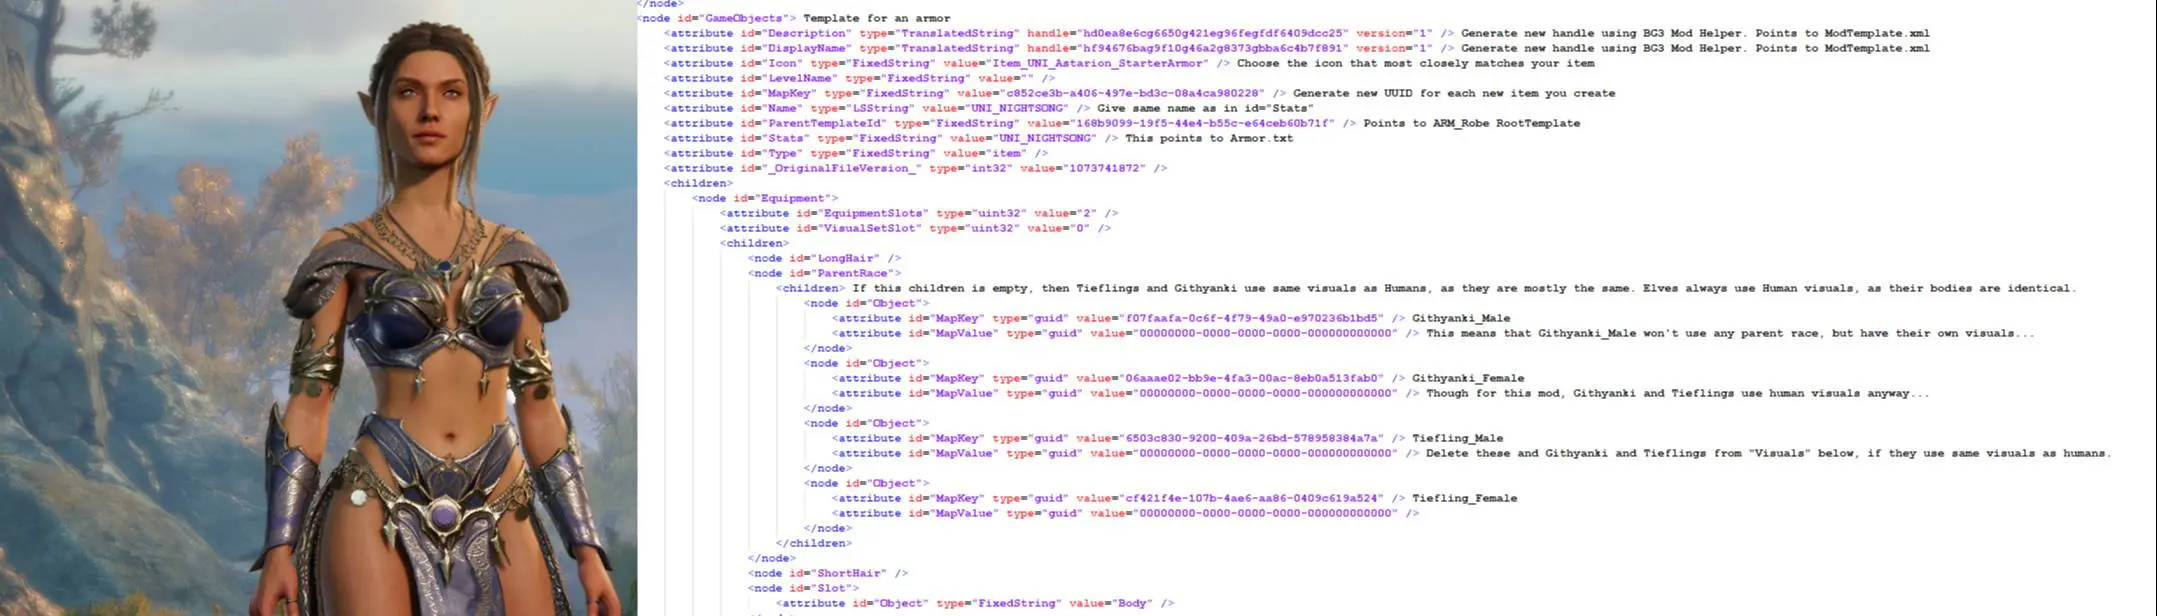
Open ModdersWorkshop\ModTemplate\Public\ModTemplate\RootTemplates\merged.lsx and follow instructions for Backpack. Then follow instructions for “Template for an armor” down to id="ParentRace". Name the Nightsong armor: UNI_NIGHTSONG
The Nightsong armor only has visuals for Human Females. They don’t fit perfectly with Githyanki or Tiefling women, but it’s close enough. We’ll have them also wear the Nightsong. So delete all 4 id="Object" nodes.
Under id="MaterialPresets" delete all "VectorParameters"
Under id="Visuals" delete the Objects for Githyanki_Male, Githyanki_Female, Tiefling_Male and Tieflin_Female
The current visuals are for casual shirt and pants. For this mod Human, Elf, Tiefling and Githyanki women will wear Nightsong, and everyone else will wear the casual shirt and pants.
Go to <attributeid="MapKey" type="guid" value="71180b76-5752-4a97-1fb7-1a911969587f" /> Human_Female Now that we deleted the ParentRaces from Githyanki and Tiefling’s. Visuals placed under here will show on Humans, Elves, Githyanki and Tieflings.
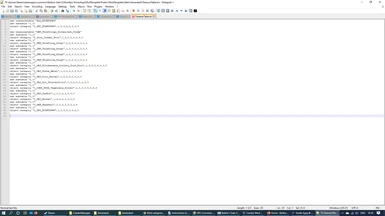
In Windows, go to the folder: Modders Workshop\Generated\Public\Shared\Assets\Characters\_Models and search for Nightsong. This shows that the Nightsong visuals only exist for Humans (and Elves). The important ones are: HUM_F_ARM_Nightsong_A_Body.GR2, HUM_F_ARM_Nightsong_A_Gloves, HUM_F_ARM_Nightsong_A_Footwear.GR2 and HUM_F_ARM_Nightsong_A_Headwear.GR2
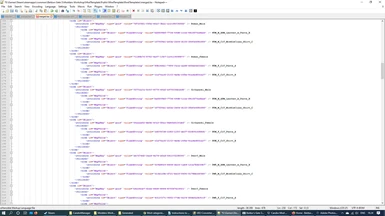
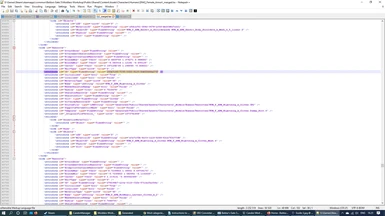
Open ModdersWorkshop\Public\Shared\Content\Assets\Characters\Humans\[PAK]_Female_Armor\_Merged.lsx. Within that file search for HUM_F_ARM_Nightsong_A_Body.GR2. Now, you could simply copy the id="ID" of this id="Resource", but then your character would be wearing their underwear visible under and over the Nightsong armor. So instead copy the whole resource and open Modders Workshop\ModTemplate\Public\ModTemplate\Content\Assets\Characters\Humans\[PAK]_Female_Armor\merged.lsx and copy the resource into this file. Or that’s what you would normally do, but I’ve already copied that Resource, and as you can see, I’ve added two "VertexColorMaskSlots" that hide the panties and the bra. Many NPC armor visual Resources need to be copied into your mod’s file to add the hide the underwear command. Always remember to generate a new UUID id for all visual Resources you alter this way.
If you 3D edit these GR2 files, then rename the GR2 file and rename the file in this lsx file. By, for example, adding _modded to the file name for id="Name", id="SourceFile" and id="Template". DO NOT alter id="ObjectID"
Now copy the newly generated id="ID" to the id="MapValue" under Human_Female and, though it’s not necessary, write something after the /> to remind yourself what that visual is. Converting back to .lsf will delete all these kind of notes. So don’t delete the .lsx file, until you're sure you're done with the mod.
Now delete all the other id="MapValue"s from Human_Female. Nightsong has only one visual for the armor item.
Now do similar edits to the gloves, boots and helmet templates. To create Nightsong gloves, Nightsong boots, and Nightsong helmet.
Now you’re done with the RootTemplate and VisualBank files. You can save and convert them to .lsf. If you made any coding errors, the converter will refuse to convert. Incorrect UUID’s won’t be noticed by the converter. Don’t convert meta.lsx
5. Making your mod. Editing the .txt mod files.
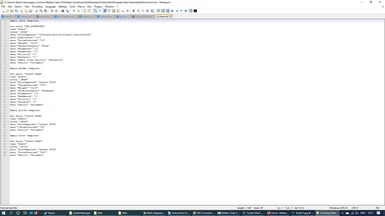
Now open ModdersWorkshop\ModTemplate\Public\ModTemplate\Stats\Generated\Data\Object.txt and rename the new entry “” and data "RootTemplate" for the backpack to match your backpack’s id="Stats" and id="MapKey". Save the file.
Now open ModdersWorkshop\ModTemplate\Public\ModTemplate\Stats\Generated\Data\Armor.txt and do the same with your Nightsong armor, gloves, boots and helmet. Save the file.
Then open ModdersWorkshop\ModTemplate\Public\ModTemplate\Stats\Generated\TreasureTable.txt and add all you items id="Stats" names, with an I_ at the beginning. Under new treasuretable "ALL_NIGHTSONG", which is for your mod’s backpack, and under new treasuretable "DEN_Thieflings_Pickpocket_Trade" so that a Trader in the Tiefling camp will sell your items, along with his own. The Trader is the young Tiefling boy.
Copy theEquipment.txt from Modders Workshop\Public\Shared\Stats\Generated\ to Baldurs Gate 3\Data\Public\Shared\Stats\Generated\ and open it.
Add the backpack to any, or all starting classes so that new characters start with all your mod’s items. Or you can delete their original gear and add yours, so that your equipment is visible in character creation. When making your mod, the only place you can view your WIP outfit is in game. So use the character creator and Equipment.txt to view your outfits as you compile them.
6. Localization
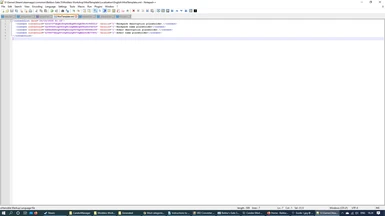
OpenModTemplate\Localization\English\ModTemplate.xml, which should now be named with your mod’s name. Copy all Description and DisplayName handles to the contentuid= and give your items names and descriptions.
7. Finishing up
Now you should be getting done. Convert all .lsx files to .lsf. Except meta.lsx. The only loose file for this mod is going to be Equipment.txt, but if you made 3D or texture edits, then those must also be placed in the loose files.
Then use BG3 Mod Helper according to it’s ReadMe and compile your mod, then load it with Candor mod manager, or add the mod manually.
8. Miscellaneous
UPDATE: The problem was likely with Candor, loading the mods manually worked, even extremely long mod files. Candor also seems to now work with latest update.
Though I haven’t 100% confirmed it, there seems to be a hard limit to how long the mod’s _merged files can be. It doesn’t really make sense, since the game’s _merged files are huge, but I’ve encountered situations where the mod simply wouldn’t load, until I removed parts from the _merged files. If this is indeed the case, then you’ll need to make multiple mods. Though they can be all compiled into a single zip file with BG3 Mod Helper.
Instructions to make a Weapons and Armour mod for BG3
In this guide I’ll show you how to make a mod containing the Nightsong armor, as an example. I have also made a mod containing the Nightsong as well as several other custom pieces of armor.
Tools you’ll need:
Notepad++: https://notepad-plus-plus.org/downloads/ (or an alternative advanced text editor)
ExportTool: https://github.com/Norbyte/lslib/releases
BG3 Mod Helper: https://www.nexusmods.com/baldursgate3/mods/76
Blender 2.79 (old): https://www.blender.org/download/releases/2-79/
Import Addon for Blender: https://github.com/LaughingLeader-DOS2-Mods/dos2de_collada_importer
Export Addon for Blender: https://github.com/LaughingLeader-DOS2-Mods/dos2de_collada_exporter
*Blender and Addons only necessary for 3D editing, so many different kinds of Weapon and Armour mods can be made without it.
Update 1.3. Adding containers to the world.
In this update I will provide instructions on how to add a container to the Ravaged Beach, near the Crash Site, that you can use to store the items from your mod. Using merchants is problematic in the long run since if multiple mods use the same merchant, only the mod that is loaded last will have its items placed in that merchant's inventory.
I created 5 containers: Basket, Barrel, Vase, Pouch and Bag and placed them in a X shape on the Ravaged Beach. This helps you understand the coordinate system we have to use. Since we don't have a level editor yet. If you place the container above the ground level, it will simply fall down. It might take fall damage if placed too high though. I confirmed that these containers appeared even in my nearly 100% completed save. I also attempted to add a container outside Jergal's Temple, but that container only appeared on saves that hadn't already visited the area. Can't confirm why.
I recommend using these container types since, unlike chests or crates, you don't need to worry about their rotation. I also recommend altering their size so they are easily differentiated of vanilla game items. Alternatively, you can use containers that wouldn't appear in this area. All these containers show their names when highlighted. You don't need to add these containers to the RootTemplate merged file, nor to Objects.txt. However, if they are not in those files, you cannot add them via Cheat Engine. Unlike the backpack which is part of the main guide.
To add containers to the world in your mod, simply follow the instructions in the ModTemplate\Mods\ModTemplate\Levels\WLD_Main_A\Items\_merged.lsx. Please place your containers sufficiently far from the coordinates I used. Though, if two mods use the same, or nearly the same coordinates, the items will simply stack. This is also why I recommend using smaller containers, or containers whose size is reduced, so that they don't take up as much space in the world.
Update 1.2.
- Fixed some typos in the guide. Shader.PAK was a typo in a few places. The correct file is Shared.PAK.
- The files from Shared.PAK and Gustav.PAK are named _merged, but similar files in mods are named merged. There were typos where the files in mods were named _merged, when they should have been named merged. The files were correctly named in the ModTemplate.rar.
Update 1.1.
- I was unclear about the ColorPresets. If you copy an armor that has id="ColorPreset", then leaving it as is uses the same colors as that armor. But having it on a Template causes all armors to use these colors (if you don't delete it, or set it to False), that were default for the armor I copied from, but not the defaults for the armor that you wish to create. Not all armors are tintable. To use the default colors of the visual you want to use. Simply delete all VectorParameters.
- I also made some minor changes to the Template.
Addendums (placed on top for visibility)
If you want to create a new armor. For example, a Druid's armor, a Barbarian armor or a Flaming Fist armor. All of which exist in EA game files. With race or gender limited visuals. Instead of using my Armor template in the RootTemplate. I recommend copying an existing armor that is as close to your new armor as possible. If, for instance, you want to create the Flaming Fist Halfplate, then I'd recommend copying the existing basic (or +1 to avoid having unnecessary data on your mod, as base models are also used as ParentTemplates) Halfplate and start your modding from there. Not only will this allow similar visuals for races and genders that you can't or don't want to create new visuals for. It also allows you to have a baseline of visuals for your desired new armor. There may be visuals for Flaming Fist Halfplate, but they may be incomplete, so then you can use the existing Halfplate visuals to complete the set.
I'd also recommend that modders release as close to completed sets of armor for all races and genders. So, please, don't leave other races or genders without visuals, but fill them in with their closest matches. Some players may want to download your mods for their stats, not their visuals. And others may wish to have your gear for lore reasons. They may want a druid's armor, even if for their character's race and gender your druid's armor is only a recolored hide armor.
It takes a little extra time, but it may be worth it if even one more person gets enjoyment from playing BG3 with your mod. For other armor designs, this may not be possible, like my original combination outfits, but I still took the time to create something for the races and genders that I didn't have time and desire, nor game resources, to create custom designs.
1. Export PAK files from Data
Extract ExportTool to \BaldursGate 3\Modders Workshop. Open it and set it to Baldur’sGate 3 (64-bit).Then export the following PAK files: Shared.PAK, Gustav.PAK and Models.PAK. And Textures.PAK, if you intend to do texture modding.
You can export them to any location, but for this guide I’ll use the following location: \Baldurs Gate 3\Modders Workshop. You should end up with folders like this: \Baldurs Gate 3\Modders Workshop\Public. You can convert all PAK files to this same location. This is the location and the way I’ve unpacked these files, but it’s not the only way, nor is it necessarily the best way.
Shared contains most game files that are relevant to this kind of modding. Gustav is a code name for Chapter 1, so it contains addon files to Shared.PAK files, that are specific to Chapter 1. Most items are in Shared, but some are in Gustav.
Models.PAK contains 3D files. You’ll want to unpack it, even if you won’t do any 3D editing. Looking through GR2 (3D model) files is the simplest way of seeing which armor and weapon visuals are available.
Textures.PAK contains textures. They are in similar file paths to the Models.PAK files.
2. Convert .lsf to .lsx
From Shared.PAK files you’ll need to convert a lot of _merged.lsf files to readable _merged.lsx files. Use ExportTool and convert the lsx files to the same folder as the lsf file.
ModdersWorkshop\Public\Shared\RootTemplates\_merged.lsf
This contains the RootTemplates for most items. Rest of the RootTemplates for items in EA are here:
ModdersWorkshop\Public\Gustav\RootTemplates_merged.lsf
Next you’ll need to convert all VisualBank files. From folders like these:
ModdersWorkshop\Public\Shared\Content\Assets\Characters\Humans\[PAK]_Female_Armor
ModdersWorkshop\Public\Shared\Content\Assets\Characters\Dwarves\[PAK]_Male_Clothing
ModdersWorkshop\Public\Shared\Content\Assets\Weapons\[PAK]_Humans
And so on… You may not use all of these for your mod, but it’s best to do it all at once.
3. Making your mod. Opening files.
You should now have all the necessary game files unpacked and converted. For this guide you’ll need to open the following files in Notepad++. And spend a minute or two browsing these files:
ModdersWorkshop\Public\Shared\RootTemplates\_Merged.lsx
ModdersWorkshop\Public\Shared\Content\Assets\Characters\Humans\[PAK]_Female_Armor\_Merged.lsx
ModdersWorkshop\Public\Shared\Stats\Generated\Data\Armor.txt
ModdersWorkshop\Public\Shared\Stats\Generated\Data\Object.txt
ModdersWorkshop\Public\Shared\Stats\Generated\Equipment.txt
ModdersWorkshop\Public\Shared\Stats\Generated\TreasureTable.txt
Now extract my ModTemplate rar file to Modders Workshop\ and open all the files contained within, with Notepad++. And spend a minute or two browsing these files:
ModdersWorkshop\ModTemplate\Mods\ModTemplate\meta.lsx
ModdersWorkshop\ModTemplate\Public\ModTemplate\RootTemplates\merged.lsx
ModdersWorkshop\ModTemplate\Public\ModTemplate\Content\Assets\Characters\Humans\[PAK]_Female_Armor\merged.lsx
ModdersWorkshop\ModTemplate\Public\ModTemplate\Stats\Generated\TreasureTable.txt
ModdersWorkshop\ModTemplate\Public\ModTemplate\Stats\Generated\Data\Armor.txt
ModdersWorkshop\ModTemplate\Public\ModTemplate\Stats\Generated\Data\Object.txt
ModdersWorkshop\ModTemplate\Localization\English\ModTemplate.xml
4. Making your mod. Editing the .lsx mod files.
Open ModTemplate\meta.lsx and follow instructions within. Once you're done with that. Rename the mod folders to your mod folder names.
Open ModdersWorkshop\ModTemplate\Public\ModTemplate\RootTemplates\merged.lsx and follow instructions for Backpack. Then follow instructions for “Template for an armor” down to id="ParentRace". Name the Nightsong armor: UNI_NIGHTSONG
The Nightsong armor only has visuals for Human Females. They don’t fit perfectly with Githyanki or Tiefling women, but it’s close enough. We’ll have them also wear the Nightsong. So delete all 4 id="Object" nodes.
Under id="MaterialPresets" delete all "VectorParameters"
Under id="Visuals" delete the Objects for Githyanki_Male, Githyanki_Female, Tiefling_Male and Tieflin_Female
The current visuals are for casual shirt and pants. For this mod Human, Elf, Tiefling and Githyanki women will wear Nightsong, and everyone else will wear the casual shirt and pants.
Go to <attributeid="MapKey" type="guid" value="71180b76-5752-4a97-1fb7-1a911969587f" /> Human_Female Now that we deleted the ParentRaces from Githyanki and Tiefling’s. Visuals placed under here will show on Humans, Elves, Githyanki and Tieflings.
In Windows, go to the folder: Modders Workshop\Generated\Public\Shared\Assets\Characters\_Models and search for Nightsong. This shows that the Nightsong visuals only exist for Humans (and Elves). The important ones are: HUM_F_ARM_Nightsong_A_Body.GR2, HUM_F_ARM_Nightsong_A_Gloves, HUM_F_ARM_Nightsong_A_Footwear.GR2 and HUM_F_ARM_Nightsong_A_Headwear.GR2
Open ModdersWorkshop\Public\Shared\Content\Assets\Characters\Humans\[PAK]_Female_Armor\_Merged.lsx. Within that file search for HUM_F_ARM_Nightsong_A_Body.GR2. Now, you could simply copy the id="ID" of this id="Resource", but then your character would be wearing their underwear visible under and over the Nightsong armor. So instead copy the whole resource and open Modders Workshop\ModTemplate\Public\ModTemplate\Content\Assets\Characters\Humans\[PAK]_Female_Armor\merged.lsx and copy the resource into this file. Or that’s what you would normally do, but I’ve already copied that Resource, and as you can see, I’ve added two "VertexColorMaskSlots" that hide the panties and the bra. Many NPC armor visual Resources need to be copied into your mod’s file to add the hide the underwear command. Always remember to generate a new UUID id for all visual Resources you alter this way.
If you 3D edit these GR2 files, then rename the GR2 file and rename the file in this lsx file. By, for example, adding _modded to the file name for id="Name", id="SourceFile" and id="Template". DO NOT alter id="ObjectID"
Now copy the newly generated id="ID" to the id="MapValue" under Human_Female and, though it’s not necessary, write something after the /> to remind yourself what that visual is. Converting back to .lsf will delete all these kind of notes. So don’t delete the .lsx file, until you're sure you're done with the mod.
Now delete all the other id="MapValue"s from Human_Female. Nightsong has only one visual for the armor item.
Now do similar edits to the gloves, boots and helmet templates. To create Nightsong gloves, Nightsong boots, and Nightsong helmet.
Now you’re done with the RootTemplate and VisualBank files. You can save and convert them to .lsf. If you made any coding errors, the converter will refuse to convert. Incorrect UUID’s won’t be noticed by the converter. Don’t convert meta.lsx
5. Making your mod. Editing the .txt mod files.
Now open ModdersWorkshop\ModTemplate\Public\ModTemplate\Stats\Generated\Data\Object.txt and rename the new entry “” and data "RootTemplate" for the backpack to match your backpack’s id="Stats" and id="MapKey". Save the file.
Now open ModdersWorkshop\ModTemplate\Public\ModTemplate\Stats\Generated\Data\Armor.txt and do the same with your Nightsong armor, gloves, boots and helmet. Save the file.
Then open ModdersWorkshop\ModTemplate\Public\ModTemplate\Stats\Generated\TreasureTable.txt and add all you items id="Stats" names, with an I_ at the beginning. Under new treasuretable "ALL_NIGHTSONG", which is for your mod’s backpack, and under new treasuretable "DEN_Thieflings_Pickpocket_Trade" so that a Trader in the Tiefling camp will sell your items, along with his own. The Trader is the young Tiefling boy.
Copy theEquipment.txt from Modders Workshop\Public\Shared\Stats\Generated\ to Baldurs Gate 3\Data\Public\Shared\Stats\Generated\ and open it.
Add the backpack to any, or all starting classes so that new characters start with all your mod’s items. Or you can delete their original gear and add yours, so that your equipment is visible in character creation. When making your mod, the only place you can view your WIP outfit is in game. So use the character creator and Equipment.txt to view your outfits as you compile them.
6. Localization
OpenModTemplate\Localization\English\ModTemplate.xml, which should now be named with your mod’s name. Copy all Description and DisplayName handles to the contentuid= and give your items names and descriptions.
7. Finishing up
Now you should be getting done. Convert all .lsx files to .lsf. Except meta.lsx. The only loose file for this mod is going to be Equipment.txt, but if you made 3D or texture edits, then those must also be placed in the loose files.
Then use BG3 Mod Helper according to it’s ReadMe and compile your mod, then load it with Candor mod manager, or add the mod manually.
8. Miscellaneous
UPDATE: The problem was likely with Candor, loading the mods manually worked, even extremely long mod files. Candor also seems to now work with latest update.
Though I haven’t 100% confirmed it, there seems to be a hard limit to how long the mod’s _merged files can be. It doesn’t really make sense, since the game’s _merged files are huge, but I’ve encountered situations where the mod simply wouldn’t load, until I removed parts from the _merged files. If this is indeed the case, then you’ll need to make multiple mods. Though they can be all compiled into a single zip file with BG3 Mod Helper.