


0 of 0
")
")
")
")
")
")
")
")
")
")
")
")
")
")
")

")

")

About this mod
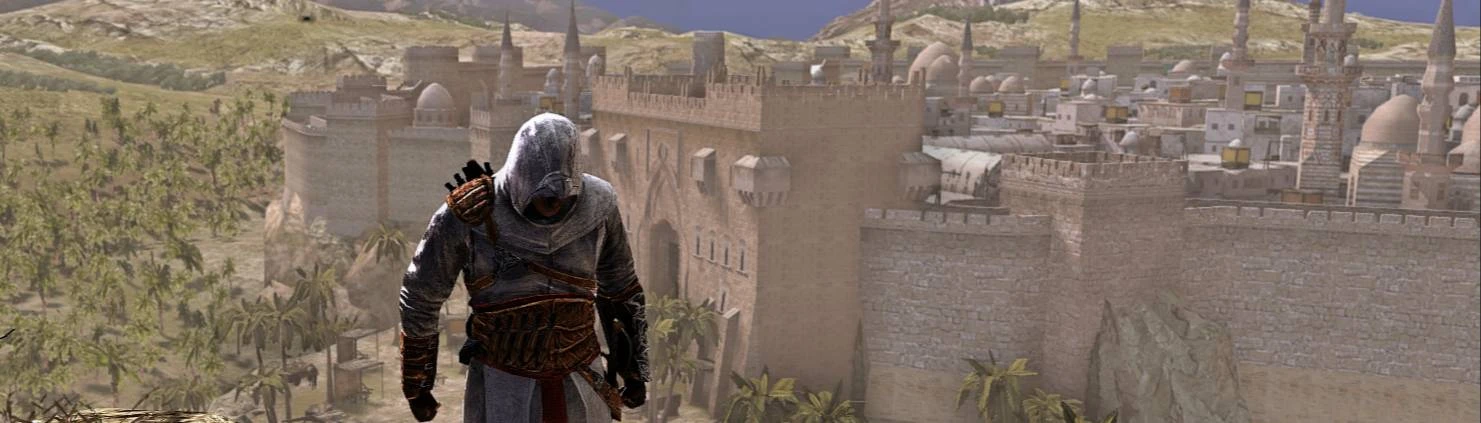
A 10-preset Reshade package which attempts to apply a relatively realistic color correction to the color palette of Assassin's Creed I
- Requirements
- Permissions and credits
Mod Description
Older Ubisoft games have the annoying habit of using an intense color palette with exaggerated tints in order to convey a specific atmosphere. While this might work for some people, I personally prefer a relatively realistic, "vanilla+" kind of look.
It was not easy to achieve this look in ACI, since the game is, at least graphically speaking, quite bizarre: A Reshade effect will look fantastic on one map, but look awful in another, or not even work at all, and colors are badly separated from each other, which means that if I,
for example, change the values of the color "white" to modify the color of a building, I might end up changing the color of the skybox as well.
I nevertheless felt the need to create a comprehensive Reshade package that covers each different map in the game, wich includes:
Mod Installation and Usage
This package is supposed to be used together with the Assassin's Creed Overhaul mod by Hecumarine! I did not test my mod with the vanilla game and have no idea if it looks any good! (feel welcome to try it out though)
If you want your game to look exactly like my screenshots, you will need to increase the saturation of your display to 150 via your graphics control center or your monitor.
1. - Put the folder Assassins Creed - Complete Reshade Package in your ACII directory
2.- Open ReShade.ini and find the the section titled: [GENERAL]
3. - In this section, modify the entry: PresetShortcutPaths=C:\Program Files (x86)\Steam\steamapps\common\Assassins Creed to correspond to your own installation path of the game
4. - Launch the game via Texmod (you must select the Dx9 EXE.)
5. - Set the in-game brightness to 5 and turn off post-effects
6. - Use the hotkeys to switch between presets on the fly (I encourage you to look at the file structure of the mod to understand the hotkey setup more easily). Each file is assigned to its corresponding number on the keyboard (Not the Numpad!):
ctrl+1 selects the preset "1. - Masyaf"
ctrl+2 selects the preset "2. - Kingdom"
ctrl+3 selects the preset "3. - Damascus"
ctrl+4 selects the preset "4. - Accre"
ctrl+5 selects the preset "5. - Jerusalem"
ctrl+6 selects the preset "Animus corridor"
shift+1 selects the preset "1. Abstergo"
shift+2 selects the preset "2. Solomon's Temple"
shift+3 selects the preset "3. Arsuf"
shift+4 selects the preset "4. Enslaved Masyaf"
shift+5 selects the preset "Animus corridor"
If you prefer to select the presets manually, you can press the HOME-key to bring up the Reshade-menu and browse the presets under the
Home-tab.
7. - Press the HOME-key to bring up the Reshade-menu. Navigate to the Add-ons-tab and tick the correct depth-buffer to prevent artifacts and ghosting effects caused by the ambient occlusion effect (ticking one of the blue glowing buffers should do the trick).
8. - Use the NUMPAD-hotkeys to quickly switch between presets according to your in-game-location:
END-key for the previous preset.
PGDN-key for the next preset
The PGUP-key toggles the current preset on/off. I hope you enjoy my reshade package! Have fun!
Older Ubisoft games have the annoying habit of using an intense color palette with exaggerated tints in order to convey a specific atmosphere. While this might work for some people, I personally prefer a relatively realistic, "vanilla+" kind of look.
It was not easy to achieve this look in ACI, since the game is, at least graphically speaking, quite bizarre: A Reshade effect will look fantastic on one map, but look awful in another, or not even work at all, and colors are badly separated from each other, which means that if I,
for example, change the values of the color "white" to modify the color of a building, I might end up changing the color of the skybox as well.
I nevertheless felt the need to create a comprehensive Reshade package that covers each different map in the game, wich includes:
- 7 Reshade presets for every city of the game, including the Kingdom, Arsuf, and enslaved Masyaf in memory block 7
- 2 Reshade presets for the mission interiors (Abstergo and Solomon's temple)
- 1 Reshade preset for the Animus corridors
Mod Installation and Usage
This package is supposed to be used together with the Assassin's Creed Overhaul mod by Hecumarine! I did not test my mod with the vanilla game and have no idea if it looks any good! (feel welcome to try it out though)
If you want your game to look exactly like my screenshots, you will need to increase the saturation of your display to 150 via your graphics control center or your monitor.
1. - Put the folder Assassins Creed - Complete Reshade Package in your ACII directory
2.- Open ReShade.ini and find the the section titled: [GENERAL]
3. - In this section, modify the entry: PresetShortcutPaths=C:\Program Files (x86)\Steam\steamapps\common\Assassins Creed to correspond to your own installation path of the game
4. - Launch the game via Texmod (you must select the Dx9 EXE.)
5. - Set the in-game brightness to 5 and turn off post-effects
6. - Use the hotkeys to switch between presets on the fly (I encourage you to look at the file structure of the mod to understand the hotkey setup more easily). Each file is assigned to its corresponding number on the keyboard (Not the Numpad!):
ctrl+1 selects the preset "1. - Masyaf"
ctrl+2 selects the preset "2. - Kingdom"
ctrl+3 selects the preset "3. - Damascus"
ctrl+4 selects the preset "4. - Accre"
ctrl+5 selects the preset "5. - Jerusalem"
ctrl+6 selects the preset "Animus corridor"
shift+1 selects the preset "1. Abstergo"
shift+2 selects the preset "2. Solomon's Temple"
shift+3 selects the preset "3. Arsuf"
shift+4 selects the preset "4. Enslaved Masyaf"
shift+5 selects the preset "Animus corridor"
If you prefer to select the presets manually, you can press the HOME-key to bring up the Reshade-menu and browse the presets under the
Home-tab.
7. - Press the HOME-key to bring up the Reshade-menu. Navigate to the Add-ons-tab and tick the correct depth-buffer to prevent artifacts and ghosting effects caused by the ambient occlusion effect (ticking one of the blue glowing buffers should do the trick).
8. - Use the NUMPAD-hotkeys to quickly switch between presets according to your in-game-location:
END-key for the previous preset.
PGDN-key for the next preset
The PGUP-key toggles the current preset on/off. I hope you enjoy my reshade package! Have fun!