About this mod
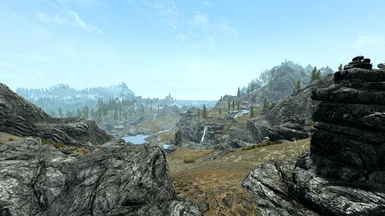
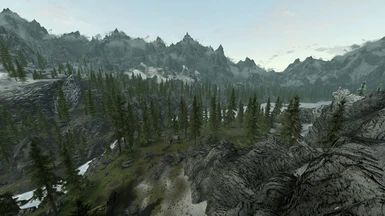
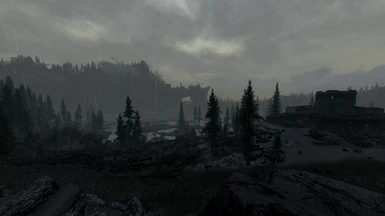
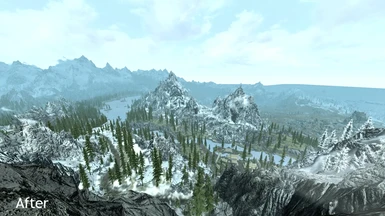
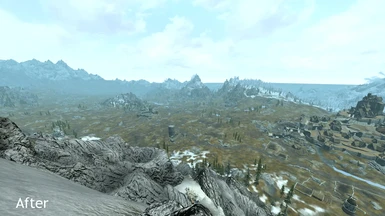
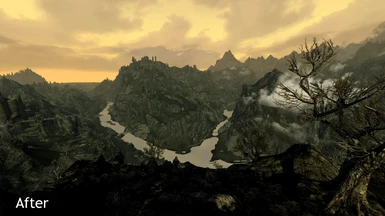
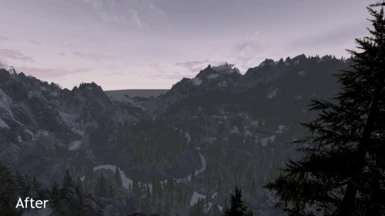
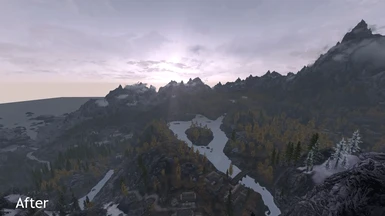
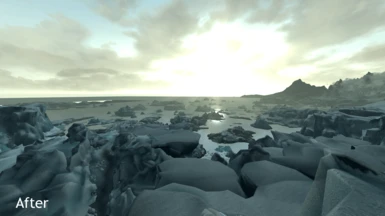
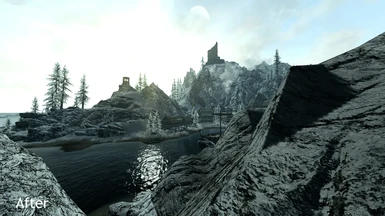
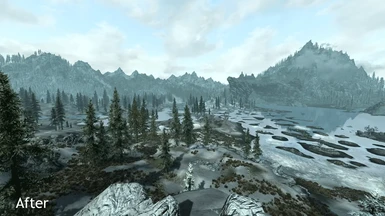
A comprehensive guide to improve Skyrims rendering, with a barebones ENBSeries preset, suggestions with actually useful INI Tweaks and of course, mods.
- Requirements
- Permissions and credits
- Changelogs
Throughout the years that Skyrim has existed on PC, many people have recommended various changes to many aspects of Skyrim to improve the graphical experience. Unfortunately, too many of them are harmful tweaks to Skyrim’s INI settings, or useless settings that bloat these files.
A lot of these recommendations have been ENBSeries presets, designed to significantly improve Skyrim’s post-processing. ENBSeries has many valuable fixes to Skyrim’s rendering, however its other improvements often hamper performance no matter what.
This is a comprehensive guide to improve the rendering side of Skyrim. Knowing how to install a mod and edit a config file is assumed.
If this guide helps you, please download and endorse to help more people improve Skyrim’s graphics.
[size=7]ENBSERIES[/size]
There are numerous ENB presets available for download, significantly altering Skyrim’s graphics with varying levels of performance. Only a few ENB’s are designed to look like vanilla, such as SkyRealism, yet these are most often out of date. This ENB is designed to completely maintain Skyrim’s post-processing, with only minor alterations to Skyrim’s object processing and a very low performance hit.
What is the point of this ENB then? It is basically a minor patch to Skyrim’s rendering, improving shadow detail and the casting of shadows, the sky and its reflection on the water, minor fixes to particles and optionally improvements to Skyrim’s water rendering, adding shadows, lighting and better shoreline blending. It also includes ENB’s fixes for Parallax, ENBoost, better Anisotropic Filtering and the double cursor glitch. This is all within Skyrim’s forward rendering pipeline, in simple terms you can use Skyrim’s Anti-Aliasing (x2, x4, and x8 if you’re crazy) with this mod.
If you already have an ENB, then you already have the majority of these fixes and can ignore this.
Installation
Go to http://enbdev.com/mod_tesskyrim_v0254.html and scroll right down until you find the ‘Download’ button. Download this and my ENB files in the download section. Download the Water Improvements version if you have performance to spare. Extract only the d3d9.dll file in the ‘Wrapper’ folder for the first download and my files into your Skyrim root folder (where TESV.exe is located). Edit your enblocal.ini files ENBoost settings according to my Stability Guide, (http://www.nexusmods.com/skyrim/mods/50244/?).
Lastly, open up your SkyrimPrefs.ini file (My Documents/My Games/Skyrim), find the line ‘bFloatPointRenderTarget=0’ in the [Display] section and set it to 1. ENBSeries requires this to function.
Technical Breakdown of ENB Preset
Shadows
ENB has many fixes for Skyrim’s shadows. It doesn’t solve the fundamental problems of Skyrim’s shadow technique, which is outdated and slow. It has a variety of improvements to make them bearable.
oSelf-shadowing of characters – Vanilla is insanely inaccurate with shadow detail on characters, with rampant flickering, no precision alongside highly inaccurate casting of shadows from hoods, cloaks (mods) and bows. ENB dramatically improves this to bearable levels, the most noticeable improvement in shadow rendering.
oShadow Aliasing – This fundamentally cannot be eradicated but it is reduced to less noticeable levels primarily in interiors, where a massive improvement can be seen.
oShadow Striping – Better filtering of distant shadows removes most sources of striping in the distance, as long as Shadow LOD settings are left at default in the Skyrim.
oAccurate Casting – Precision on mountain geometry, buildings, characters and more is improved, increasing realism across the board.
oVegetation shadows – Grass finally casts a shadow and reacts properly to shadows cast upon it. Minor improvements to tree shadowing.
Sky rendering
The largest problem with vanilla Skyrim’s sky (besides dated clouds and a bad horizon) is actually its reflection unto the water. It isn’t locked to the water plane, when you jump the sky jumps with you along the water. Alongside this, there is heavy sky banding (Google ‘colour banding’ if your confused) and imprecise math used to calculate the gradients.
oProcedural Sun – An ENB shader to replace Skyrim’s imprecise sun texture with a shader effect. Far more accurate, less issues with rendering.
oSky Reflection – Finally locked down to the water plane, finally provides stable water reflections.
oSky Banding – Dramatically reduces the banding effect across the sky, and completely removes it if used with an improved sky mesh, such as the one included with Pure Weathers.
Water rendering
Skyrim’s water by nature is nothing to boast about, a simple water plane with basic normal maps. Its default texture is awful, its shoreline blending is horrid and its LOD texture is even worse. To top this off, specularity is imprecise and reflections are a joke. ENB has some improvements that allow the water to fade into the scene with less issues.
oImproved blending – Shoreline blending finally works completely (at least with Pure Waters). Easily the most notable improvement, allowing water to fade into the background.
oVolumetric Shadows and Lighting – Water at least blends into the environment, with objects like bridges casting shadows onto the water, and the scene generally providing basic lighting to the water.
oImproved Dispersion effects – Wading through the water now produces far better effects then vanilla, easily noticeable.
Other ENB improvements
oParticles – Better visual collision with surfaces, less coarse and less aliasing. Also better blending between overlapping fires.
oParallax fixes – Allows proper parallax textures and meshes for many objects in the game.
oSnow brightness fix – A slight decrease to Direct Lighting intensity improves the blinding snow effect, making it less overblown and more realistic, yet still present.
oTransparency Sorting – Better sorting of some objects (like trees) through effects like fog, barely noticeable but present.
oDouble Cursor Fix – No more need for SKSE plugins to fix this, ENB does it for you.
oOcclusion Culling – Minor improvement to the polygon and draw call (unique objects) counts, improving performance on bottlenecked systems.
oImproved Anisotropic Filtering – Skyrim uses very poor filtering by default, causing a loss of distant detail. ENB enables the highest quality filtering, for improved clarity of textures.
[size=7]INI TWEAKS[/size]
This section is here to clarify and recommend many tweaks that will improve the rendering of the game.
These INI files are located in My Documents/My Games/Skyrim. The two files are SkyrimPrefs.ini, Skyrim.ini. If you use Mod Organiser, they are located in your Mod Organiser folder, within Mod Organiser/profiles/(YourProfileNameHere).
If you want a better Notepad, I recommend Notepad++, download, and open the files with that.
Warning
It is highly recommended you start with a fresh set of INI files set to Ultra, delete your existing ones and launch the Skyrim Launcher to regenerate them. Use Ultra settings if you can, they should be your baseline. 4x Multisampling is more than enough for 1080p, since no form of hardware transparency anti-aliasing is present in Skyrim.
How to Tweak
Simply find the lines to change, and change them. Most will be already there, if not add them. The Baseline will be what you should always change, anything else in any section are optional changes. Optional changes always modify existing variables listed in the baseline. Use the baseline settings then modify certain lines based on what you desire. Some of these will not be in your files, add them if they aren’t.
Shadows
Despite three years of torment, no-one (Especially not Bethesda) has a true solution for Skyrim’s shadows. It’s always been a quantity vs quality choice, distance or detail. This cannot be changed. While the shadows on characters are mostly fixed with ENBSeries, shadows in general still have the same problems.
Baseline
(The following are in the Display section of SkyrimPrefs.ini)
iBlurDeferredShadowMask=4
fInteriorShadowDistance=3000.0000
fShadowDistance=5500.0000
iShadowMode=4
bTreesReceiveShadows=1
bDrawLandShadows=1
iShadowMapResolution=2048
fShadowBiasScale=0.2500
iShadowMaskQuarter=4
iShadowFilter=4
bShadowsOnGrass=1
Detail over Distance
fShadowDistance=3000.0000
Distance over Detail
fShadowDistance=6500.0000
High Resolution
(Warning, heavy performance impact possible)
iShadowMapResolution=4096
fShadowBiasScale=0.1500
Explanation
First off, iBlurDeferredShadowMask. Too much blur, and you’re crushing the possible detail that can be recovered by ENBSeries. Also, every blur pass hits performance. Too little blur, and ENBSeries doesn’t blur correctly, and as a bonus you get horrid shadows. A value of 4 works perfectly.
fInteriorShadowDistance and fShadowDistance, these are simple. Interior shadows are perfect with ENBSeries, so the full distance of 3000 works well. fShadowDistance impacts immersion greatly, shadows are the most visual demonstration of depth in a 3D world. Too high however, and shadows become a joke. 5500 strikes a balance, but this is more of a personal choice, change as you will. The shadow map is a texture. Skyrim stretches this texture depending on this distance.
iShadowMode, iShadowFilter and iShadowMaskQuarter. The first two control the quality of certain passes done to the shadow texture, values of 4 appear to have a mild improvement in precision of the casting of finer shadows, with no real impact on performance. iShadowMaskQuarter is a variable no-one fully understands, its best left to its Ultra setting of 4. Setting it to 8 made no real difference on any shadowing present.
bTreesReceiveShadows, bDrawLandShadows, bShadowsOnGrass. The names of these variables are explanatory enough, the quality of these passes however are improved with ENBSeries, and should be enabled.
iShadowMapResolution has an impact on fShadowBiasScale, and thankfully Skyrim has values already for each resolution. iShadowMapResolution is set to 2048, which is sufficient for high resolution character shadowing with ENBSeries and decent quality for other shadowing. 4096x is an option if you have a strong GPU (192 bit Memory Bus+, high end model) or performance to spare. Different scenes will have varying levels of performance impact. Quick note, shadows are rendered on the GPU, not the CPU.
LOD
Skyrim has three options for improving LOD distance, and two are relatively harmful. One is safe but still has a performance and VRAM hit.
uGridsToLoad is an old variable, present since the engine was first accessible years ago. Skyrim’s world is divided into cells, forming a large grid. If the player were the centre of this grid, uGridsToLoad controls how many of these cells in a radius around the player have their content fully loaded into memory. Every cell fully loaded can include actors, geometry, navmeshs, scripts, textures, lights, high-resolution water and 3D trees. Its default value is 5, which is conservative and safe. Papyrus (scripting engine) has its load kept low, draw call count (amount of unique objects to be processed by the CPU and GPU drivers) is kept minimal, Video memory is kept low due to less HD textures presently loaded and Skyrim’s forward renderer is fed a smaller list of lights in the scene.
Increasing this variable overloads many aspects of Skyrim’s 32 bit engine, designed for machines with just 512MB of combined RAM and VRAM. There are safer ways to render certain aspects of the game at a longer distance.
Another method to improve the quantity and maximise the quality of LOD objects is to flag the full quality mesh of an object with the ‘Is Full LOD’ in the Creation Kit, like Distant Detail. This will exponentially increase the polygon count compared to other methods, and increase the draw call count significantly, depending on how many are flagged to load regardless of distance to the object. This is a bad choice, possible causing aliasing or z-flickering, and increasing the CPU load.
The desirable method to distant detail is to have polygon-reduced models loaded past a certain distance, which switches to the full-polygon model when closer to the player. Less noticeable objects are kept out of the LOD, with a focus on larger rocks and noticeable objects like bridges or forts. Skyrim has these models for only mountain meshes, a few rocks and major architecture. There is a mod recommended in the next section to add significantly more LOD objects, yet the following tweaks work regardless of mods (of course with a less significant impact).
Skyrim has four LOD levels, starting with fully loaded cells, then Level 0, 1 and 2. Level 2 is loaded depending on the distance that the world in general is loaded at (fBlockMaximumDistance). It includes a decent amount of very low-poly meshes for the mountains, some major features (Holds, solitude rock) as well as some major cliffs/rock meshes. Level 1 includes more LOD objects like forts, ruins and many more major rocks. Level 0 includes these LOD objects at much higher detail levels and additionally some smaller meshes. Fully loaded cells have full detail meshes loaded right up to the cell edge.
Baseline
(The following are in the TerrainManager section of SkyrimPrefs.ini)
fTreeLoadDistance=125000.0000
fBlockMaximumDistance=250000.0000
fBlockLevel1Distance=70000.0000
fBlockLevel0Distance=35000.0000
fSplitDistanceMult=1.50000
Distance
(Warning, heavy performance impact possible, especially on HDD based systems)
fBlockLevel1Distance=120000.0000
fBlockLevel0Distance=70000.0000
Performance
(Loss of quality will be present in LOD meshes, use if stuttering after installing the SDO mod)
fBlockLevel1Distance=50000.0000
fBlockLevel0Distance=25000.0000
Terrain detail
(Warning, heavy performance hit and longer loading times possible, especially on HDD based systems)
fSplitDistanceMult=2.00000
Explanation
fTreeLoadDistance is a very simple variable, it controls the distance that LOD trees (flat, 2D intersecting planes textures) are rendered at. 75000 is relatively low, especially when viewed from a high place. 125000 is a distance that ensures visible terrain is covered in trees. Past this, with fog and blur, you will not notice a difference.
fBlockMaximumDistance controls the distance that cells are rendered at. 250000 is the ultra setting, and there is no practical difference when raising it. It is best to leave this at default.
fBlockLevel1Distance and fBlockLevel0Distance are very important variables, which control the distance that LOD objects are rendered at and the quality they are rendered at. 70000 and 35000 is the ultra default, and is the baseline I recommend. Lowered past this, distant mountain meshes will no longer load in the higher quality Level0 region, and instead load in the Level1 region. Additionally, and many new LODs won’t appear due to a smaller Level1 region. Raise it past this, and meshes in the Level0 will gain detail, and more meshes will be rendered in the Level1 region at a greater distance. These variables have varying levels of performance impact on different systems. HDD based systems will gain stutter however on higher settings. Better CPU’s can process more unique objects without hitches or performance impacts. When using raised values and the Skyrim Distance Overhaul, I recommend at least an i5.
fSplitDistanceMult controls the quality of the landscape mesh and texture. Its default of 1.5 is adequate, yet at 2.0 it raises texture quality and mesh accuracy to a good degree, while avoiding the loading errors that occur at excessive values. If you suffer any form of Infinite Loading Screens, revert this variable.
Grass
Skyrim renders grass at a relatively short distance, and for good reason. Skyrim’s grass is limited by the uGridsToLoad value. With a value of 5, it can render up to ~7000 (the ultra default) before the grass attempts to render past the limit. When it reaches this limit the grass will stop expanding into the distance, and wait for a new cell to be loaded. When loaded, the grass that was waiting to load will ‘pop’ into view, a very visible issue many complain about when raising these values.
Since most extra variables are ineffective and seem to not work as planned, there is nothing to change here. Grass should be left at default settings to avoid the grass pop-up on cell transition.
Explanation
fGrassStartFadeDistance and fGrassMaxStartFadeDistance should be capped at 7000 to avoid the cell transition issue, unless you use higher uGrids settings and have changed iGrassCellRadius. fGrassMinStartFadeDistance should be kept at 0 to avoid bad grass fading.
iGrassCellRadius is a setting you can add to the Grass section of Skyrim.ini IF you are changing uGridsToLoad, and WILL cause issues if you are not. The formula for this value is uGridsToLoad/2 - 0.5 (uGrids 7/2 = 3.5 – 0.5 = 3.). This will increase the maximum radius for grass, and allow you to experiment with higher fGrassStartFadeDistance and fGrassMaxStartFadeDistance values.
Water
Skyrim has very few settings for controlling water. Most are hidden away, and disabled. Many are from the older titles (Fallout NV and beyond), and no longer have a real effect. Only two variables can be changed for an improvement from the default ultra settings, yet even then the effect is very subtle.
Baseline
(The following are in the Water section of SkyrimPrefs.ini)
iWaterReflectHeight=1024
iWaterReflectWidth=1024
bUseWaterDisplacements=1
bUseWaterRefractions=1
bUseWaterReflections=1
bUseWaterDepth=1
(The following are in the Water section of Skyrim.ini)
bReflectSky=1
bReflectLODTrees=1
bReflectLODObjects=1
bReflectLODLand=1
Explanation
iWaterReflectHeight and iWaterReflectWidth control the resolution of the real-time reflections for Skyrim’s ‘updated’ water rendering. Increasing them has a very subtle effect, most noticeable with the detail of glacier reflections on still LOD water. It has an exponential performance hit, especially at 4096x. 1024x has no real effect on performance.
bUseWaterDisplacements, bUseWaterRefractions, bUseWaterReflections, bUseWaterDepth are all standard, keeping them enabled ensures Skyrim’s water is completely rendered with all effects.
bReflectSky, bReflectLODTrees, bReflectLODObjects, bReflectLODLand are all self-explanatory and simple. bReflectSky can now be enabled with ENBSeries without unstable sky reflections. Skyrim only reflects LOD objects as they are cheap, low-polygon, pre-calculated and fewer in number. It keeps performance high on Skyrim’s outdated renderer.
Other
(The following are in the General section of Skyrim.ini)
fFlickeringLightDistance=7000.00
(The following are in the Display section of Skyrim.ini)
fLightLODMaxStartFade=7000.00
bDecalsOnSkinnedGeometry=1
fSunShadowUpdateTime=0.1000
fSunUpdateThreshold=2.0000
(The following are in the Display section of SkyrimPrefs.ini)
iMaxAnisotropy=16
fTreesMidLODSwitchDist=10000000.0000
fLightLODStartFade=7000.00
bFloatPointRenderTarget=1
(The following are in the Main section of SkyrimPrefs.ini)
fSkyCellRefFadeDistance=250000.0000
Explanation
Skyrim has two types of lights the game can load, static and animated (flickering) lights. fFlickeringLightDistance controls the distance that lights flicker at. When set lower then fLightLODMaxStartFade, there will generally be pop-in as the light changes from static to animated. Keep this at the same setting as fLightLODMaxStartFade.
fLightLODMaxStartFade and fLightLODStartFade control the rendering distance of lights in Skyrim. The default value of 3500.00 is too low for a modern system, which can handle many more lights (thousands more in a better renderer, not just 5). Make sure fFlickeringLightDistance is the same as this variable.
bDecalsOnSkinnedGeometry allows blood decals to apply to ‘skinned’ models, such as NPC and player models. This should specifically be for the skin of a model, not the clothing geometry, which is handled by other variables.
fSunShadowUpdateTime and fSunUpdateThreshold control the speed and timing of shadow time-of-day updates. These settings keep the transitions quick and subtle.
iMaxAnisotropy controls the amount of filtering applied to textures, this can significantly reduce blurry distant textures. ENBSeries however provides better anisotropic filtering, while also providing better compatibility with Skyrim’s rendering compared to Driver-force Anisotropic filtering. Ensuring ENBSeries and Skyrim have the same setting will maximise compatibility.
fTreesMidLODSwitchDist controls the distance that trees switch to a lower-polygon model. What I recommend is the same as the Ultra settings for this, but it’s still included to ensure people keep it maxed. This switching can be a very distracting visual effect.
bFloatPointRenderTarget enables a wider range of colour values for rendering, enabling greater precision, less banding and more intense extremes of different effects in theory. In reality, Skyrim’s engine doesn’t utilise these values well. ENBSeries does use and requires this sort of precision however.
fSkyCellRefFadeDistance controls the distance that 3D clouds on mountains are rendered at. Setting this to match fBlockMaximumDistance is a safe way to add more detail in the distance, and to additionally conceal more of the distant mountains z-flickering.
Placebo/Harmful/Useless settings
iShadowSplitCount, iShadowMapResolutionPrimary and iShadowMapResolutionSecondary aren’t included, because it appears that these values are hardcoded, and changing them has no effect. iShadowSplitCount controls the amount of shadow maps rendered, which are layered across a distance dependent on fShadowDistance. More cascades would hit performance, but you could reduce the resolution of cascades further out. (Primary and Secondary) to reduce that hit. Every cascade allows each shadow map to be stretched less. Unfortunately it seems that these values are locked, hardcoded and currently untouchable. Such a shame…
bShadowMaskZPrepass and bMainZPrepass are useless variables, Z-Prepassing is an older technique, one that most agree doesn’t really help performance anymore on DX11+ GPU’s without heavy optimization, which Bethesda clearly didn’t bother with. It additionally can cause rendering glitches with many systems. Best it’s left disabled, saving useless effort.
fShadowLODStartFade and all shadow fade settings are generally harmful to the quality of the shadows in one way or another. Max this out to 1000 and your shadows will have a visible line as the fade distance is reached. Max all shadow LOD settings to 6000, and nothing changes. Leave this at 200.
bTransparencyMultisampling and iWaterMultiSamples are older variables from Fallout NV and beyond, no longer functioning in Skyrim. bTransparencyMultisampling should allow multisampling on transparent textures, like trees and grass. If you enable this form of multisampling through the control panel however, a significant amount of glitches occur (likely due to Skyrim’s poor transparency sorting). iWaterMultiSamples in older games provided anti-aliasing to the water shader. This variable does nothing in Skyrim.
bAllow30Shaders has no real effect with Skyrim. Shader Packages from the older games are gone, it’s a relic of an older system. Skyrim has one set of shaders, and this variable has no real effect.
b30GrassVS has been proven to have no real effect, it is not worth enabling.
bGrassPointLighting should enable point lighting (light sources) to light grass, but this option seems to not work as intended, with no relation to b30GrassVS or anything else. Skyrim’s grass shader is incredibly simple, to compensate for its brute force rendering of grass objects. Point lighting does not appear to be a part of this shader, so this option by nature cannot do anything.
bUseWaterHiRes, bForceHighDetailReflections and bAutoWaterSilhouetteReflections are all left out as they appear to have no real effect on Skyrim’s water, and aren’t in the config files at all initially. The first two could be added to Skyrim.ini and set to 1, however you will likely see no difference at all.
bUseWaterReflectionBlur and iWaterBlurAmount are left out as they are relics of an older water renderer and again have no effect.
If you have any tweaks you would like clarification on, post in the comments.
[size=7]MODS[/size]
Skyrim’s rendering hasn’t been the focus of most mods, but there are a couple of mods dedicated to improving the LOD and correcting certain glitches with Skyrim’s rendering.
The Skyrim Distance Overhaul LOD Improvement
This mod is a massive improvement to the landscape of Skyrim. It makes the world feel denser, by giving many objects a low-polygon mesh to display past the uGridsToLoad distance. Rocks, buildings and bridges are added in large quantities, allowing you to see more of Skyrim from afar. Its performance hit depends on your fBlockLevel1Distance and fBlockLevel0Distance, alongside its draw distance. HDD based systems will suffer however, and will likely stutter, especially if Level1 and Level0 are kept at Ultra or above.
I do not recommend any of the optional esp’s at this time, their performance hit can be hefty, SkyFalls handles waterfalls, and the esp’s are full of dirty edits.
http://www.nexusmods.com/skyrim/mods/19446/?
SkyFalls and SkyMills - Animated Distant Waterfalls and WindMills
This mod works alongside the Skyrim Distance Overhaul, by adding animated low-detail waterfalls in the distance, replacing the horrid static meshes in vanilla Skyrim. It also adds animated sails for the Windmill’s, improving immersion from afar. It supports all DLC, and works with the SDO as long as you don’t install the optional Skyrim LOD from this mod.
Additionally, it can further improve compatibility if you manually install the compatibility patch for SkyFalls from the SDO downloads.
http://www.nexusmods.com/skyrim/mods/40564/?
High Quality LOD’s
The terrain LOD’s in Skyrim are generally lacking in detail. Their meshes are sharp and inaccurate, full of flickering and generally are poor to look at. This mod regenerates them with a high quality tool, to improve their quality significantly. It also includes better textures and normals, which allows better lighting and generally pleasing landscape compared to the vanilla textures.
Install of this mod is generally involved, but not difficult. Download the ‘Meshes – Hi-Res’ through the Nexus Mod Manager or any other tool. Install this package as is. Install the texture and normal packages manually, follow these instructions carefully. For the textures and normals, first download the ‘normals’ package. If you have any corresponding landscape texture packs, then download the relevant texture package, otherwise just download the vanilla package.
Once they are downloaded, extract them both into their own folders. Choose the resolution you want (I recommend 256x normals no matter what. Choose 512x textures if you have 2GB VRAM+, otherwise choose 256x textures). Once chosen, open the corresponding folder of each (normals and textures), and compress each of their ‘textures’ folders (the folder) into a .rar or .zip (one for each). Add these .rars or .zips to your Mod Manager software and install.
http://www.nexusmods.com/skyrim/mods/4834/?
Skyrim Particle Patch
Many of Skyrim’s meshes have incorrect settings assigned to them, causing missing shadows, bright textures, and more. Many mods fix parts of these meshes, but some are still left out. This package will ensure all meshes are fixed and work correctly with ENBSeries.
These can be installed through NMM or other tools, you just need to add them to it. Download the PARTICLE PATCH ALL-IN-ONE, SUBSURFACE SCATTERING PATCH and ICE SHADER FIX packages. Don’t overwrite any files, just let it install any that aren’t covered by other mods.
http://enbseries.enbdev.com/forum/viewtopic.php?f=6&t=1499
High Quality 3D Map
A very similar mod to High Quality LOD’s, this regenerates the LOD’s for the map, allowing much finer detail on lakes and mountains, and providing high quality normals for better lighting. Installing this mod is similar to installing High Quality LOD’s, except that the texture package can be skipped and instead you can use the ‘A Quality World Map’ mod, it has an option for High Res textures that support these meshes, along with roads on the map.
Install of this mod is generally involved, but not difficult. Download the ‘Meshes – Hi-Res’ through the Nexus Mod Manager or any other tool. Install this package as is. Install the texture and normal packages manually, follow these instructions carefully. For the normals, just download the ‘normals’ package.
Once they are downloaded, extract them both into their own folders. Choose the resolution you want (I recommend 1024x normals for 2GB VRAM and 512x for 1GB VRAM). Once chosen, open the corresponding folder, and compress the ‘textures’ folder (the folder itself) into a .rar or .zip (one for each). Add the .rar or .zip to your Mod Manager software and install.
For the textures, either follow above except for the relevant Texture package and choose 1024x res for 2GB VRAM or 512x for 1GB VRAM, or instead download the ‘A Quality World Map’ mod and choose the Hi-Res textures option in its installer.
http://www.nexusmods.com/skyrim/mods/4817/?
A Quality World Map
http://www.nexusmods.com/skyrim/mods/4929/?
Thankyou for following this guide, hopefully Skyrim should look better, more consistent and far denser than before. Avoid following things just because its popular, it’s the reason so many harmful tweaks (like the Papyrus Memory Tweak) have spread around for years. Do your own research if you’re not sure.
If this guide helped you, please download and endorse to help more people improve Skyrim’s graphics.


