About this mod
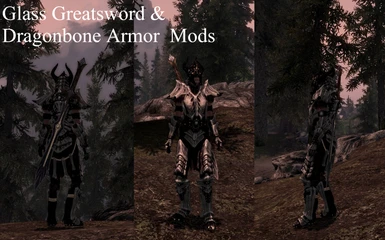
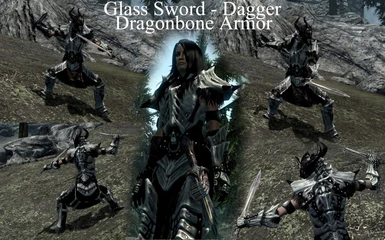
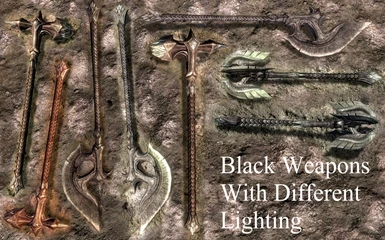
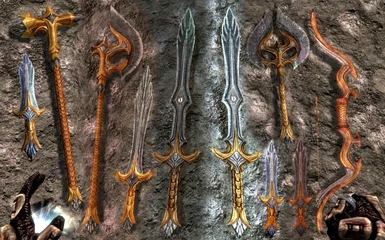
Black Glass Weapon Pack with Detailed Golden Accents! Got tired of the Green Glass, so I made this to match my Paraleyes_Black_Metal_Dragonbone_Armor.
- Permissions and credits
PLEASE ENDORSE IF YOU LIKE! ;) Thank you for looking!
V2.1 Contains: Corrected File and Version conflict.
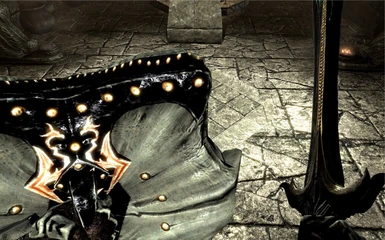
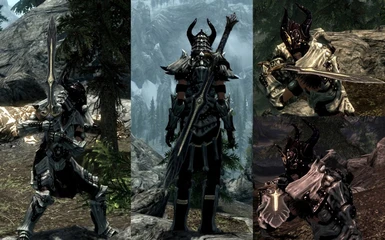
-Very detailed Gold Trim work on all the Glass blades! I spent many hours on this. I guess glass armor and weapons are just my favorite. As long as you upgrade them.. Enchant them.. They are still pretty darn damaging. Or just enjoy them on mid level characters! :) Either way...
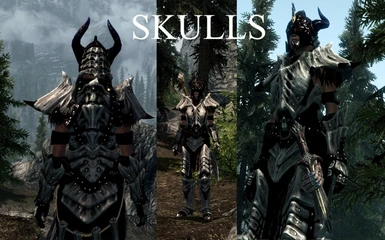
MUST SEE!MY DRAGONBONE SKULL ARMOR IS COMPLETELY NEW AND REDONE!
-Skull Mouth Hold Up Your Belt!
-New HD Leathers
-More Realistic Bone colors
Available here: http://www.skyrimnexus.com/downloads/file.php?id=5280
Check out my Ultra Reflective Glass Weapons Mod in optional files.
IF you prefer the Bronze colors of my original retextures, I am working on upgraded them as well to v2.0 to include the new Gold Trimmed blades! :)
ENJOY MY NEXUS FRIENDS!
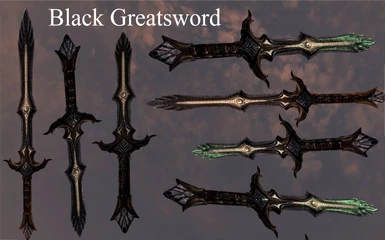
I am redoing this weapon pack to ALL BLACK! -With GREEN still reflecting under any illumination source. Greatsword is done and looks beautiful! The rest of the kit should go fairly quickly! Please be patient and check back for more. I will be adding weapons throughout the day.
In the ALL BLACK Main File VERSION:
-The Gold High trim is double wide so it actually shows up without having to be 2 feet away from it to see the details.
-The original areas that were super green are now all black, but still reflect green under reflection of light.
-Just good clean looking stealthy black armor that is deadly as glass! :)
Enjoy! :)
~Paraleyes
ORIGINAL VERSION IS COMPLETE IN OPTIONAL FILES AND MATCHES DWARVEN & ELVEN ARMOR SPLENDIDLY!!!
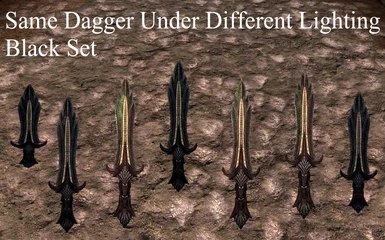
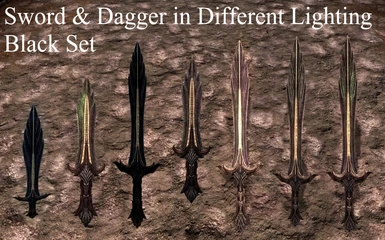
THE PICTURE SHOWS MANY DIFFERENT LIGHTING CONDITIONS, BUT THEY DO ALL MATCH!
Enjoy my Glass Weapon retexture Packs!
1) Changed all the green glass to black
2) Changed all the metal to Gold/Dwarven/Elven look
-NOTE: This mod also matches very well to my Paraleyes_Black_Metal_Gold_Accents_Dragonbone_Armor_Set!
3) I gave each sword very specific individually drawn golden accents.
-NOTE: I still plan to do this to the Axes and Bow, but I wanted to get this uploaded for now.
4) I spent extra time on the Greatsword! I put a lot of time into drawing many golden trim accents and also added a Dragon Eye into the sword which matches the Dragon Eye Arm Band on my Dragonbone Armor pack.
PERSONAL NOTE TO USERS:
I did my best to give you quality images to preview this texture mod before you spend the time to download it. Please try it out and if you like it, be sure to comment on how it effects your gaming experience within the discussion area. If you don't like it, just follow the UNINSTALL directions below and go right back to enjoying your original Skyrim experience! It's all about having fun with the game!!! So enjoy! :) :) :)
INSTALL:
It is my goal for everyone using these mods to learn how to install these textures on their own and hopefully even begin making wonderful new creations of their own to share the rest of the modding community. For this reason, I may decide to not even include the NMM option with my file uploads. Installation on your own is really very simple!
Many of you will know the following information. If so, please continue on to try out my armor mod! I will be as specific as I can on these steps so you ALL can begin taking control of your Skyrim reality! Open your downloaded file with your preferred compression utility(WinZip, WinRAR, etc..) and extract all the files to the following directory (c:\program files(x86)\steam\steamapps\common\skyrim) ***Uneless you chose to install Skyrim in a different directry of course and in which case you already understand this process. If asked to overwrite any files, Click YES! If that concerns you, please read below WHY THIS IS SAFE?!
UNINSTALL:
Locate the all the files that were extracted into the (C:\Program Files (x86)\Steam\SteamApps\common\skyrim\Data) directory that came with this mod. If you are unsure of which files were installed. It would be helpful to open the original compressed file you downloaded so you can identify each individual file name specifically. The files that need to be deleted for this mod will be located in the (C:\Program Files (x86)\Steam\SteamApps\common\skyrim\Data\textures\armor\dragonbone) directory. I don't want to name each file individually as I will be updating this mod with more textures several times.The same should go for most any other mod you have implemented into your Skyrim experience. However, if using the NMM, you are NOT guaranteed full control over what is installed onto your system, so I do encourage you all to learn how to install these mods on your own.
WHY THIS IS SAFE?!
It is completely risk free and safe to install this mod and to overwrite any existing Data mod files you may have already installed. This is why. All the factory Bethesda designed meshes and textures are located in .BSA files within the (C:\Program Files (x86)\Steam\SteamApps\common\skyrim\Data) directory. Any mods that you install go into this same directory, but under a completely separate and new sub-directory as described in the UNINSTALL section of this write up. Therefore, if you chose to uninstall, delete and/or overwrite any files in the Data folder, you can rest assured that they are completely separate from the file and design structure of the original game. I hope that helps! :)
HOW TO MOD IT YOURSELF:
-Yes, you can take control of your Skyrim reality!!! Below is my personal "How to" do this yourself and to start reflecting the very best of your own creations within your very own Skyrim experience!!!
The way these texture mods work is we are extracting the .DDS texture files from Bethesda's .BSA files which are all also located in the C:\Program Files (x86)\Steam\SteamApps\common\skyrim\Data directory. Then we edit them with our preferred photo editors and resave them as new .DDS files. And then we create a new sub-directory within the Data folder of Skyrim's directory and and install the new textures there.
To do this, you need a handful of programs.
1) FO3_Archive_Utility-34.zip ***Free Program!
-FO3 is of course Fallout 3; another Bethesda creation with the same .BSA file structure.
-With this, you can open the .BSA texture directories within the Skyrim Directory and extract them to a new working folder of your choosing.
2) PAINT.net ***Free Program!
-With this, you will be able to open any .DDS file that you wish to edit the textures on.
-You can also save the .DDS texture file as .TIF with transparency and then open it with your personal favorite photo editor.
3) DDS Converter 2.1
-***Download this optionally for reasons explained below.
-The reason I like this program is that it gives you a preview of any photo file within the Right Click context menu anytime you Right Click on any photo file, including .DDS! This makes browsing through which .DDS file you need to open with PAINt.net very efficient! :)
-This program needs to be bought in order to use the full features, which is not necessary as I do not even ever open the program. I only use the sub-context preview window that pops up within the Right Click option on your mouse.
4) If you wish to use another photo program that you own such as PhotoShop, there is an Nvidia plug-in that allows you to open and edit .DDS files directly which is available on nvidia's website.
5) I actually use a different program alltogether to do my photo editing. However, it does not have a .DDS plug-in available to use. If you fall under this category, use the following steps to convert the files to be edited.
1) Locate the .DDS file using the Right Click preview option from installing the DDS Converter 2.1 program.
2) Open the .DDS file with PAINT.net
3) Save the file as a .TIF with transparency with whatever preferred name you want.
-There are many other file formates available. .TIF works for me quite well though.
4) Open the .TIF file with your favorite Photo Editor.
5) Complete and re-save your modifications as .TIF. Be sure to use the Transparency option!
6) Open up the modified file with PAINT.net and the save it back to .DDS. Use the "DXT5 Interpolated Alpha) option to retain transparency! Other options workd for me, but DXT5 was the cleanest in my experience! :)
USER INPUT:
Feel free to upload any photos you wish to share after installing my mod. I will likely approve them right away!
Especially if they are tasteful and decent quality. One request however, please try to use a compression editor to keep down on the load times. Not everyone has super fast internet. :)
Feel free to comment in the discussion area and ask me questions about this mod.


