About this mod
How to make your mod NMM compatible, in pictures ( ~ 1280x960)! NMM makes it so you don\'t mess up your Skyrim game installation if you mess up your mod :)
- Permissions and credits
NMM makes it so you don't mess up your Skyrim game installation if you mess up your mod :) There is no reason beyond those that involve complex mods not to use NMM. AND IT'S EASY TO DO :)
-Not my videos, but video references (Gopher): http://wiki.tesnexus.com/index.php/NMM_Video_Tutorials
Nothing to Noob:
A Simple Guide to Make Your Mod NMM Compatible
Disclaimer: This guide is written in US English. If you believe there are spelling mistakes, hopefully now you know why :) I too am a Noob, a beginner, so if there are any step mistakes, let them be known in the comments or a personal message to me, o3zman.
Prestep: Have your mod done, or close to done :)
--------------------------------------------------------------------------
Step 1:
Know the limitations of NMM.
It can ONLY access the “DATA” folder of the Skyrim game. That’s all you get access to, basically*. Anything else needs to be manually put into your game, such as ENB’s and “.ini” files.
* There are fancy ways (i.e. Coding) to get your mod to have a fancy UI when installing. That will not be covered here. I too am a NOOB :)
--------------------------------------------------------------------------
Step 2:
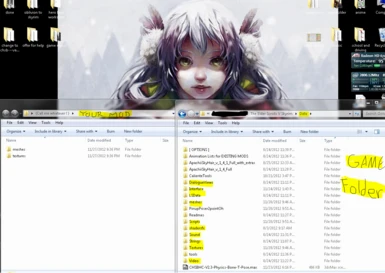
Imitate the Skyrim game “DATA” folder structure.
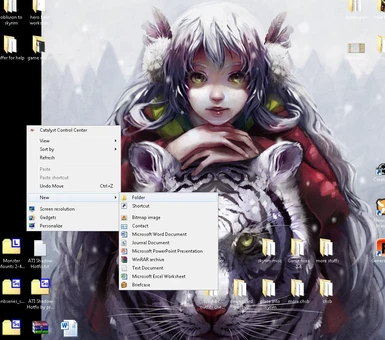
Ideally you start with a folder:
-- Right click in empty space, hover over “new”, left click on “folder”.


It can be named anything or “DATA” (NMM reads it and anything inside it, putting it in the “DATA” folder by default).
Whatever you prefer this is the “DATA” folder you are imitating. Anything in this folder is then placed into your game files the way YOU place them in.
(This is the only place you can place any “read me” files other than outside your compressed file, or package.)
--------------------------------------------------------------------------
Step 3A:
Place your modded files into your folder in the appropriate directories.

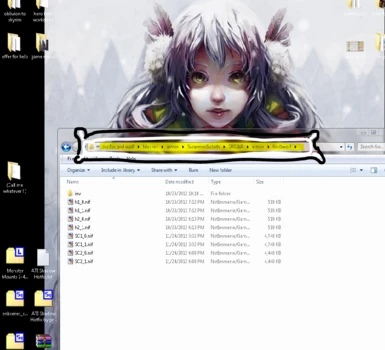
Texture files, for example, are further divided into “sub-folders” such as:
--“armor,” --> “steel plate,” --> then the texture “.dds” files.
Or
-- “clothes,” --> “Dovahkiin,” --> “male” --> then the mesh “.nif” files.

The same can be true of the “scripts” folder, the “meshes,” the “strings.”
*The longer the directory goes, the longer the game will take to load them up when you want to access them. Make it short, differentiate your file’s directory from the game’s and you’ll be golden.
--------------------------------------------------------------------------
Step 3B:
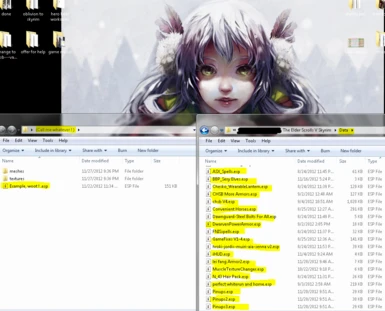
Also next to these folders is your “.esp” if your mod has one.
It also goes into the “DATA” folder to be recognized. It will NOT be read/recognized if placed anywhere else!

--------------------------------------------------------------------------
Step 4:
Compression of the modded folder.
7z or Rar. The compression types that NMM has least trouble handling. 7z is a free program, Winrar is shareware. (I can't post links, search them or click in the links in the pdf I've uploaded :)
Shareware = free to use, DO NOT HAVE TO BUY, but with a constant
annoyance to buy it after your XX day “grace” period.
The max file size on the Nexus is about 5000 MB, or 5GB. Hopefully your mod is smaller.

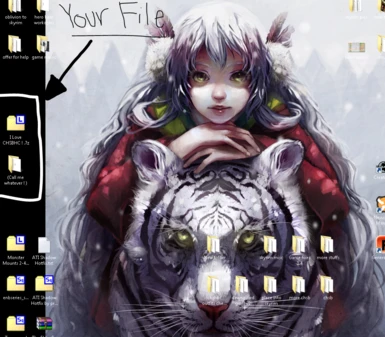
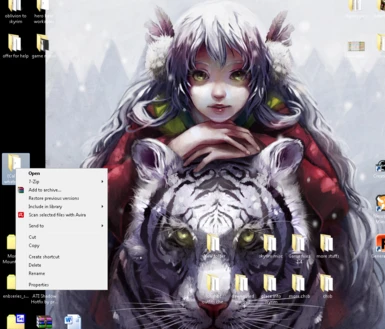
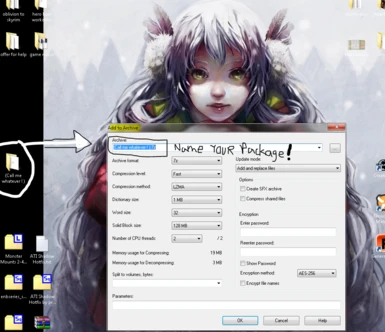
Take your pick of program: right click on the folder you made --> hover over “7z” or the red stack of books “rar” --? left click on “add to archive” --> NAME YOUR NEW PACKAGE something meaningful, like the name of your mod :)

NAME YOUR FILE APPROPRIATELY!!
If I was making a mod named “CHSBHC: The Fanatic’s Guide,” I would call the package: “I love CHSBHC ! .7z”
MAKE the name appropriate to what you are trying to accomplish.
Don’t punish the mod downloader by calling it “Main File” or “insert-MOD-author-name-here”
As an Uploader, a person that is sharing your hard work, you are appealing to the people to look and use your file. You work for their enjoyment for a brief moment, not torture!

--------------------------------------------------------------------------
Step 5: Get pictures and/or video of your mod in action.
(I use my ENB’s default picture taker, converting the .BMP to .JPG)
Make your mod profile on the nexus/whatever site you prefer. If on Nexus, there is a section that reads close to:
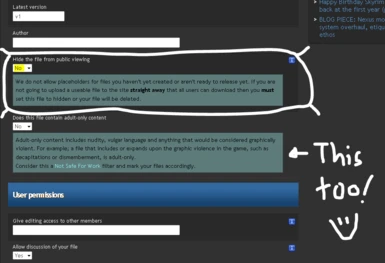
-- “Hide this file from public viewing?” there is a clicky with “yes” and “no.”
Click Yes.
Post those pics and/or vid onto the Nexus, then upload your package. Finally, Edit your mod profile, go to this again:
-- “Hide this file from public viewing?” there is a clicky with “yes” and “no.”
Click no.


