File information
Created by
No_Aardvarks_AllowedUploaded by
No_Aardvarks_AllowedVirus scan
About this mod
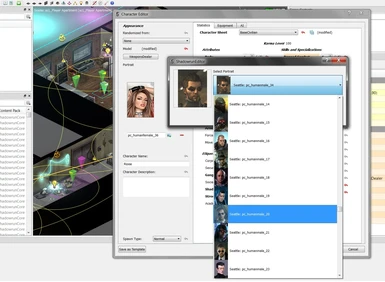
Add up to 400 of your custom player portraits to SR:R. It's quick and easy, and no vanilla portraits are replaced. The added portraits will be available on character generation in the main DMS campaign, all UGC and also in the editor.
- Permissions and credits
---------------------------------------------------------------------------------------------------------------------------------------------------------------------------------------------
---------------------------------------------------------------------------------------------------------------------------------------------------------------------------------------------
Attention users of Dragonfall Director's Cut!
The Director's Cut version added new portraits to the game. This means that some of the name slots the mod uses now conflict with the names of the new DC portraits. To fix this, you need to rename the portraits you added that conflict by changing the number at the end of the file name to a higher number that you aren't using. At present I don't know how many new portraits for the different races/genders came with Dragonfall:DC (I don't have that version), so I can't tell you how many portraits conflict. But since the original game only had 9 portraits per race/gender combination, it seems unlikely that any of the number slots from 20 upwards will conflict. To be sure when renaming, I would start from number 50 and work my way backwards.
So, a portrait you added and previously named pc_dwarffemale_11 should now be renamed pc_dwarffemale_50.
If anyone who has played Dragonfall:DC could check on just how many new portraits came with it for each race and gender, I would appreciate it. Than I could update the info here to avoid all confusion.
Also, thank you to Sophisa for bringing this issue to my attention!
---------------------------------------------------------------------------------------------------------------------------------------------------------------------------------------------
---------------------------------------------------------------------------------------------------------------------------------------------------------------------------------------------
Introduction
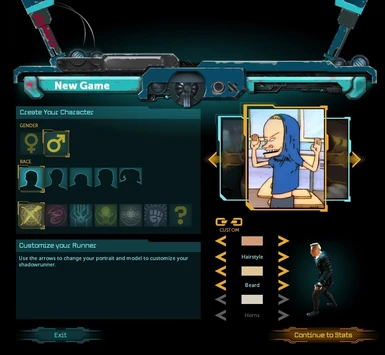
Personalized Player Portraits lets you quickly and easily add your own custom player portraits to the game. They will be added to the available portraits in the character creation screen, and will not replace any of the existing vanilla ones. The portraits will be available in the main Dead Man's Switch campaign and all User Generated Content you play, and also in the game's editor.
The mod lets you add up to 40 new player portraits to each of the race/gender combinations in the game.
The mod is for those who want to add their own portraits to the game without replacing anything, while not being comfortable hex editing game files themselves (and also those very sensible people who don't mind doing it, but simply prefer having others do the work for them!).
Updating from mod version 1.0 to 2.0
When HBS patched the game, version 1.0 of the mod not only stopped working, it actually borked the character creation in the game. If you get a black screen when trying to create a character, this is the reason. Therefore it's vitally important that you do the following thing:
Go to your Steam/SteamApps/common/ShadowrunReturns/Shadowrun_Data/StreamingAssets/ContentPacks/seattle/data/portraits folder and delete all files EXCEPT seattle.pl.bytes and seattle.pcode.bytes. This restores the game to its vanilla condition. Then, if you wish to install the new version of the mod, follow the instructions below.
Instructions
1. Download the mod.
2. Go to your Steam/SteamApps/common/ShadowrunReturns/Shadowrun_Data/StreamingAssets/ContentPacks/seattle/data/portraits folder and make a folder called Backup. Copy the seattle.pl.bytes file in the Portraits folder and paste it inside Backup. (If you use the DRM-free version, the ShadowrunReturns folder will obviously not be located under Steam.)
3. Copy the files inside the mod folder you downloaded and paste them inside the Portraits folder. When asked if you want to replace an existing file, click yes (we just backed it up, so don't worry).
4. Go to your Steam/SteamApps/common/Shadowrun Returns/Shadowrun_Data/StreamingAssets/ContentPacks/seattle/art/portraits folder. Here you add the custom portraits portraits you want to add to the game, and they need to be in a specific format to work (see Making Portraits below).
5.Rename your added portraits so the game can find them. It's critically important that you rename them exactly right. See the section Renaming below on how to correctly do the renaming. (The information is also available in a text file included with the mod.)
6. That's it! If you (and I!) have done everything right, your new portraits will be ready for use in game.
Note:
You don't have to fill all the available 40 portrait spots for every race/gender with portraits. The ones that aren't used will simply be greyed out in the character creation screen.
Making Portraits
For portraits to work in the game they have to be of a particular size and type, namely 212 pixels x 278 pixels and in the .PNG format. This likely means you have to crop any picture you want to add, and then also save it/export it as a .PNG-file, using the editing software of your choice (Gimp, Paint.net are free).
Renaming
Your added portraits need to be renamed so they look like this: "pc_elffemale_11" (without the quotation marks). All names will start with "pc_" in accordance with the naming practice of the game. Then comes the race and gender part which can be any combination of the two, like "trollfemale_", "orkmale_", etc. Last is the actual numbering of the portraits. It starts from 11 so they will be sorted after the portraits already in the game (which are numbered from 01 to 09). If you use the Director's Cut version of Dragonfall, don't use the numbers between 11 and 19 for now, since this may result in name conflicts.
Use the table below or the text file included with the mod for the exact naming practice.
Reference table
Again, if you use Dragonfall:DC, avoid the lower number (i.e. 11-19) names!
For dwarf females:
pc_dwarffemale_11
pc_dwarffemale_12
pc_dwarffemale_13
...
pc_dwarffemale_50
For dwarf males:
pc_dwarfmale_11
pc_dwarfmale_12
pc_dwarfmale_13
...
pc_dwarfmale_50
For elf females:
pc_elffemale_11
pc_elffemale_12
pc_elffemale_13
...
pc_elffemale_50
For elf males:
pc_elfmale_11
pc_elfmale_12
pc_elfmale_13
...
pc_elfmale_50
For human females:
pc_humanfemale_11
pc_humanfemale_12
pc_humanfemale_13
...
pc_humanfemale_50
For human males:
pc_humanmale_11
pc_humanmale_12
pc_humanmale_13
...
pc_humanmale_50
For ork females:
pc_orkfemale_11
pc_orkfemale_12
pc_orkfemale_13
...
pc_orkfemale_50
For ork males:
pc_orkmale_11
pc_orkmale_12
pc_orkmale_13
...
pc_orkmale_50
For troll females:
pc_trollfemale_11
pc_trollfemale_12
pc_trollfemale_13
...
pc_trollfemale_50
For troll males:
pc_trollmale_11
pc_trollmale_12
pc_trollmale_13
...
pc_trollmale_50
Issues
If you use Dragonfall Director's Cut, portrait names with the numbers 11-19 might conflict with the new DC portraits, so these numbers should be avoided. You will need to rename your added portraits with these numbers and give them unused numbers.
When adding a portrait, the game will assign a default model for it. This means any character with a custom portrait will start bald and with the darkest skin tone. Just click the chain link symbol to the left of the model settings window in the character creation screen and change the values suitably.
In the editor things get slightly trickier if you want to use the pc portraits for other actors. I have not edited the seattle.pcode.bytes file, which determines what model a particular portrait is associated with. Since I don't know what the portraits people will add look like, there is no point in doing that. This means that if you create an actor in the editor and gives it one of the added player portraits, the actor will not show up in game. What you have to do to get around this, is first give the actor one of the existing portraits that looks kind of like the added one you want to use, and then you change it to the new one. This way the actor will keep the model from the other portrait.
Alternatively, you can add your custom portraits the regular way to your content pack (see here how to do it). The main point of this mod is letting you add PLAYER portraits, not NPC ones.
Uninstalling
To completely uninstall the mod, simply copy the file in your Backup folder and paste it in the Data/Portraits folder. That restores the game. Then just delete everything else you've added for the mod.
Permissions
Modders are free to include my work in their content on condition that credit is given.
Credits
Steam user chaos915. The only reason I could do this mod, is because he explained how to do it (in this thread on the Steam forums) so that even an idiot could understand.
Harebrained Schemes for making the game.
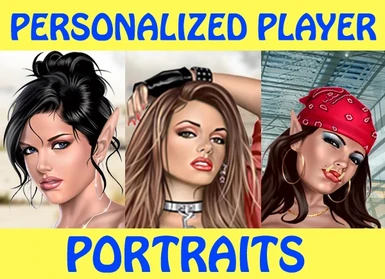
Garvgraphx.com for the title image ladies.
Robin and the Nexus.


