About this mod
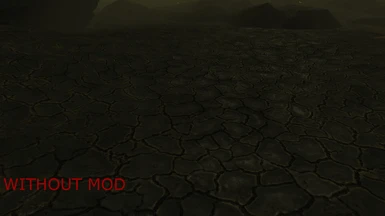
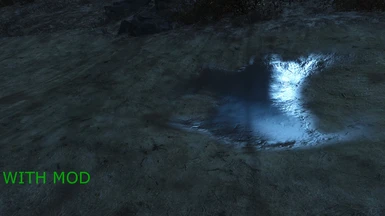
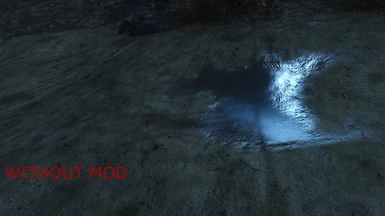
Vanilla textures are far too large for the majority of computers to handle, such as 2K-Res textures for 40-60% of all diffuse maps in the game, even on grass! This is ridiculous. This mod fixes that problem by selectively reducing texture size, using proper compression and retaining the vanilla art style!
- Requirements
- Permissions and credits
- Donations
NEWS
GamerPoets fully detailed step-by-step guide on how to install Texture Optimization Project.
!!!~IMPORTANT~!!!
When you finish saving a repacked .ba2 file, go into folder "1" and delete everything there before extracting another vanilla .ba2 file to folder "1"
OBJECTIVE
Fallout 4 Texture Optimization Project(TOP) is tasked with improving you PC's Framerates Per Second(FPS) without sacrificing too much visual fidelity(save for close ups visuals). To accomplish this, I have replaced the high-resolution textures with properly compressed and resized textures.
All of this is done manually, one texture at a time, to ensure that any buggy files are fixed and the end goal will be a MUCH BETTER playing game ESPECIALLY for people with a low to mid tier PC with only a MINOR loss in texture quality.
Extra Info:
Vanilla textures are HUGE: 2048x2048 ground textures, 2048x2048 plant textures, and 4096x2048 tree textures, so on and so forth. Most entry level gaming computers cannot handle this.
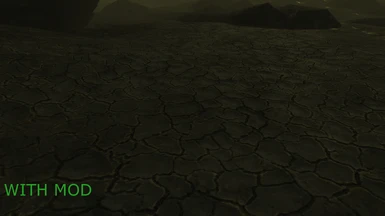
Therefore, what I have done is fix that problem while retaining the vanilla art style all the while, reducing the texture size and using proper compression on textures. This leads to a VERY impressive micro-stutter fix and sometimes removal!
The mod is a VERY good FPS boost for low to mid-grade computers with anywhere up to Overclocked i7-3770ks and Overclocked gtx770s seeing massive improvements! Also, it is the BEST fps boost you can get for the quality retained, without making the game look like complete garbage, which is PERFECT for low to mid-tier computers.
Furthermore, it can even improve framerate stability, even on some higher end graphics cards!
--Note: To truly test how much of an FPS improvement you are getting from this mod, don't stand still, looking at a wall, and call that your FPS. Test your FPS while fighting, walking through cities, open fields, tunnels, etc.
PLEASE TAKE A THOROUGH LOOK AT THE STICKIED COMMENTS AND THE BUGS SECTION BEFORE POSTING QUESTIONS/PROBLEMS. THANK YOU.
INSTALLATION PROCESS
----Securing Assets----
- Manually download the main file
- Download THE LATEST VERSION of the hotfix(if any is available)
- Merge The hotfix into the main file, overwriting any files in the main file
- Follow the steps in the following guide on how to properly repackage the .ba2 vanilla files
----.ba2 Repackaging Guide----
!!!~IMPORTANT~!!!
When you finish saving a repacked .ba2 file, go into folder "1" and delete everything there before extracting another vanilla .ba2 file to folder "1"
(Archive2 can be found at Bethesda.net but you must first create a Bethesda.net account and download the Creation Kit)
Once the Creation Kit is downloaded, Archive2 can be accessed in this file path "Bethesda.net Launcher\games\Tools\Archive2"
Make a backup of your original textures.ba2 files, they're +20gb in total and not fun to re-download if something goes wrong.
- Create a folder on your desktop called "working"
- Create folders "1" and "2" inside of that folder
- Extract TOP's contents into folder "2" leaving folder "1" empty for now
- Open Archive2, select "File >Open"
- Navigate to your FO4 Data folder and open a vanilla texture.ba2 file(such as "Fallout4 - Textures1.ba2")
- Once Archive2 has loaded the contents of the .ba2 file, extract the contents to folder "1" inside the "working" folder
- Open the "working" folder, deselect any folders, Shift+Right click and select "Open command window here"
- In the newly opened CMD prompt, type this exactly as I do(spaces included but without quotes)
- Type "robocopy " then click and drag folder "2" into the CMD prompt and add a space after it
- Drag folder "1" into the CMD prompt and add a space after it
- Type "/s /xl"
The finished code should look like "robocopy C:\Users\owner\Desktop\working\2 C:\Users\owner\Desktop\working\1 /s /xl" - Press enter and there should be a flood of text as specific files are automatically replaced in folder "1"
If there is no flood of text, re-read all the steps so far to make sure you didn't miss something
- Go back to Archive2 and select "File >New" select "DDS" as the format and leave everything default and select "OK"
- Select "Archive >Add Folder..."
- Navigate inside folder "1" and select the "Textures" folder
- Select "File >Save As..." and save with the original .ba2's name(such as Fallout4 - Textures1.ba2)
- Repeat steps 4-16 with each individual vanilla .ba2 until you have all of the vanilla .ba2's completed
When you finish saving a repacked .ba2 file, go into folder "1" and delete everything there before extracting another vanilla .ba2 file to folder "1"
(It should be noted, once again, that it is ABSOLUTELY IMPERATIVE THAT YOU DO THIS TO EACH VANILLA BA2 INDIVIDUALLY!) - Move the original .ba2 to a backup folder on your computer then replace where it originally was with your new .ba2
As a completely Optional recommendation I recommend including FAR - Faraway Area Reform into this process as well!
...even though SparrowPrince left the nexus for an unknown reason... :'(
(It may be possible to use B.A.E. - Bethesda Archive Extractor instead of Archive2. However, since I have not, and will not, test it, any bugs that happen because of it, do not post comments about it)
Credits
GamerPoets for being outstandingly helpful by creating a comprehensive installation video for all of us! :D
Cruzifixio for the outstanding graphical image design of the mod logo! :D
Commander19 for tidying up the original description for this mod and showing me some tips for using BBCODE! Very appreciated!
Gopher for the video tutorials, which really help people understand how to do things.
Zapper215 for reworking the BBCODE and rewording the .ba2 Repackaging Guide, and being a BBCODE Wizard! ;D


