


0 of 0
About this mod
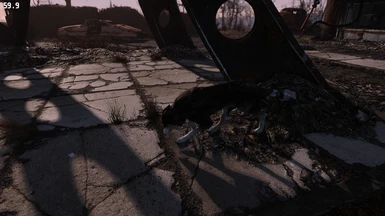
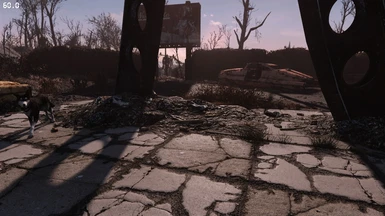
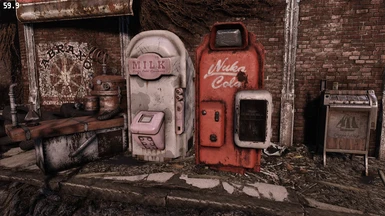
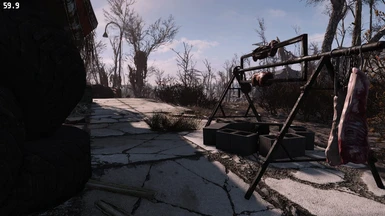
Complete Modlist and Load Order Guide for Best Fallout 4 Modding Experience. Extreme Fallout 4 Engine & Textures Mods Optimization.
- Requirements
- Permissions and credits
- Changelogs
This Mod List and Load Order Guide is the fully detailed process to achieve a Great Fallout 4 Modding experience with Smooth FPS and Close to Bethesda's Fallout 4 Game Idea.
{-The Most Complete, Performance Friendly and Endorsed for Fallout 4-}
- #3 File of the Month - August 2017 - 117 Votes -
- #3 File of the Month - August 2017 - 117 Votes -
- Just 205 mod pages out of 28.3k reached such a prestigious achievement and this is one of them -

Requirements
- Fallout 4 + Season Pass or Fallout 4 Goty Edition - (NO High Quality Textures DLC) - To disable that DLC you just unselect it from the Steam library page.
Suggestions (Read at least Once) <-----------------
1)
Mod List is in Order, Overwrite Everything (Merge for MO2) unless I say different. Do not use LOOT or any Sorting feature as that is already made at best by human brain and those auto tools have confirmed to instead put things upside down and not in the real correct way, at least for fallout 4.
Always say yes\ok whenever you will get warnings through mod installers if i don't say different.
2)
Green Mods are Must Have or Highly Recommended Mods, so I want you or suggest for you to install all of these.
Yellow Mods are Optional but still Recommended. You can freely skip these to enhance performance, stability or to play an intended way, but on my end i find these to be same essentials as the green ones.
3)
Read the Official Mods' Descriptions to know how a mod works in-game, leave an endorsement to that mod if you loved it and donate to the official author/s if you want.
4)
If i don't say which file to download or the installation text next to the mod is empty, then you just have to install the main file only or one of your preference if there are more. Don't Install mods requirements if i don't say that, in many cases these requirements are fake and not really required, more intended as credits or suggestions, unlucky authors abuse of many nexus site features and make people only confused.
5)
If you have doubts or you are not sure what you doing, Just Ask, its better to improve modding knowledge and to avoid useless mistakes.
Step 0: Tools Needed
Spoiler:
- Start with a clean Fallout 4 installation (So delete all mods you had, the Documents/My Games/Fallout4 folder and verify files with steam). It's recommended that Fallout 4 is not installed inside one of the two ProgramFiles folders. Open the game at least once and when on main menu close the game. Then go to Fallout 4/Data folder and delete all cc files.
- Disable auto updates for Fallout 4 in Steam, in order to avoid waiting for tools to update to a latest version. To do this, in Steam, right click on Fallout 4 and select Properties, then click first on the Updates
tab and then on the drop-down menu under Automatic Updates. Here select Only update this game when I launch it, then click Close.
- In order to safely and easily access all mods files it's extremely recommended to Download 7-Zip and to Install it. You might also use other similar programs to this, but we found out 7-Zip is the one causing the least amount of issues if not anything.
1.
You must choose only one manager between Nexus Mod Manager and Mod Organizer 2 and that's completely up to you. Even if I consider Nexus Mod Manager a must to be used for fallout 4 and many other games, i even gave proper guidance for Mod Organizer 2 users, as i know you are a lot using it and i wanted to help you aswell. If you can, just use Nexus Mod Manager.
- Nexus Mod Manager - Download the Nexus.Mod.Manager-0.72.2.exe right below the latest release, run it and follow the installer. When you finish installing it, launch it and wait for it to search your games, then select all green ticks in all games you see that. Then click ok and select Fallout 4. In the opening Windows just click ok or yes. Then on the lower left corner select the Red Minion Icon and Authorize your Nexus Site account. Always run the program with administrator and download all mods with manager other than if i say different or if the option is not available.
- Mod Organizer 2 - I highly recommend using the v2.3.2 (Archive) version. Once downloaded, extract its contents (using 7-Zip). Once extracted, rename the Mod Organizer 2 (Archive)-6194-2-3-2-1597663207 folder to just BRB Guide Modlist. Now right click on that BRB Guide Modlist folder and select Cut. Navigate to either your system drive (usually C:) or to the SSD/HDD in which you moved your Steam Games Library to and right click on an unused empty space and select Paste. You want your BRB Guide Modlist folder on the same drive in which you copied your Steam Games Library to.Open your BRB Guide Modlist folder and right click on ModOrganizer.exe and select Create Shortcut (if you wish to have a Desktop Shortcut – Highly Recommended!).
Now you can either double click on the ModOrganizer.exe (since it may still be open in Explorer) OR you can double click on your new Shortcut we just created. Next, a new window will pop up saying Choose your Instance, select Portable from the drop-down menu. A new window will appear. Now select Fallout 4 from the drop-down list.
Next, Mod Organizer 2 (MO2) will ask if you are a New User or not. Select NO. Now one last window will appear asking if you wish to add Nexus Links Association. Select Yes.
2.
- F4SE - Download the 7z archive and open it. From the f4se_0_06_21 folder you have to extract the Data folder, f4se_1_10_163.dll, f4se_loader.exe and f4se_steam_loader files to the Fallout 4 Main Directory folder.
(NMM Users:Everytime you want to play the game, you must Launch the f4se_loader.exe in your Fallout 4 Main Directory folder or a shortcut of it somewhere else.)
[MO2 Users: Inside Mod Organizer 2 Select the Gears/Executables icon, and in the new window select the Plus Sign (Add an Executable) and select Add from File. In the new window navigate to your Fallout 4 main directory folder and select the f4se_loader.exe file you just extracted and click OK in the Modify Executables window. From now on you always have to launch the game through F4SE drop down menu in the MO2 right panel to recognize all the installed mods.]
- xSE PluginPreloader F4 - Download the main file manually and open it. Extract the two files inside it to the Fallout 4 Main Directory folder.
- FO4Edit - Create a folder named FO4Edit in the Fallout 4 Main one, download the main file and extract all files inside it to the FO4Edit Folder you created. Now follow the next steps carefully.
Run the FO4EditQuickAutoClean.exe file and once opened inside the Module Selection window Tick on the DLCRobot.esm box only and select Ok.
Wait for it to finish, then when it's done you can just close the program.
Do the same for the following files one at a time.
DLCWorkshop01.esm
DLCCoast.esm
DLCWorkshop02.esm
DLCWorkshop03.esm
DLCNukaWorld.esm
3.
- Nvidia Profile Inspector - [NVIDIA Users Only to Improve game Performance] - Click on nvidiaProfileInspector.zip and open the file, then extract the two files inside it to Desktop or anywhere you want. Also Download my Nvidia Inspector Profile from the Miscellaneous section and extract it in the same place as before. Now Run the nvidiaProfileInspector.exe file and on the Profiles search bar in the top left corner type and select Fallout 4. Between the Icons line on the Middle Top Select on the one with a green arrow pointing down, then select the Import Profile(s) option and find my profile you downloaded.
Now if in the Green Bar on top of the Nvidia Inspector window the f4se_loader.exe you can Apply Changes on the top right corner and close the window. If it's not there, select on the Middle Top icon with a little green plus and find the f4se_launcher.exe file that should be in your fallout 4 main folder, then Apply Changes on the top right corner and close the window.
- ENB Series - Download the 0.428 file and open it. Open the Wrapper folder inside it and extract the d3d11.dll and d3dcompiler_46e.dll to your Fallout 4 main folder.
- BRB ENB - Preview - Even if every enb preset is optional and you may end up choosing also others than mine, i still highly recommend to use mine for its latest features which have been enhanced in performance compared to all other enbs, and with that base in mind, which makes it one of the most performance friendly enb out there while reserving all modern enb effects and changes, changing colors stuff to fit well with your taste or monitor settings.
Download my BRB ENB miscellaneous file and extract all files to Fallout 4 main folder.
For more Quality: Open the enbseries.ini file from Fallout 4 main folder. Under the Effect tab change EnableDepthOfField=true and EnableDetailedShadows=true and EnableWater=true at some performance costs. (4fps the depth of field, 3fps the shadows and 5+fps the water effects)
You can open the in-game ENB interface with Shift+Enter keycombo while in game.
Sometimes the game may be affected by a common "low-res bug" that can render some textures in really low-resolution instead of default one. With ENB installed you can fix this issue by going into the enblocal.ini file in your fallout 4 main directory folder.
In this file On the [MEMORY] category set ForceVideoMemorySize=True and depending on how much VRAM and RAM your system has, set the proper value for VideoMemorySizeMb=
(32 GB RAM - 8 GB VRAM) = 33000 (32 GB RAM - 6 GB VRAM) = 31000 (16 GB RAM - 8 GB VRAM) = 17000
(16 GB RAM - 6 GB VRAM) = 15000 (16 GB RAM - 4 GB VRAM) = 13000 (16 GB RAM - 2 GB VRAM) = 11000
(12 GB RAM - 4 GB VRAM) = 9000 (12 GB RAM - 2 GB VRAM) = 7000 (8 GB RAM - 6 GB VRAM) = 7000
(8 GB RAM - 4 GB VRAM) = 5000 (8 GB RAM - 2 GB VRAM) = 3000
Attention: If you still experience the bug with above values, it's said that 8000 could be the most valuable for many different systems, so you may want to try that as well in the end if the above do not work fully for you.
4.
- BethINI - Download the main file and open it. Extract the BethINI Standalone folder into the Fallout 4 main directory one.
[MO2 Users: Close MO2 if you have it launched]
Run the BethINI.exe file and select Fallout 4 as the game when asked, and Yes when it asks to Modify Custom Files.
Now Change the Settings on Each Tab as follows while leaving intact the ones not mentioned.
Setup: [MO2 Users: SOn Game Path select Browse and select the Fallout 4 game folder. On the Mod Organizer path Select Browse and select the Mod Organizer 2 Folder. On the INI Path Select Browse and select the BRB Guide Modlist/Profiles/Default folder created in Mod Organizer 2 setup part. Now bethini will restart and once done it will asks you to edit the .ini files and you say Yes. Once restarded you can keep on going].
Basic: Select Recommended Tweaks and a preset of your preference (I recommend one lower than the one detected as default in the launcher when opening Fallout 4 for the first time, or Ultra for High end Systems). Check the Windowed Mode, Borderless, Always Active and Always on Top, while Uncheck Vsync.
Gameplay: Select the Sprint Fix option.
Interface: Select both Dialogue Subtitles and General Subtitles. Then make sure that in Colors, HUD, Pipboy and Item Highlight are set to 255 Red, 250 Green, 240 Blue.
Detail: Select Decal Quantity=Medium if you have higher than that. Particles=750, then Unselect Bokeh, Motion Blur and Depth of Field. Select Shadow Resolution=1024, Exterior Draw Distance= 8000. [If you are using my BRB ENB Above Select None on Ambient Occlusion because my enb yet gives much better performing Ambient Occlusion]
View Distance: Decal Fade=Medium if you have higher than that.
(NMM Users: Now go to your Documents\MyGames\Fallout4 folder and open the Fallout4Custom.ini file).
[MO2 Users: Iniside Mod Organizer 2 select the Tools Icon (Puzzle Pieces) and select INI Editor and click on the Fallout4Custom.ini tab]
Replace the lines in the file with the ones you find below in case they are there, or add them to the bottom of the section if they are not. If also the section is not there in the file you can simply copy the section below entirely. Keep in mind that the NVFlex value below is to be used in case you own an RTX graphic card, otherwise do not copy it or make sure it is set to 1. Now save the file and close it.
[Display]
bMultiThreadedRendering=1
fBlendSplitDirShadow=96
iDirShadowSplits=3
iMaxFocusShadows=3
iMaxFocusShadowsDialogue=3
uiOrthoShadowFilter=2
[Imagespace]
bDoRadialBlur=0
[Gameplay]
iDifficulty=5
[General]
bForceUpdateDiffuseOnly=0
iNumHWThreads=4
iTextureDegradeDistance0=1600
iTextureDegradeDistance1=3000
iTextureUpgradeDistance0=1200
iTextureUpgradeDistance1=2400
sStartingConsoleCommand=bat BRB
[NVFlex]
bNVFlexEnable=0
[Papyrus]
fExtraTaskletBudgetMS=2.4
fUpdateBudgetMS=2.4
iMaxAllocatedMemoryBytes=307200
iMaxMemoryPageSize=1024
iMinMemoryPageSize=256
[Pipboy]
bPipboyDisableFX=1
Now inside the Fallout 4 Main Directory folder create a text document right clicking and selecting New, then Text Document. Rename it to just BRB and then open it. Copy the following lines inside, then save the file and close it.
gr quality 3
gr grid 8
gr scale .4
gr maxcascade 2
cl rim .002
fov 90 90
setgs iTerminalDisplayRate 1200
setgs fWorkshopWireMaxLength 2200
setgs fGunShellLifetime 150
setgs fGunShellCameraDistance 12800
setgs iDebrisMaxCount 375
setgs iHoursToRespawnCell 720
setgs iHoursToRespawnCellCleared 2160
setgs iHoursToClearCorpses 10
setgs iRemoveExcessDeadComplexCount 50
setgs iRemoveExcessDeadCount 50
setgs iRemoveExcessDeadComplexTotalActorCount 65
setgs iRemoveExcessDeadTotalActorCount 50
taa on
taa sharp 0
taa lf 0
taa hf 0.7
taa ps 0
taa po 0.3
fxaa off
What these lines do?
Show
- Start with a clean Fallout 4 installation (So delete all mods you had, the Documents/My Games/Fallout4 folder and verify files with steam). It's recommended that Fallout 4 is not installed inside one of the two ProgramFiles folders. Open the game at least once and when on main menu close the game. Then go to Fallout 4/Data folder and delete all cc files.
- Disable auto updates for Fallout 4 in Steam, in order to avoid waiting for tools to update to a latest version. To do this, in Steam, right click on Fallout 4 and select Properties, then click first on the Updates
tab and then on the drop-down menu under Automatic Updates. Here select Only update this game when I launch it, then click Close.
- In order to safely and easily access all mods files it's extremely recommended to Download 7-Zip and to Install it. You might also use other similar programs to this, but we found out 7-Zip is the one causing the least amount of issues if not anything.
1.
You must choose only one manager between Nexus Mod Manager and Mod Organizer 2 and that's completely up to you. Even if I consider Nexus Mod Manager a must to be used for fallout 4 and many other games, i even gave proper guidance for Mod Organizer 2 users, as i know you are a lot using it and i wanted to help you aswell. If you can, just use Nexus Mod Manager.
- Nexus Mod Manager - Download the Nexus.Mod.Manager-0.72.2.exe right below the latest release, run it and follow the installer. When you finish installing it, launch it and wait for it to search your games, then select all green ticks in all games you see that. Then click ok and select Fallout 4. In the opening Windows just click ok or yes. Then on the lower left corner select the Red Minion Icon and Authorize your Nexus Site account. Always run the program with administrator and download all mods with manager other than if i say different or if the option is not available.
- Mod Organizer 2 - I highly recommend using the v2.3.2 (Archive) version. Once downloaded, extract its contents (using 7-Zip). Once extracted, rename the Mod Organizer 2 (Archive)-6194-2-3-2-1597663207 folder to just BRB Guide Modlist. Now right click on that BRB Guide Modlist folder and select Cut. Navigate to either your system drive (usually C:) or to the SSD/HDD in which you moved your Steam Games Library to and right click on an unused empty space and select Paste. You want your BRB Guide Modlist folder on the same drive in which you copied your Steam Games Library to.Open your BRB Guide Modlist folder and right click on ModOrganizer.exe and select Create Shortcut (if you wish to have a Desktop Shortcut – Highly Recommended!).
Now you can either double click on the ModOrganizer.exe (since it may still be open in Explorer) OR you can double click on your new Shortcut we just created. Next, a new window will pop up saying Choose your Instance, select Portable from the drop-down menu. A new window will appear. Now select Fallout 4 from the drop-down list.
Next, Mod Organizer 2 (MO2) will ask if you are a New User or not. Select NO. Now one last window will appear asking if you wish to add Nexus Links Association. Select Yes.
2.
- F4SE - Download the 7z archive and open it. From the f4se_0_06_21 folder you have to extract the Data folder, f4se_1_10_163.dll, f4se_loader.exe and f4se_steam_loader files to the Fallout 4 Main Directory folder.
(NMM Users:Everytime you want to play the game, you must Launch the f4se_loader.exe in your Fallout 4 Main Directory folder or a shortcut of it somewhere else.)
[MO2 Users: Inside Mod Organizer 2 Select the Gears/Executables icon, and in the new window select the Plus Sign (Add an Executable) and select Add from File. In the new window navigate to your Fallout 4 main directory folder and select the f4se_loader.exe file you just extracted and click OK in the Modify Executables window. From now on you always have to launch the game through F4SE drop down menu in the MO2 right panel to recognize all the installed mods.]
- xSE PluginPreloader F4 - Download the main file manually and open it. Extract the two files inside it to the Fallout 4 Main Directory folder.
- FO4Edit - Create a folder named FO4Edit in the Fallout 4 Main one, download the main file and extract all files inside it to the FO4Edit Folder you created. Now follow the next steps carefully.
Run the FO4EditQuickAutoClean.exe file and once opened inside the Module Selection window Tick on the DLCRobot.esm box only and select Ok.
Wait for it to finish, then when it's done you can just close the program.
Do the same for the following files one at a time.
DLCWorkshop01.esm
DLCCoast.esm
DLCWorkshop02.esm
DLCWorkshop03.esm
DLCNukaWorld.esm
3.
- Nvidia Profile Inspector - [NVIDIA Users Only to Improve game Performance] - Click on nvidiaProfileInspector.zip and open the file, then extract the two files inside it to Desktop or anywhere you want. Also Download my Nvidia Inspector Profile from the Miscellaneous section and extract it in the same place as before. Now Run the nvidiaProfileInspector.exe file and on the Profiles search bar in the top left corner type and select Fallout 4. Between the Icons line on the Middle Top Select on the one with a green arrow pointing down, then select the Import Profile(s) option and find my profile you downloaded.
Now if in the Green Bar on top of the Nvidia Inspector window the f4se_loader.exe you can Apply Changes on the top right corner and close the window. If it's not there, select on the Middle Top icon with a little green plus and find the f4se_launcher.exe file that should be in your fallout 4 main folder, then Apply Changes on the top right corner and close the window.
- ENB Series - Download the 0.428 file and open it. Open the Wrapper folder inside it and extract the d3d11.dll and d3dcompiler_46e.dll to your Fallout 4 main folder.
- BRB ENB - Preview - Even if every enb preset is optional and you may end up choosing also others than mine, i still highly recommend to use mine for its latest features which have been enhanced in performance compared to all other enbs, and with that base in mind, which makes it one of the most performance friendly enb out there while reserving all modern enb effects and changes, changing colors stuff to fit well with your taste or monitor settings.
Download my BRB ENB miscellaneous file and extract all files to Fallout 4 main folder.
For more Quality: Open the enbseries.ini file from Fallout 4 main folder. Under the Effect tab change EnableDepthOfField=true and EnableDetailedShadows=true and EnableWater=true at some performance costs. (4fps the depth of field, 3fps the shadows and 5+fps the water effects)
You can open the in-game ENB interface with Shift+Enter keycombo while in game.
Sometimes the game may be affected by a common "low-res bug" that can render some textures in really low-resolution instead of default one. With ENB installed you can fix this issue by going into the enblocal.ini file in your fallout 4 main directory folder.
In this file On the [MEMORY] category set ForceVideoMemorySize=True and depending on how much VRAM and RAM your system has, set the proper value for VideoMemorySizeMb=
(32 GB RAM - 8 GB VRAM) = 33000 (32 GB RAM - 6 GB VRAM) = 31000 (16 GB RAM - 8 GB VRAM) = 17000
(16 GB RAM - 6 GB VRAM) = 15000 (16 GB RAM - 4 GB VRAM) = 13000 (16 GB RAM - 2 GB VRAM) = 11000
(12 GB RAM - 4 GB VRAM) = 9000 (12 GB RAM - 2 GB VRAM) = 7000 (8 GB RAM - 6 GB VRAM) = 7000
(8 GB RAM - 4 GB VRAM) = 5000 (8 GB RAM - 2 GB VRAM) = 3000
Attention: If you still experience the bug with above values, it's said that 8000 could be the most valuable for many different systems, so you may want to try that as well in the end if the above do not work fully for you.
4.
- BethINI - Download the main file and open it. Extract the BethINI Standalone folder into the Fallout 4 main directory one.
[MO2 Users: Close MO2 if you have it launched]
Run the BethINI.exe file and select Fallout 4 as the game when asked, and Yes when it asks to Modify Custom Files.
Now Change the Settings on Each Tab as follows while leaving intact the ones not mentioned.
Setup: [MO2 Users: SOn Game Path select Browse and select the Fallout 4 game folder. On the Mod Organizer path Select Browse and select the Mod Organizer 2 Folder. On the INI Path Select Browse and select the BRB Guide Modlist/Profiles/Default folder created in Mod Organizer 2 setup part. Now bethini will restart and once done it will asks you to edit the .ini files and you say Yes. Once restarded you can keep on going].
Basic: Select Recommended Tweaks and a preset of your preference (I recommend one lower than the one detected as default in the launcher when opening Fallout 4 for the first time, or Ultra for High end Systems). Check the Windowed Mode, Borderless, Always Active and Always on Top, while Uncheck Vsync.
Gameplay: Select the Sprint Fix option.
Interface: Select both Dialogue Subtitles and General Subtitles. Then make sure that in Colors, HUD, Pipboy and Item Highlight are set to 255 Red, 250 Green, 240 Blue.
Detail: Select Decal Quantity=Medium if you have higher than that. Particles=750, then Unselect Bokeh, Motion Blur and Depth of Field. Select Shadow Resolution=1024, Exterior Draw Distance= 8000. [If you are using my BRB ENB Above Select None on Ambient Occlusion because my enb yet gives much better performing Ambient Occlusion]
View Distance: Decal Fade=Medium if you have higher than that.
(NMM Users: Now go to your Documents\MyGames\Fallout4 folder and open the Fallout4Custom.ini file).
[MO2 Users: Iniside Mod Organizer 2 select the Tools Icon (Puzzle Pieces) and select INI Editor and click on the Fallout4Custom.ini tab]
Replace the lines in the file with the ones you find below in case they are there, or add them to the bottom of the section if they are not. If also the section is not there in the file you can simply copy the section below entirely. Keep in mind that the NVFlex value below is to be used in case you own an RTX graphic card, otherwise do not copy it or make sure it is set to 1. Now save the file and close it.
[Display]
bMultiThreadedRendering=1
fBlendSplitDirShadow=96
iDirShadowSplits=3
iMaxFocusShadows=3
iMaxFocusShadowsDialogue=3
uiOrthoShadowFilter=2
[Imagespace]
bDoRadialBlur=0
[Gameplay]
iDifficulty=5
[General]
bForceUpdateDiffuseOnly=0
iNumHWThreads=4
iTextureDegradeDistance0=1600
iTextureDegradeDistance1=3000
iTextureUpgradeDistance0=1200
iTextureUpgradeDistance1=2400
sStartingConsoleCommand=bat BRB
[NVFlex]
bNVFlexEnable=0
[Papyrus]
fExtraTaskletBudgetMS=2.4
fUpdateBudgetMS=2.4
iMaxAllocatedMemoryBytes=307200
iMaxMemoryPageSize=1024
iMinMemoryPageSize=256
[Pipboy]
bPipboyDisableFX=1
Now inside the Fallout 4 Main Directory folder create a text document right clicking and selecting New, then Text Document. Rename it to just BRB and then open it. Copy the following lines inside, then save the file and close it.
gr quality 3
gr grid 8
gr scale .4
gr maxcascade 2
cl rim .002
fov 90 90
setgs iTerminalDisplayRate 1200
setgs fWorkshopWireMaxLength 2200
setgs fGunShellLifetime 150
setgs fGunShellCameraDistance 12800
setgs iDebrisMaxCount 375
setgs iHoursToRespawnCell 720
setgs iHoursToRespawnCellCleared 2160
setgs iHoursToClearCorpses 10
setgs iRemoveExcessDeadComplexCount 50
setgs iRemoveExcessDeadCount 50
setgs iRemoveExcessDeadComplexTotalActorCount 65
setgs iRemoveExcessDeadTotalActorCount 50
taa on
taa sharp 0
taa lf 0
taa hf 0.7
taa ps 0
taa po 0.3
fxaa off
What these lines do?
Spoiler:
gr quality 3
gr grid 8
gr scale .4
gr maxcascade 2
These lines modify godrays ( Similar to what Ultra Quality Godrays fix, but more quality good looking and performance friendly than that)
For more Quality Godrays:
gr quality 3
gr grid 12
gr scale .4
gr maxcascade 1
For more Performance Godrays:
gr quality 2
gr grid 7
gr scale .4
gr maxcascade 3
cl rim .002
This line controls lighting on character
setgs iTerminalDisplayRate 1200
This line will make the terminals load the screen faster. (Similar to Faster Terminal Displays, but with no plugin)
setgs fWorkshopWireMaxLength 2200
This line will make power lines longer. (Similar to Longer Power Lines, but with no plugin)
setgs fGunShellLifetime 150
setgs fGunShellCameraDistance 12800
setgs iDebrisMaxCount 375
These lines will make bullets visible for long times after shooting. (Similar to Shell Rain but with no plugin)
setgs iHoursToRespawnCell >> 720
setgs iHoursToRespawnCellCleared >> 2160
These lines increase lenght of area and corpses respawn time. (Similar to Longer Area Respawn but with no plugin)
setgs iRemoveExcessDeadComplexCount 50
setgs iRemoveExcessDeadCount 50
setgs iRemoveExcessDeadComplexTotalActorCount 65
setgs iRemoveExcessDeadTotalActorCount 50
These lines limit the amount of dead actors in the same scene to have a more stable experience.
taa on
taa sharp 0
taa lf 0
taa hf 0.8
taa ps 0
taa po 0.3
fxaa off
These lines modify TAA game effect in order to try and prevent the shimmering or intense sharpening when moving camera around. Altough on my end fixes the problem doesnt mean it does it for you in case you have great fast timing monitors or so. So need feedback on it and alet me know if it makes the whole image worse or better.
Show
gr quality 3
gr grid 8
gr scale .4
gr maxcascade 2
These lines modify godrays ( Similar to what Ultra Quality Godrays fix, but more quality good looking and performance friendly than that)
For more Quality Godrays:
gr quality 3
gr grid 12
gr scale .4
gr maxcascade 1
For more Performance Godrays:
gr quality 2
gr grid 7
gr scale .4
gr maxcascade 3
cl rim .002
This line controls lighting on character
setgs iTerminalDisplayRate 1200
This line will make the terminals load the screen faster. (Similar to Faster Terminal Displays, but with no plugin)
setgs fWorkshopWireMaxLength 2200
This line will make power lines longer. (Similar to Longer Power Lines, but with no plugin)
setgs fGunShellLifetime 150
setgs fGunShellCameraDistance 12800
setgs iDebrisMaxCount 375
These lines will make bullets visible for long times after shooting. (Similar to Shell Rain but with no plugin)
setgs iHoursToRespawnCell >> 720
setgs iHoursToRespawnCellCleared >> 2160
These lines increase lenght of area and corpses respawn time. (Similar to Longer Area Respawn but with no plugin)
setgs iRemoveExcessDeadComplexCount 50
setgs iRemoveExcessDeadCount 50
setgs iRemoveExcessDeadComplexTotalActorCount 65
setgs iRemoveExcessDeadTotalActorCount 50
These lines limit the amount of dead actors in the same scene to have a more stable experience.
taa on
taa sharp 0
taa lf 0
taa hf 0.8
taa ps 0
taa po 0.3
fxaa off
These lines modify TAA game effect in order to try and prevent the shimmering or intense sharpening when moving camera around. Altough on my end fixes the problem doesnt mean it does it for you in case you have great fast timing monitors or so. So need feedback on it and alet me know if it makes the whole image worse or better.
Step 1: Textures Optimization
What This Step Does?
Spoiler:
In your Fallout 4\Data folder you have 15 .ba2 files dedicated to textures and are having a size of 17,5 gb. Normally what you do is installing textures mods as loose files or in the best case as new added .ba2 files, but these textures you are installing are even in the 15 .ba2 files you yet have in Data folder, just modded. When you start installing textures, really heavy usually, or performance textures and so on, you add to the 17,5 gb of textures many more gb for the game to load, making the game extremely more unstable, heavy and slow in in-game performance and loading screen.
With my method, created years and years ago for fallout 4 and Skyrim communities, i managed to make the modded textures to overwrite the files inside the vanilla .ba2 files actually replacing the vanilla textures. Thanks to this with the same setup of mods you will gain a 30% or more performance and stability compared to just installing things normally without using my modding method.
Tough, doing this process required me a full week of work to be done completely, and even if the result in the beginning was impressive, i couldn't give such a process to the public and make you suffering from it. For a lot i studied coding and made a fully functional and working installer that could have done the Whole process automatically and in just a couple of hours on weakest systems, a massive time saver compared to the raw method i used.
But in the beginning of this project, even if for my standards the time saved was impressive, for many it was still tedious to download and install each single mod, possibly unpacking the .ba2 files coming with them and so on. That's where the repacks come from. They are the representation of a community of mod authors that are kindly giving permissions to let this new method be more easy to be introduced on the Whole modding scene, and I can't ever thank them enough. Today the repacks got so many mods that are the real representation of the best textures package one can get for fallout 4 currently, and that surely help on a download, install, unpack process you previously had to do and now not anymore.
Show
In your Fallout 4\Data folder you have 15 .ba2 files dedicated to textures and are having a size of 17,5 gb. Normally what you do is installing textures mods as loose files or in the best case as new added .ba2 files, but these textures you are installing are even in the 15 .ba2 files you yet have in Data folder, just modded. When you start installing textures, really heavy usually, or performance textures and so on, you add to the 17,5 gb of textures many more gb for the game to load, making the game extremely more unstable, heavy and slow in in-game performance and loading screen.
With my method, created years and years ago for fallout 4 and Skyrim communities, i managed to make the modded textures to overwrite the files inside the vanilla .ba2 files actually replacing the vanilla textures. Thanks to this with the same setup of mods you will gain a 30% or more performance and stability compared to just installing things normally without using my modding method.
Tough, doing this process required me a full week of work to be done completely, and even if the result in the beginning was impressive, i couldn't give such a process to the public and make you suffering from it. For a lot i studied coding and made a fully functional and working installer that could have done the Whole process automatically and in just a couple of hours on weakest systems, a massive time saver compared to the raw method i used.
But in the beginning of this project, even if for my standards the time saved was impressive, for many it was still tedious to download and install each single mod, possibly unpacking the .ba2 files coming with them and so on. That's where the repacks come from. They are the representation of a community of mod authors that are kindly giving permissions to let this new method be more easy to be introduced on the Whole modding scene, and I can't ever thank them enough. Today the repacks got so many mods that are the real representation of the best textures package one can get for fallout 4 currently, and that surely help on a download, install, unpack process you previously had to do and now not anymore.
Spoiler:
This step takes quite a while to fully complete but can be even made whenever you want, during or at the end of the following mod list.
ATTENTION: Only if you use Nexus Mod Manager and you decided to do this after one or more Steps of the following ones instead of the given order, to not mess things up you must rename the Fallout 4\Data\Textures folder to TexturesBackup, then do the following 1-2-3 sections completely. After that rename the Fallout 4\Data\TexturesBackup folder back to Textures and do the last 4 section.
1.
- Download my WorkBase file and extract it to a drive that has a lot of free space. DO NOT put it in either Program Files or Program Files (x86) folders on your operating system drive.
- Copy the Following 15 Textures.ba2 files from Fallout 4/Data folder to my WorkBase/OriginalBa2 folder. Always keep a Backup of these files.
Fallout4 - Textures1.ba2
Fallout4 - Textures2.ba2
Fallout4 - Textures3.ba2
Fallout4 - Textures4.ba2
Fallout4 - Textures5.ba2
Fallout4 - Textures6.ba2
Fallout4 - Textures7.ba2
Fallout4 - Textures8.ba2
Fallout4 - Textures9.ba2
DLCworkshop01 - Textures.ba2
DLCworkshop02 - Textures.ba2
DLCworkshop03 - Textures.ba2
DLCRobot - Textures.ba2
DLCCoast - Textures.ba2
DLCNukaWorld - Textures.ba2
2.
To compare the Graphic Card Recommendations with yours just use UserBenchmark site comparison.
- Performance Overhaul - Download and install this Repack to have the best Performance overhaul available on Nexus site, including 30+ thousands textures compressed in BC7 format to enhance more fps and stability.
- Use with the Main Repack if you intend to greatly optimize the textures not covered by it and select 1k or 2k options on the main repack to ensure the most important textures of the game are well retextured in quality. Perfect mix of quality textures and performance boost.
- Recommended on Low-End PC Systems (Same or less powerful than a GTX 1060).
- Main Repack - Download and install the three parts from my Main Files section. This repack is really a must for everyone, with 15k textures of 1k, 2k and a bunch of 4k sizes that are of the most optimized and performance friendly, granting both better quality than vanilla and more performance.
- Quality Addon - Requires the Main Repack. Download and install both parts from my optional files to get the best quality overhaul available on nexus site, including 6k textures to expand and improve what the Main Repack has. If you are looking for the max possible textures quality and amount, this combo is all you need.
- Recommended on High-End Pc systems only (Same or more powerful than a GTX 1660ti)
- Restyle Pack - Compatible with all packs or combos you used before. Download it from my optional files and install it. During Installer pick what you want. This pack includes those big restyles mods so that they don't bother those looking for vanilla enhanced textures but which many like me still prefer to use.
3.
- Cut and paste the Fallout 4\Data\Textures folder to the WorkBase/PatchedFiles folder so that it is no more in Data cause now we will integrate it into the 15 .ba2 files.
[MO2 Users: Move in order of Installation the Textures folder in each Addon\Pack you installed with MO2 to the WorkBase\PatchedFiles folder. You can find the Textures folders by right clicking on MO2 over the installed Addon\Pack and Selecting the Open in Explorer option].
You can even uninstall the Main Repack and the Addons from your Manager after moving the Textures folder so you get less useless overwriting prompts from other mods.
- Run the installer.bat file (NOT with Administrator Privileges) in my WorkBase Folder and wait for it to finish (it takes some time to finish depending on your system, 1 hour and half on 12 CPU Cores. Be sure you have enough space in the drive and that you don't overheat cpu while processing the installer. Also don't worry about the text inside the installer like file not found or something like that, if files are processing it means it's working and you'll have them all in the patchedba2 folder). In the end close the installer, go to the WorkBase\PatchedBa2 folder and copy all the 15 .ba2 files to Fallout 4\Data folder.
- If you have problems with the installer like it closes itself immediately, it means your pc is not properly up to date and you need to use the following fix:
Microsoft Visual C++ Update 3 - Download it and select the 2 files x64 and x86 only, then click next and run both of them. Install them both and then try running the installer again.
4.
To fix the Metal Shine bug coming from doing this process simply drag and drop the Cubemap Fix archive inside the WorkBase folder to NMM/MO2 manager window and then install it.
Show
This step takes quite a while to fully complete but can be even made whenever you want, during or at the end of the following mod list.
ATTENTION: Only if you use Nexus Mod Manager and you decided to do this after one or more Steps of the following ones instead of the given order, to not mess things up you must rename the Fallout 4\Data\Textures folder to TexturesBackup, then do the following 1-2-3 sections completely. After that rename the Fallout 4\Data\TexturesBackup folder back to Textures and do the last 4 section.
1.
- Download my WorkBase file and extract it to a drive that has a lot of free space. DO NOT put it in either Program Files or Program Files (x86) folders on your operating system drive.
- Copy the Following 15 Textures.ba2 files from Fallout 4/Data folder to my WorkBase/OriginalBa2 folder. Always keep a Backup of these files.
Fallout4 - Textures1.ba2
Fallout4 - Textures2.ba2
Fallout4 - Textures3.ba2
Fallout4 - Textures4.ba2
Fallout4 - Textures5.ba2
Fallout4 - Textures6.ba2
Fallout4 - Textures7.ba2
Fallout4 - Textures8.ba2
Fallout4 - Textures9.ba2
DLCworkshop01 - Textures.ba2
DLCworkshop02 - Textures.ba2
DLCworkshop03 - Textures.ba2
DLCRobot - Textures.ba2
DLCCoast - Textures.ba2
DLCNukaWorld - Textures.ba2
2.
To compare the Graphic Card Recommendations with yours just use UserBenchmark site comparison.
- Performance Overhaul - Download and install this Repack to have the best Performance overhaul available on Nexus site, including 30+ thousands textures compressed in BC7 format to enhance more fps and stability.
- Use with the Main Repack if you intend to greatly optimize the textures not covered by it and select 1k or 2k options on the main repack to ensure the most important textures of the game are well retextured in quality. Perfect mix of quality textures and performance boost.
- Recommended on Low-End PC Systems (Same or less powerful than a GTX 1060).
- Main Repack - Download and install the three parts from my Main Files section. This repack is really a must for everyone, with 15k textures of 1k, 2k and a bunch of 4k sizes that are of the most optimized and performance friendly, granting both better quality than vanilla and more performance.
- Quality Addon - Requires the Main Repack. Download and install both parts from my optional files to get the best quality overhaul available on nexus site, including 6k textures to expand and improve what the Main Repack has. If you are looking for the max possible textures quality and amount, this combo is all you need.
- Recommended on High-End Pc systems only (Same or more powerful than a GTX 1660ti)
- Restyle Pack - Compatible with all packs or combos you used before. Download it from my optional files and install it. During Installer pick what you want. This pack includes those big restyles mods so that they don't bother those looking for vanilla enhanced textures but which many like me still prefer to use.
3.
- Cut and paste the Fallout 4\Data\Textures folder to the WorkBase/PatchedFiles folder so that it is no more in Data cause now we will integrate it into the 15 .ba2 files.
[MO2 Users: Move in order of Installation the Textures folder in each Addon\Pack you installed with MO2 to the WorkBase\PatchedFiles folder. You can find the Textures folders by right clicking on MO2 over the installed Addon\Pack and Selecting the Open in Explorer option].
You can even uninstall the Main Repack and the Addons from your Manager after moving the Textures folder so you get less useless overwriting prompts from other mods.
- Run the installer.bat file (NOT with Administrator Privileges) in my WorkBase Folder and wait for it to finish (it takes some time to finish depending on your system, 1 hour and half on 12 CPU Cores. Be sure you have enough space in the drive and that you don't overheat cpu while processing the installer. Also don't worry about the text inside the installer like file not found or something like that, if files are processing it means it's working and you'll have them all in the patchedba2 folder). In the end close the installer, go to the WorkBase\PatchedBa2 folder and copy all the 15 .ba2 files to Fallout 4\Data folder.
- If you have problems with the installer like it closes itself immediately, it means your pc is not properly up to date and you need to use the following fix:
Microsoft Visual C++ Update 3 - Download it and select the 2 files x64 and x86 only, then click next and run both of them. Install them both and then try running the installer again.
4.
To fix the Metal Shine bug coming from doing this process simply drag and drop the Cubemap Fix archive inside the WorkBase folder to NMM/MO2 manager window and then install it.
Step 2: Core Mods & Fixes
Spoiler:
1.
-Achievements
- Mod Configuration Menu
- PrivateProfileRedirector F4
- Faster Workshop
- Crafting Highlight Fix
- Unofficial Fallout 4 Patch
- Workshop Framework
- Boston FPS Fix - Download the AIO main file and the PaladinBaileyRedRocket optional file. Install them in order.
- Flicker Fixer - During Installer select Next and Finish.
- Raw Input - During installer select Finish.
- Companion Stealth Distance Fix - During Installer just select finish.
2.
- LooksMenu Customization Compendium - (The Looksmenu Requirement is not a real one, its abusing the nexus category just for a simple crediting, don't install it thinking it's required)
- CBBE - During the Installer Select your preferences
- Merged Mods - Fixes - Download it from my Update Files and install it. During installer select Finish for the AIO option. On Nexus Mod Manager Plugins tab move the Merged Fixes.esp above the CBBE.esp one, so before it.[For MO2 Users:On Mod Organizer 2 be sure to load the Merged Fixes.esp before or above the CBBE.esp one].
- Armor and Weapon Keywords Community (AWKCR) - Download only the first main file and install it. During the installer, on the second panel select the CBBE Patch option, then on the third panel select Finish.
- Armorsmith Extended
- CBBE Underwear Retexture for Armorsmith Extended
Show
1.
-Achievements
- Mod Configuration Menu
- PrivateProfileRedirector F4
- Faster Workshop
- Crafting Highlight Fix
- Unofficial Fallout 4 Patch
- Workshop Framework
- Boston FPS Fix - Download the AIO main file and the PaladinBaileyRedRocket optional file. Install them in order.
- Flicker Fixer - During Installer select Next and Finish.
- Raw Input - During installer select Finish.
- Companion Stealth Distance Fix - During Installer just select finish.
2.
- LooksMenu Customization Compendium - (The Looksmenu Requirement is not a real one, its abusing the nexus category just for a simple crediting, don't install it thinking it's required)
- CBBE - During the Installer Select your preferences
- Merged Mods - Fixes - Download it from my Update Files and install it. During installer select Finish for the AIO option. On Nexus Mod Manager Plugins tab move the Merged Fixes.esp above the CBBE.esp one, so before it.[For MO2 Users:On Mod Organizer 2 be sure to load the Merged Fixes.esp before or above the CBBE.esp one].
- Armor and Weapon Keywords Community (AWKCR) - Download only the first main file and install it. During the installer, on the second panel select the CBBE Patch option, then on the third panel select Finish.
- Armorsmith Extended
- CBBE Underwear Retexture for Armorsmith Extended
Step 3: UI/HUD & Camera
Spoiler:
1.
- Extended Dialogue Interface
- DEF_UI - Download both main files and install them.
During the first file's installer, on the second panel select DEF_HUD and DEF_INV options, one Language and Screen Ratio based on your preferences, then next and On the fourth panel select "I already have XML files" option, then click and select Finish.
Delete the Translate_xx.txt file from Fallout 4\Data\Interface folder.
[MO2 Users: On MO2 Right-Click over DEF_UI and Select Information, then go to the File tree tab, click the arrow next to interface, right-click over the Translate_xx.txt file and Select Delete or Hide, then click Close].
Download and install my HUD preset from my miscellaneous files for a better and less annoying HUD.
- HUDFramework
- Power Armor HoloHUD
- Immersive HUD
2.
-VIS-G Item Sorting - During Installer Select Next, Vanilla Weight and then your monitor Resolution (16x9 is recommended)
- Crafting Framework - During Installer Select Finish.
3.
- Alex's Male First Person Camera Height Fix
- Ultimate Colored Vault Boy Animations Overhaul
- QuickTrade Redux
Show
1.
- Extended Dialogue Interface
- DEF_UI - Download both main files and install them.
During the first file's installer, on the second panel select DEF_HUD and DEF_INV options, one Language and Screen Ratio based on your preferences, then next and On the fourth panel select "I already have XML files" option, then click and select Finish.
Delete the Translate_xx.txt file from Fallout 4\Data\Interface folder.
[MO2 Users: On MO2 Right-Click over DEF_UI and Select Information, then go to the File tree tab, click the arrow next to interface, right-click over the Translate_xx.txt file and Select Delete or Hide, then click Close].
Download and install my HUD preset from my miscellaneous files for a better and less annoying HUD.
- HUDFramework
- Power Armor HoloHUD
- Immersive HUD
2.
-VIS-G Item Sorting - During Installer Select Next, Vanilla Weight and then your monitor Resolution (16x9 is recommended)
- Crafting Framework - During Installer Select Finish.
3.
- Alex's Male First Person Camera Height Fix
- Ultimate Colored Vault Boy Animations Overhaul
- QuickTrade Redux
Step 4: Clothes\Armors - Gadgets - Weapons
Spoiler:
1.
- Visible Weapons
- Just Visible Holstered Weapons - Download the last optional file only and install it.
- Holsters and Sheats - Download the optional file only and install it.
- Fallout 3 Vault Suit - During Installer Select Next, Next, Next, CBBE Curvy + Bodyslide, Fallout 3 Style - Replacer and Finish.
- The Mercenary Pack - Download the 0.9a main file and install it. (From the 0.9b and 0.9a there's no difference but the CBBE one comes Loose just so that you can easily use Bodyslide tool to fit the clothes to the body, but since we don't use it just go for the 0.9a that is extremely nice anyway)
- Mercenary Outfit Mash-ups
- K-9 Harness - Download the second main file and the armorsmith plus def_ui optional file. Install them in order
2.
- Tactical Flashlights - During Installer, on the second panel: Select 100% with no shadows.
- PreWar Binoculars- During installer pick AWKCR binoculars option and standard viewfinder.
Show
1.
- Visible Weapons
- Just Visible Holstered Weapons - Download the last optional file only and install it.
- Holsters and Sheats - Download the optional file only and install it.
- Fallout 3 Vault Suit - During Installer Select Next, Next, Next, CBBE Curvy + Bodyslide, Fallout 3 Style - Replacer and Finish.
- The Mercenary Pack - Download the 0.9a main file and install it. (From the 0.9b and 0.9a there's no difference but the CBBE one comes Loose just so that you can easily use Bodyslide tool to fit the clothes to the body, but since we don't use it just go for the 0.9a that is extremely nice anyway)
- Mercenary Outfit Mash-ups
- K-9 Harness - Download the second main file and the armorsmith plus def_ui optional file. Install them in order
2.
- Tactical Flashlights - During Installer, on the second panel: Select 100% with no shadows.
- PreWar Binoculars- During installer pick AWKCR binoculars option and standard viewfinder.
Step 5: Factions
Spoiler:
1.
- We Are the Minutemen
- Raider Overhaul - Download the 11.4c optional file and install it.
- AE Patch - Download the AE Replacer Raider Overhaul v11.4c v4 optional file and install it.
- Improved Bos- Download the Improved BoS Redux main file and install it.
- CROSS_BrotherhoodRecon
- Super Mutant Redux - Download the SD main file and install it. During Installer, on the second panel select SuperMutantRedux_ArmorSmithExtended.esp and SueperMutantRedux VIS-G Patch plugins, then Click on Finish.
2.
- Cross_InstituteExpeditionarySuit - Download both the main and optional files. Install them in order.
- IEX Suit AE VIS Patch - Download the first main file and first optional file. Install them in order.
- CROSS_Courser Strigidae
- Synth Overhaul - Download a .ba2 main file and the update file. Install them in order.
During the first file's installer, on the first panel Select your preference. In the second panel select AWKCR + AE option. In the third panel select Remove level Requirements. Do the same for the update file.
- AE Patch - Download the AE VIS-G Replacer Synth Overhaul v3.0.4 optional file and install it.
- CROSS_Chosen_Of_Atom
Show
1.
- We Are the Minutemen
- Raider Overhaul - Download the 11.4c optional file and install it.
- AE Patch - Download the AE Replacer Raider Overhaul v11.4c v4 optional file and install it.
- Improved Bos- Download the Improved BoS Redux main file and install it.
- CROSS_BrotherhoodRecon
- Super Mutant Redux - Download the SD main file and install it. During Installer, on the second panel select SuperMutantRedux_ArmorSmithExtended.esp and SueperMutantRedux VIS-G Patch plugins, then Click on Finish.
2.
- Cross_InstituteExpeditionarySuit - Download both the main and optional files. Install them in order.
- IEX Suit AE VIS Patch - Download the first main file and first optional file. Install them in order.
- CROSS_Courser Strigidae
- Synth Overhaul - Download a .ba2 main file and the update file. Install them in order.
During the first file's installer, on the first panel Select your preference. In the second panel select AWKCR + AE option. In the third panel select Remove level Requirements. Do the same for the update file.
- AE Patch - Download the AE VIS-G Replacer Synth Overhaul v3.0.4 optional file and install it.
- CROSS_Chosen_Of_Atom
Step 6: Gameplay
Spoiler:
1.
- Everyone's Best Friend
- Lore-Based Power Armor Changes - During Installer Select Next, Next and AWKCR Patch, then finish.
- Immersive Fallout - During Installer select Default installation, then DLC and Raw Input patch options, then finish.
- See-Through Combat Scopes - During Installer Select: Replace, Install and Merge both DLC's option and Remove lens reflection when aiming option, then click next and finish.
- Better Cooking Stations - Download the main file and the Far Harbor plus Nuka World patch optional file. Install them in order.
- Better Cooking Stations Immersive Patch - Download the first main file and install it.
- Better Explosives Redux
- Better Locational Damage -
Download the first main file and install it.Show
1.
- Everyone's Best Friend
- Lore-Based Power Armor Changes - During Installer Select Next, Next and AWKCR Patch, then finish.
- Immersive Fallout - During Installer select Default installation, then DLC and Raw Input patch options, then finish.
- See-Through Combat Scopes - During Installer Select: Replace, Install and Merge both DLC's option and Remove lens reflection when aiming option, then click next and finish.
- Better Cooking Stations - Download the main file and the Far Harbor plus Nuka World patch optional file. Install them in order.
- Better Cooking Stations Immersive Patch - Download the first main file and install it.
- Better Explosives Redux
- Better Locational Damage -
During Installer Select: Ghouls version, Better Cooking Valdacil, BV - NR and Better Chems.
Go to the Plugins tab and move Better locational damage plugins so that they are in the following order and below Better Explosives plugins:
Better Locational Damage.esp
Better Locational Damage - DLC_Automatron.esp
Better Locational Damage - DLC_WWorkshop.esp
Better Locational Damage - DLC_Far_Harbor.esp
Better Locational Damage - DLC_Nuka_World.esp
BLD - Leveled Lists - DLC.esp
SuperMutantRedux.esp
SuperMutantRedux_ArmorSmithExtended.esp
SuperMutantRedux VIS-G Patch.esp
Better Locational Damage - Ghoul Edition.esp
Better Perks.esp
Better VATS - No Reduction.esp
Better Cooking.esp
Better Chems.esp
When you are in game, Pause it and go to the Mod Config menu. On the Better Locational Damage Settings be sure to turn Bleedings Off.
Step 7: Player/NPCs Looks & Animations
Spoiler:
Show
1.
- Misc Hairstyles and Beards - Download the 2 files at the bottom of the page and open them, Create a folder on the Desktop named Data and extract both files content to it. Rename MoreHairstyles4Female.esp to MoreHairstyles4Female4.1.esp and MoreHairstyles4Male.esp to MoreHairstyles4Male3.1.esp.
Now Right-Click over the just created Data folder and Select Add to archive... option. Here rename it as Misc Hairstyle and change the Archive Format to Zip one and select ok. Wait for it to finish. Now move the created Archive inside Nexus Mod Manager\Mod Organizer 2 and install it.
- Commonwealth Cuts
- The Eyes Of Beauty - During Installer select next till end.
- Ghastly - Download the All in One main file and install it.
- Deluxe Makeup - Download both files and install them.
2.
- Merged Mods - Appearance - Download it from my Update files and install it. During Installer Select Finish or Custom if you prefer it.
- Captivating Companions - Download the Misc Hair (Cait with No Tattoos) optional file and install it.
- Charming Cito
- Determined Desdemona - Download the vanilla hair main file and install it.
- Kind Kasumi - Download the first optional file and install it.
- Manly Mason - Download the Eyes of Beauty main file and install it.
- Mesmerizing Magnolia
- Mighty Maxson - Download the with Beard main file and install it.
- Money Mags - Download the alternate hair optional file and install it.
- Nasty Nisha - Download the second main file and install it.
- The New Settlers
3.
- Stay Focused Son
- Automatically Lowered Weapons
Step 8: Settlements & Quests
Spoiler:
1.
- Place Everywhere
- Settlement Menu Manager - Download and install the first main file.
- Workshop Rearranged
- Sim Settlements - Download the Three-In-One main file and install it.
- Salvage Beacons
- SKK Settlement Attack System - Download both main and optional file and install them in order.
- SKK Combat Settlers
2.
- Fusion City Rising
- Outcasts and Remnants
- Project Valkyrie
- Depravity
If you want to install quests mods from section 2, be sure you install all of them, they play greatly together and some require eachothers. Remember that these are quite heavy considering they are all Loose Unlucky, and may increase loading times by a lot.
Show
1.
- Place Everywhere
- Settlement Menu Manager - Download and install the first main file.
- Workshop Rearranged
- Sim Settlements - Download the Three-In-One main file and install it.
- Salvage Beacons
- SKK Settlement Attack System - Download both main and optional file and install them in order.
- SKK Combat Settlers
2.
- Fusion City Rising
- Outcasts and Remnants
- Project Valkyrie
- Depravity
If you want to install quests mods from section 2, be sure you install all of them, they play greatly together and some require eachothers. Remember that these are quite heavy considering they are all Loose Unlucky, and may increase loading times by a lot.
Step 9: Environment/Visuals & Audio
Spoiler:
1.
- Merged Mods - Visuals - Download and install it from my Update files. Once installed If you don't use BLD from Step 6, unselect the Patch BLD-HBT.esp plugin from the Plugins Tab in Nexus Mod Manager.
- WET - During Installer select the WET Assets With Rain and the WET Clearer (ESP) options.
- Ultra Interior Lighting
2.
- Pip-Boy Flashlight - Download the BETA main file and install it.
- Thaylar's Settlement Lighting Fixes - Download the second main file and install it, then Unselect the Thaylar Lighting 3.2 VTWO Patch.esp from the plugins tab in NMM or delete it from Fallout 4/Data folder.
- Power Armor Impact FX Overhaul - Download the 1.4 old file and install it
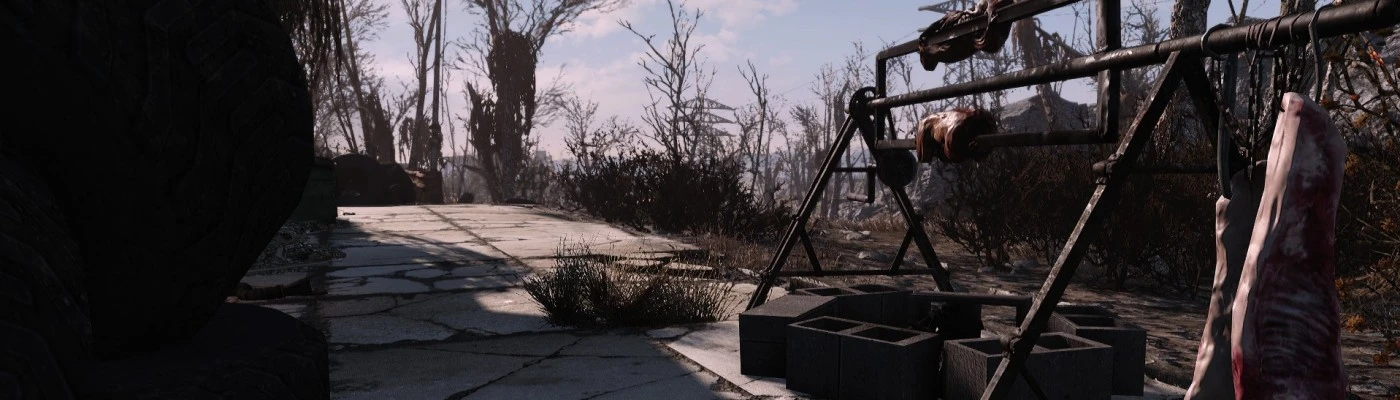
- Swinging Animated Meat Bags
3.
- Merged Mods - Audio - Download it from my Update files and install it. During Installer Select Finish or Custom if you prefer it.
- Quieter Settements - Download and install the optional file only.
- Realistic Conversations
Show
1.
- Merged Mods - Visuals - Download and install it from my Update files. Once installed If you don't use BLD from Step 6, unselect the Patch BLD-HBT.esp plugin from the Plugins Tab in Nexus Mod Manager.
- WET - During Installer select the WET Assets With Rain and the WET Clearer (ESP) options.
- Ultra Interior Lighting
2.
- Pip-Boy Flashlight - Download the BETA main file and install it.
- Thaylar's Settlement Lighting Fixes - Download the second main file and install it, then Unselect the Thaylar Lighting 3.2 VTWO Patch.esp from the plugins tab in NMM or delete it from Fallout 4/Data folder.
- Power Armor Impact FX Overhaul - Download the 1.4 old file and install it
- Swinging Animated Meat Bags
3.
- Merged Mods - Audio - Download it from my Update files and install it. During Installer Select Finish or Custom if you prefer it.
- Quieter Settements - Download and install the optional file only.
- Realistic Conversations
Step 10: Patches
Spoiler:
- Configurable Minutemen Radiant Quest Limits and Fixes - During Installer Select Next and then Finish.
- Schnips's VIS-G Patches - Download the VIS-G Patches - BiRaitBec ModList - Fomod main file and install it. During Installer Select Finish.
- Wrye Bash - Download the Standalone Executable main file and open it. Extract the Mopy folder to the Fallout 4 main one and run the Wrye Bash.exe file inside the extracted folder. [MO2 Users: Run Wrye Bash with MO2 Closed once, then after it's opened, just close it. Now open MO2 again and from now on you must run the Wrye Bash program from MO2 window every time you need it, so on the top right of mo2 select the bar on the left of the Orange Arrow, and select Edit, here on binary select the Wrye Bash folder inside the Mopy one on the Fallout 4 main directory folder and as a title type Wrye Bash, then run it from there. Remember that if you have issues with Wrye Bash and Mo2 be sure to update Windows to it's latest updates, otherwise they do not work together.] (If you have installed Better Locational Damage mod you must select the BLD - Leveled Lists - DLC.esp, after that right click over the Bash Tags window on the bottom right of the program and select Delev, then do the same and select Relev as well).
Scroll to the bottom of the load order and Select the Bashed Patch.esp box. Right click on it and select Rebuild Patch. In the popup window select Build Patch. After it finishes when it asks to activate the Bashed Patch.esp say yes. You can close the program now.
Show
- Configurable Minutemen Radiant Quest Limits and Fixes - During Installer Select Next and then Finish.
- Schnips's VIS-G Patches - Download the VIS-G Patches - BiRaitBec ModList - Fomod main file and install it. During Installer Select Finish.
- Wrye Bash - Download the Standalone Executable main file and open it. Extract the Mopy folder to the Fallout 4 main one and run the Wrye Bash.exe file inside the extracted folder. [MO2 Users: Run Wrye Bash with MO2 Closed once, then after it's opened, just close it. Now open MO2 again and from now on you must run the Wrye Bash program from MO2 window every time you need it, so on the top right of mo2 select the bar on the left of the Orange Arrow, and select Edit, here on binary select the Wrye Bash folder inside the Mopy one on the Fallout 4 main directory folder and as a title type Wrye Bash, then run it from there. Remember that if you have issues with Wrye Bash and Mo2 be sure to update Windows to it's latest updates, otherwise they do not work together.] (If you have installed Better Locational Damage mod you must select the BLD - Leveled Lists - DLC.esp, after that right click over the Bash Tags window on the bottom right of the program and select Delev, then do the same and select Relev as well).
Scroll to the bottom of the load order and Select the Bashed Patch.esp box. Right click on it and select Rebuild Patch. In the popup window select Build Patch. After it finishes when it asks to activate the Bashed Patch.esp say yes. You can close the program now.
WHEN FALLOUT 4 UPDATES
When the game gets an official update, your F4SE and the mods using its full features will be broken, causing a Crash to Desktop on Launch.
To avoid that for next update go on steam library, right click over Fallout 4, select properties and in the Updates tab, on the Automatic Updates selection, select Only update this game when I launch it, in this way, since you run it from f4se, it won't start updating when you launch it from f4se .exe.
If instead it got updated just do as follows:
- Delete the f4se_1_10_XXX.dll you have in your Fallout 4 Main Directory folder.
- Wait for F4SE Team to update their tool and then repeat the F4SE installation in Step 0.
- Wait for the following mods/files to update for the latest F4SE version and install them again.
Mod Configuration Menu
Crafting Highlight Fix
def_ui_translations main file.
Extended Dialogue Interface
Place Everywhere
CREDITS
Leave an Endorsement to these mods and kudos to authors.
They kindly shared their work to make installation process easier and faster for all.
(I've all permissions from authors involved granted by personal messages in almost all cases or from usage approves in their mod pages Permisson tab)
Main Repack
- HD DLC Armor and Clothes, HD Vanilla Clothes, HD Vanilla Armor, Super Mutant HD Armor, Creature Pack DLC Redone, Better Robots and HD Liberty Prime, Weapon HD DLC, Organic Gore, Power Armor HD DLC, Synth HD, Organic Super Mutant, Junk and Props DLC, Food and Foodware, HD Settlement and Clutters, HD 1k Buildings and Interior, Detailed Hair, HD Vanilla Landscape and Landscape Interior Building DLC by SavrenX
- Enhanced Blood Textures by dDefinder1
- Thaylar's Armor and Clothing Enhanced by thaylar
- BoS Jumpsuit Retexture by guidethisonekalaheria
- Power Armor Jetpack HD by dpillari
- More Realistic Pipe Weapons by AlexSlesh
- Assault Rifle Retexture AR-51 and Better Ammo Boxes by DeviousMeth0ds
- Dogmeat 4k Optimized by SavrenX
- Detailed Deathclaws by jimhsu
- Detailed Feral Ghouls by erkprok
- Police Protectron Re-Texture by Nikoli Grimm
- Vivid Fallout All in One by Hein84
- HD Alien UFO Retexture by jiveo123
- Better Settlements and Camps 2 and Haul'd Out by DUST2DEATH
- 2287 - Billboards and Posters by Apolocrato
- Improved holotapes by ClearanceClarence
- Stromberg Retexture Project by Stromberg90
- Far Harbor Pine Branches 4k, Defined HighTech Floor Tiles, Fix For Tiles02, Fix For Forsythia and Finer Vanilla Vines 4k by mediasylum
- Wasteland Nights by CptJoker71
- Bottles Labels Overhaul by BlastoLho
- Monkey Trap HD by mm137
- Proper Flyers and Posters by mindkiller316
- Retex_Skeletons by kj666
- HD Lockpick Interface by dpillari
Performance Overhaul
- Performance Textures by Nero1024
- Potato Textures by kkthebeast
- Optimized Vanilla Textures by AlpineYJ
Quality Addon
- Grafix Texture Overhaul by koojinn
- PhyLight All in One Textures by Phylith
- Thaylar's Armor and Clothing Enhanced by thaylar
- Assault Rifle Retexture AR-51 by DeviousMeth0ds
- Detailed Deathclaws by jimhsu
- Detailed Feral Ghouls by erkprok
- Vivid Fallout All in One by Hein84
- Better Settlements and Camps 2 and Haul'd Out by DUST2DEATH
- Improved holotapes by ClearanceClarence
- Bottles Labels Overhaul by BlastoLho
- Proper Flyers and Posters by mindkiller316
- luxor8071's HD Texture Pack AIO, luxor8071's HD Texture Pack AIO Pt2, luxor8071's HD Texture Pack AIO Pt3, luxor8071's HD Texture Pack AIO Pt4, Vault 111 HD, Diamond City HD, Interiors HD and Real Water HD by luxor8071
- The Lavish Laser Collection, The Top-Notch TommyGun, The Delightful Deliverer, The Radical Ripper, The Meritable Minigun, Power Armor Jetpack HD, Power Armor Frame 4k UHD and T51 4k UHD by dpillari
Restyle Pack
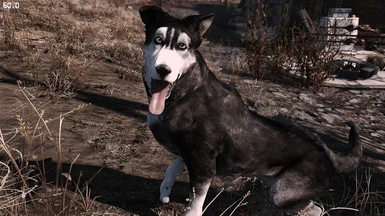
- Shadow the Dark Husky Companion, Siberian Husky and Classic Dogmeat a.k.a. Pirate by 7iger
- Evil Institute by bLaCkShAd0w
- Perk Grid Background Replacer by Cthorthu
Merged Mods - Fixes
- Console Enabler by BiRaitBec
- Power Armor Map Fix by spanian77
- Smooth First Person Sprint and Water LOD Fix by Bretton
- Barber and Surgeon Camera Fix by k4tonic
- 3rd Person Beard Fix by Karniage
- FSM Body Textures by fsm135, Caliente, Ousnius, Jeir, XunAmarox, xs2reality and Fuse00
- CBBE Headrear Fix by alan81512
- Female Rear Head Clipping Fix by QuietPippin
- No Aggro Impact Landing by mm137
- Fixed Alpha Maps by ScottyX2
- HD Lensflare by MystiriousDawn
- X-01 Invisible Flashlight Remove by Castell
- Skeletal Adjustaments for CBBE by SQr17
Merged Mods - Appearance
- Appealing Moles by JTesmer
- Lots More Male Hairstyles and Lots More Facial Hair by rbddc12
- Hair Tones Redux by radbeetle
- AlexScorpions Male Body Retexture by AlexScorpion
- Eyewear and Mask Retexture by Castell
- Live Action Mr. Handy by Pyrota111000
- Floppy Eared Dogmeat by MissMorose
- Concord NPC Overhaul by EnclaveOverlord1
- Minutemen Faces Overhaul and Diamond City Faces Overhaul by SeriouslySarcastic
- Varied Diamond City Guards and Varied Gunner Mercenaries by Cthulhuandme
- Sexy Hancock by Dysthe
- Alternative Walk Animation and New Alternative Animations by onymaru9
- 10mm Pistol Reanimation Pack, Revolver Reanimation Pack, Reanimation Pack for Combat Shotgun and Rifle, DoubleBarrel Shotgun Reload Animation and Right-handed SubmachineGun by wardaddy755
- Laser Weapons 1st Person Reposition by akir4 and wardaddy755
- Hunting Rifle Animation Replacer by hitman47101
- Fiddler's Deliverer Animation Replacer by FiddlerGreen
Merged Mods - Visuals
- Clarity by Bretton
- Hollywood Bullet Tracers and Hollywood Lasers by Flecked
Merged Mods - Audio
- Project Reality Footsteps FO4 by HULKHOD3N and Project Reality
- Barefoot Footsteps by GrozaTerroristow
- Better Automatic Weapon Sounds by AngryZealot
- Commonwealth Gunfire Overhaul by bluechipmunk1225
- Immersive Squeaky Doors by Hicsuntdracones1
- Power Armor Intercom Voice and Resynched Power Armor Handling Sounds by LolzMan1325
- P.A.M.S. by ONIXer
- Cinematic Sounds - Explosions by OlFosterlO
- Terrifyer Ghouls by taylorlongboard
- Inner City Ambience by Zorkaz
- Reverb and Ambience Overhaul by mm137
- Decreased Subway Announcement Sound by kakinotane2000
- Reverb and Ambiance Overhaul - Vault Reverb Patch by jakelad
- Radio Reverb Fix by TheKetzku
BRB ENB
- ENBSeries by Boris Vorontsov
- Advanced Depth of Field by Marty McFly
- Remade by BiRaitBec
VIS-G Official Patches by Schnips and NexusKrendl
FOMOD Creation Tool by Wenderer
MO2 Infos by Marayoor
Special Thanks to:
FoxHunter69, mikazu, rayhne, ApoAlaia, PaleRiderx, undeadrat, ChutneyBadger, Spawn1702, mupp3n, Aryius, mailleweaver, Kiedra666, kippOmen, Venlafaxin, Arcanant, Kal_Choedan, Ape75, titostalokito, Shevyi, popej, CrimsonKnight98, ImNotDexDex, DrawVid, Stejawiko, KhatsworthAlt, mrb783, TGM2018, ThatFeelIknowIt, Marayoor, Schnips, adamtasma
These users joined this page in a really good way. They've been helpful, creative, useful for infos and updates.
(The List will be updated constantly chronologically)