About this mod
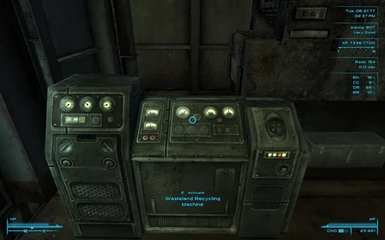
\"We\'re cleaning up the Capitol Wasteland... one random item at a time!\" Welcome to the Bad Ass Wasteland Recycle Machine!! WHOOOO!! This mod provides a service to all those scavengers of the wasteland, by converting various piles of metal items into Scrap Metal! It recycles junk items as well as unused schematic components!
- Permissions and credits
Author: Shiholude
Version: 1.2
Date: March 18, 2011
Category: Gameplay Effects and Changes
==============
Latest News:
==============
(March 19, 2011)
Updates:
-Version changed to 1.2
Changes:
-New parts for all the WRM's have finally arrived! Now the machines will "silently" remove parts from your backpacks (no message in the upper left corner). The machine will still inform you of how many scrap parts you received.
(April 5, 2010)
Updates:
-Added machines to Megaton and Tenpenny Tower.
-Version changed to 1.10r.
(April 3, 2010)
Updates:
-Website page update to tell about the location of the machine (Rivet City, Lower Stairwell by the Muddy Rudder).
==============
Description:
==============
"We're cleaning up the Capitol Wasteland... one random item at a time!"
Welcome to the Bad Ass Wasteland Recycle Machine!! WHOOOO!!
This mod provides a service to all those scavengers of the wasteland, by converting various piles of metal items into Scrap Metal! It recycles junk items as well as unused schematic components!
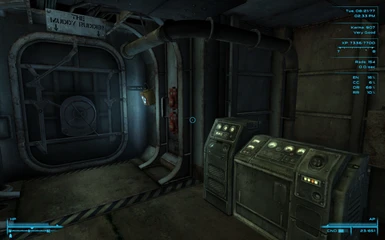
The first machine was purchased from Bad Ass mods by Rivet City, and it resides in the lower stairwell by the enterence to the Muddy Rudder.
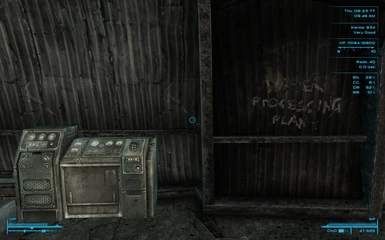
Due to the popularity of the WRM in Rivet City, Lucas Sims of Megaton ordered a unit for their settlement. After some diliberations on where to install the unit, Walter from the Water Processing Plant encouraged the unit to be installed outside of his building - hoping that some of the scrap metal produced will be sent his way for repairs around town.
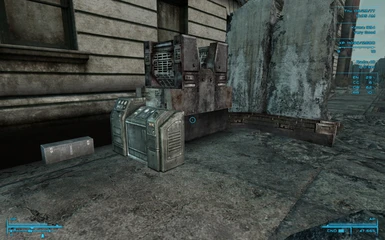
Immediately after construction started in Megaton, Allistar Tenpenny called up Bad Ass Mods and insisted that he must have a WRM installed at his facility as well stating, "My residents deserve the best technologies, moreso than those Megaton wastelanders!" Although we here at Bad Ass Mods wouldn't comply with Allistars wishes to stop all associations and contracts with Megaton, we have been able to provide the Tenpenny residents with a WRM as well.
==============
Background:
==============
Since I created my BA_Repair mod, I've wanted to have something that provided this type of service. However, the supply of useful mods out there were either overpowered and granted too much Scrap Metal per component, or wre simply not extensive enough and make use of all the crap items that I end up selling to vendors. So, I decided to make my own mod to achieve this factor!
==============
File Information:
==============
There are two versions of this mod:
BA_WRM.esp (Status: Release - Fully Tested)
Provides recycling options for all items that I felt were metal scrap worthy.
BA_WRM_ALT.esp (Status: Release - Fully Tested)
The same as above, except it excludes Tin Cans and Bent Tin Cans for those that use my BA_Repair mod. I'z gotz to look out for my peeps! :)
There are a few comment to make here:
1) I originally included Bobby Pins in the main file listing. But since the majority of people still advance their lockpicking skill (as opposed to using a force-lock mod), this seemed counterproductive to most people. For those that don't use their LP skill, sell em! :)
2) If you play with the DLC's, please note that the LARGE JUNK category includes Camera's, which is a repeatable quest item.
3) For all listings, they are an ALL or NOTHING kind of choice. I didn't feel like making them optional and exclusive per item. Therefore, you have a few options for this situation:
a - Unload all of the items you wish to save prior to going to the WRM.
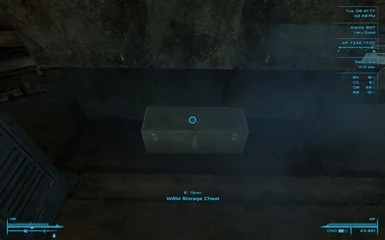
b - Use the WRM Storage Chest to temporarily store your items in while you use the machine.
c - Manually edit the script to your own liking.
4) As for the items in each category, I played around with several options, judging items by weight, by value, and by size. In the end, I decided to simply categorize items according to what I felt a pile of scrap metal would be comparible to, to an extent. As for schematic components, those were more-so judged by their value, since some small items are worht a lot, and they are not very valuable to recycle if they only provide 1 piece. Therefore:
For SMALL JUNK items, the average value per item is 1.6 caps, or 8.33 caps per Scrap Metal.
For MEDIUM JUNK items, the average value per item is 2.9 caps, or 8.7 caps per Scrap Metal.
For LARGE JUNK items, the average value per item is 2.6 caps, or 2.6 caps per Scrap Metal.
For SMALL SCHEMATIC items, the average value per item is 4 caps, or 4 caps per Scrap Metal.
For MEDIUM SCHEMATIC items, the average value per item is 13.43 caps, or 4.48 caps per Scrap Metal.
For LARGE SCHEMATIC items, the average value per item is 25.83 caps, or 5.17 caps per Scrap Metal.
But please note that the above information is based on AVERAGES, and not selective choices for what the person sells and what they recycle. In other words, you could sell all the Scalpels, Sizzors, and Tweezers to vendors, and drop the average per item cost for SMALL JUNK items to 5 caps per Scrap Metal, since all the other items have a value of 1. Use good judgement here. I only provide an outline, not a requirement! :P
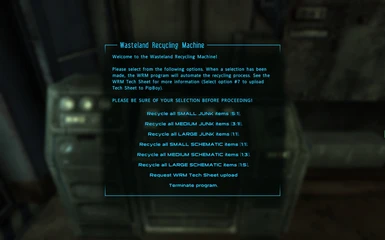
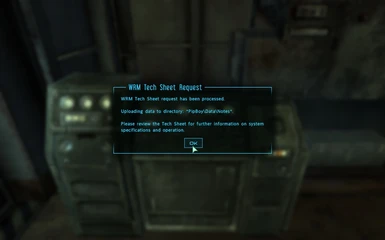
5) The WRM is a logical device. You cannot recycle 4 SMALL JUNK items for a Scrap Metal. Furthermore, if you have 7 SMALL JUNK items in your inventory at the time of recycling, all 7 items will be removed from your inventory and you will only get 1 piece of Scrap Metal in return. The fractional amount is lost to processing waste and convienent overages. <wink> <br><br>My recommendation for all these situations is to always SAVE YOUR GAME prior to using the machine. This way you can revert back if you recycle something by mistake or feel that the fractional loss is too much to bare! :)<br><br><br><font style="color: yellow;"><strong><br>==============<br>Further Information:<br>==============</strong></font><br>HERE IS THE INFORMATION FROM THE TECH SHEET NOTE:<br><br>Thank you for using the Wasteland Recycling Machine! <br><br>----------- WARNING ------------<br>It is important to understand that any command issued to the WRM program is non-reversible. Please ensure that all items associated with a specific option are ready to be recycled. <br><br>NOTE: There is a storage unit located next to the WRM to conveniently store any item(s) that you do not wish to process.<br><br><br>----------- OVERVIEW -----------<br>When you select a recycling option from the WRM Program Menu, the WRM will automate the following actions:<br><br>1) It inventories the total quantities of all items from the category you chose. <br>2) It calculates the ratio of products required to make applicable Scrap Metal according to pre-set system parameters (listed below).<br>3) Through an automated process, the WRM will remove the associated items from your inventory and place them into the recycler.<br>4) The WRM will recycle all corresponding items into Scrap Metal, and place them back into your inventory.<br><br><br>---------- CATEGORIES -----------<br>SMALL JUNK (WRM requires 5 small junk items to process 1 Scrap Metal. Any fraction of items left over will be lost.):<br>-Bent Tin Can (not in ALT version)<br>-Big Spoon<br>-Butter Knife<br>-Fork<br>-Metal Spoon<br>-Scalpel<br>-Scissors<br>-Spork<br>-Tin Can (not in ALT version)<br>-Tweezers<br>-Wrench<br><br>MEDIUM JUNK (WRM requires 3 medium junk items to process 1 Scrap Metal. Any fraction of items left over will be lost.):<br>-Bonesaw<br>-Forceps<br>-Hammer<br>-Harmonica<br>-Hot Plate<br>-Iron<br>-Opthalmoscope<br>-Paperweight<br>-Spatula<br>-Tin Plate<br><br>LARGE JUNK (WRM will process 1 large junk item for 1 Scrap Metal.):<br>-Camera<br>-Coffee Pot<br>-Metal Cooking Pan<br>-Metal Cooking Pot<br>-Nuka-Cola Truck<br>-Pot<br>-Rake<br>-Toaster<br><br>SMALL SCHEMATICS (WRM will process 1 small schematic item for 1 Scrap Metal.):<br>-Conductor<br>-Firehose Nozzle<br><br>MEDIUM SCHEMATICS (WRM will process 1 medium schematic item for 3 Scrap Metal.):<br>-Lawnmower Blade<br>-Leaf Blower<br>-Lunchbox<br>-Medical Brace<br>-Motorcycle Gas Tank<br>-Motorcycle Handbrake<br>-Paint Gun<br><br>LARGE SCHEMATICS (WRM will process 1 large schematic item for 5 Scrap Metal.):<br>-Pilot Light<br>-Pressure Cooker<br>-Sensor Module<br>-Steam Gauge Assembly<br>-Vacuum Cleaner<br>-Wood Chipper<br><br>------ END OF TECH SHEET -------<br><br><br><font style="color: yellow;"><strong><br>==============<br>Requirements:<br>==============</strong></font><br>Fallout 3 (patch 1.7 optional, but highly reccommended)<br>no DLC content is required!<br><br><br><font style="color: yellow;"><strong><br>==============<br>Install:<br>==============</strong></font><br>1. Download the files to a secure location. Contrary to some other authors, I do not recommend directly downloading or unzipping directly to your Data folder.<br><br>2. Extract the files from the archive to a new folder under it's name. This is handy for keeping a record of what version is associated with the mod (if the author properly marked the download file). Once you get to 40+ mods, it will be hell trying to remember when you got the last update for each mod.<br><br>3. Inspect the folder contents, including the file names and any corresponding meshes or textures folders to understand what you are about to replace.<br><br>4. Read the included ReadMe file for installation instructions or additional information. I understand the irony of including this install step in a ReadMe file for installation that would only be read if someone opened the ReadMe file in the first place. JUST SHADDUP AND DO AS I COMMAND!! :)<br><br>5a. If satisfied, copy the associated file(s) and folders to [DRIVE]:[INSTALL PATH]\Fallout 3\Data\ folder.<br><br>5b. If unsure of the contents, or to learn more about the mod, transfer ONLY the .esp file to the Data folder, and use FO3 Edit to inspect the contents.<br><br>6. When ready to play with the mod, open your Fallout 3 Launcher (or mod manager - I suggest Timeslip's FOMM), place a checkmark beside the .esp file, and run the game.<br><br>7. Enjoy this fine product from Shiholude!<br><br><br><font style="color: yellow;"><strong><br>==============<br>Un-Install:<br>==============</strong></font><br>1. Open your Fallout 3 Launcher (or mod manager), and uncheck the .esp file.<br><br>2. Delete the files/folders associated with the mod.<br><br>3. Run your "Master Update" again if you're using FO3edit.<br><br><br><font style="color: yellow;"><strong><br>==============<br>Compatibility:<br>==============</strong></font><br>The only compatibility issues may be if you have other mods that place items in the same locations as these machines.<br><br><br><font style="color: yellow;"><strong><br>==============<br>Bugs/Issues:<br>==============</strong></font><br>No known issues at this point, but please let me know if you find any.<br><br><br><font style="color: yellow;"><strong><br>==============<br>To Do:<br>==============</strong></font><br>Pee my name in the snow.<br><br><br><font style="color: yellow;"><strong><br>==============<br>History:<br>==============</strong></font><br>1.00r 4/2/2010 - Initial Release<br><br>1.00r (April 3, 2010)<br>-Website page update to tell about the location of the machine (Rivet City, Lower Stairwell by the Muddy Rudder).<br><br>1.10r (April 5, 2010)<br>-Added machines to Megaton and Tenpenny Tower.<br>-Version changed to 1.10r.<br><br>1.20 (March 19, 2011)<br>-New parts for all the WRM's have finally arrived! Now the machines will "silently" remove parts from your backpacks (no message in the upper left corner). The machine will still inform you of how many scrap parts you received.<br><br><br><font style="color: yellow;"><strong><br>==============<br>Contact:<br>==============</strong></font><br><a href="http://thenexusforums.com/index.php?act=Msg&CODE=4&MID=1090316">Private Message - Shiholude</a><br><br><br><font style="color: yellow;"><strong><br>==============<br>Mods/Tools Used:<br>==============</strong></font><br><a href="http://www.fallout3nexus.com/downloads/file.php?id=640">Fallout Mod Manager (FOMM)</a> - The ultimate mod manager<br><a href="http://www.fallout3nexus.com/downloads/file.php?id=637">FO3 Edit</a> - An awesome tool for anyone and everyone that plays FO3!<br><a href="http://www.fallout3nexus.com/downloads/file.php?id=8269">Fallout 3 ReadMe Generator</a> - Which this form is based from (with additonal tweaks from myself)<br><a href="http://www.fallout3nexus.com/downloads/file.php?id=759">G.E.C.K.</a> - Which I used to build this mod.</wink>


